National Parks Camping Checklist: Complete Beginner's Guide (2026)
National parks camping checklist for 2026: reservations, bear-safe food storage, tents, stoves and gear for developed campgrounds, plus 5 mistakes.
There's a moment every first-time national park camper knows. You've driven hours, found your campground, pitched your tent — and then the sun drops behind the ridge, the temperature plummets, and you realize you forgot something important. Maybe it's the bear-safe food container the backcountry permit required. Maybe it's a headlamp that actually holds a charge. Maybe it's a stove that works at 8,000 feet.
I've been that camper. This guide is everything I wish I'd known before my first national park trip — written for 2026, when reservations are harder than ever, campgrounds fill six months out, and the line between a magical trip and a miserable one comes down to preparation.
Whether you're headed to Yellowstone, Yosemite, the Grand Canyon, Acadia, or a lesser-known gem, the fundamentals are the same. Let's walk through them.
The same logic plays out nationally, and our Oklahoma camping guide breaks the pattern down park by park — which system owns each campground, what it costs, and when each one shuts for the season.
Quick Answer: The National Park Camping Starter Kit
- Tent for a developed campground: CORE 6 Person Instant Cabin — sets up in about a minute and fits a family without a wrestling match.
- Food storage that passes the ranger check: a hard-sided Coleman 316 Series Wheeled 62QT cooler, plus bear-safe storage wherever the park requires it.
- Cooking: Coleman Classic 1-Burner Butane Stove — simple, cheap, and reliable at altitude.
- Sleep system for cold mountain nights: the TETON Sports Celsius XXL 0°F for adults, and the Morrison Outdoors Big Mo for kids ages 2—4.
- Light you can trust: Black Diamond Spot 400 — waterproof, and it runs on batteries you can buy at any park store.
- Day gear: the Osprey Daylite for hikes, plus the Sawyer Squeeze if you will be filtering from streams rather than campground taps.
Why National Park Camping Is Different
A national park campground is not the same as a random state park or dispersed site. Three things make it unique:
First, demand outstrips supply. The most popular parks — Yosemite Valley, Yellowstone's Madison, Grand Canyon's Mather — fill within minutes of reservation windows opening. If you don't know the booking calendar, you simply won't get a site.
Second, wildlife rules are strict and enforced. Bear country means every food item, scented toiletry, and cooler must be stored in a bear box or hard-sided vehicle. Rangers will cite you for a cooler on a picnic table. This shapes your gear choices more than you'd expect.
Third, developed campgrounds have real amenities — and real limits. Most have potable water, pit toilets, fire rings, and picnic tables. Few have showers, hookups, or dump stations. Knowing what's there (and what's not) determines what you pack.
The good news: if you prep correctly, national park camping is the most rewarding outdoor experience you can have. The scenery is world-class, the campgrounds are well-maintained, and the cost is a fraction of a nearby lodge.
If a dog is coming, one rule changes your plan. Leashed dogs are welcome in almost every park campground, but most parks ban dogs from unpaved trails — so the day gets built around what the dog can join. Our dog-friendly national parks guide lists the parks that allow dogs on trails (Shenandoah and Acadia lead) and the ones where camping and scenic pullouts are the whole dog-friendly trip.
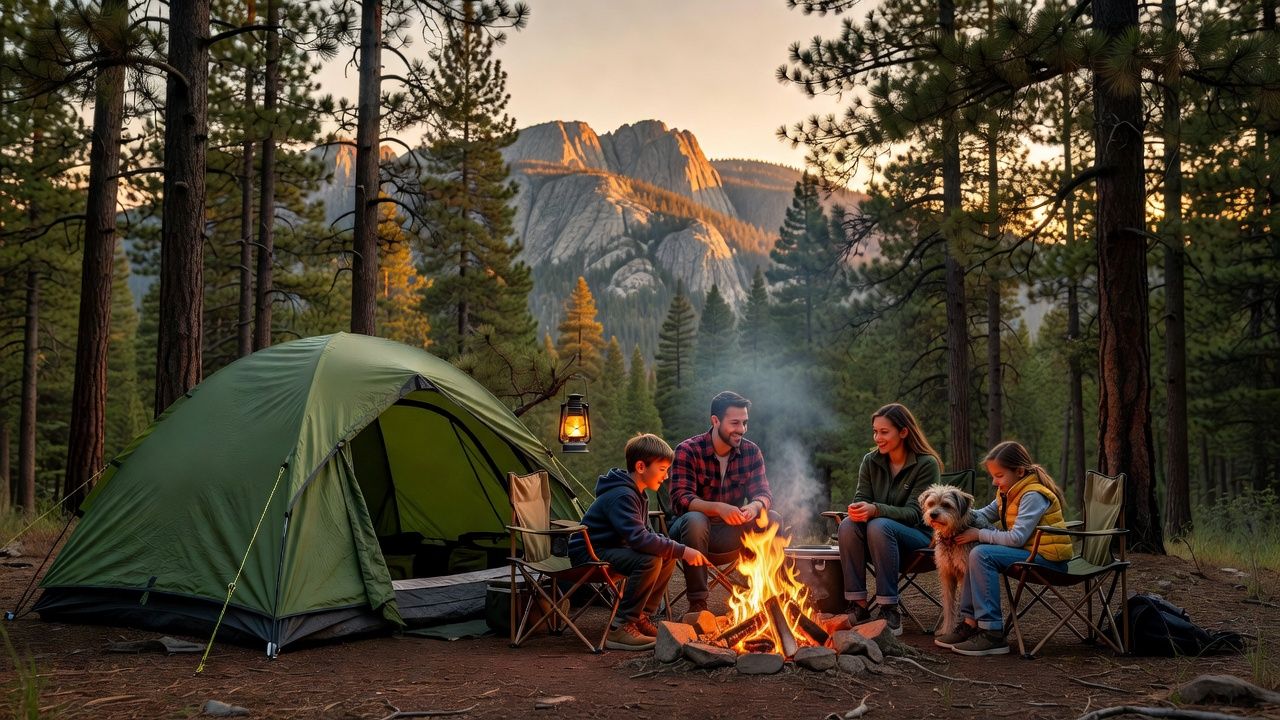
Step 1: Master the Reservation System Before Anything Else
This is the single biggest barrier for first-timers. Recreation.gov runs reservations for most national park campgrounds, and the system is brutal if you don't understand it.
The 6-month rolling window. Most campgrounds release sites six months in advance, at 10:00 AM Eastern (7:00 AM Pacific) on Recreation.gov. For a July trip, that means booking in January. Set a calendar alert the moment you pick your dates.
The "campsite availability" lottery reality. Popular sites vanish in under a minute. Have your dates flexible (±2 days), your payment saved, and your group size decided before the window opens. Bookmark the specific campground page so you're not searching when the clock starts.
First-come, first-served sites. Roughly 30-40% of national park campgrounds hold back sites for walk-ins. These require arriving at dawn — sometimes the night before — to claim a spot. Research this before you go; it's a legitimate strategy for parks like Zion or Rocky Mountain in peak season.
Backcountry permits are separate. If you're backpacking (not car camping), you need a backcountry permit, often through a lottery (Half Dome, Enchantments, Wave). These are entirely different from campground reservations — don't confuse them.
Free-entry days change the math. The National Park Service waives entrance fees several times a year, and those dates draw noticeably bigger crowds at gateways, trailheads, and campgrounds. Two fall on the calendar in September 2026: Constitution Day, September 17 and Public Lands Day, September 26. They're worth using — a family vehicle normally pays $35 to enter a park like Yellowstone or Acadia — but book your campsite earlier than usual for those dates, because a fee-free day waives the gate fee, not the reservation requirement.
Once your site is secured, the real planning begins.
Step 2: Pick the Right Tent for a Developed Campground
National park campgrounds have tent pads — flat, graded rectangles. Most are 12×12 feet or larger. This is good news: you don't need a lightweight backpacking tent. You need a tent that's comfortable, weatherproof, and easy to set up after a long drive.
For a family or group of 3-4, the CORE 6 Person Instant Cabin Tent is an excellent choice. Its instant-cabin design makes setup practical when you arrive tired, and the roomy interior gives families space for sleeping bags and duffels during a national-park stay. At $169.99, it's a strong value for car campers who want extra elbow room.
For larger families (5-6 people), the CORE 6-Person Instant Cabin Tent offers 60-second setup and a cabin-style design with near-vertical walls — more headroom for changing clothes and hanging out during rain. At $169.99, it's the tent I'd pick for a week-long Yellowstone or Acadia family trip.
Budget alternative: If you're testing whether camping is for you, the Coleman Sundome series (under $100) covers the basics — no instant setup, but reliable weatherproofing for a first trip.
Don't skip the footprint
A tent footprint (or tarp) under your tent prevents punctures from gravel and pinecones on the tent pad. Most tents sell matching footprints; a $20 tarp works too. This is the cheapest insurance against a ruined trip.
Step 3: Bear-Safe Food Storage (Non-Negotiable)
This is where first-timers get into real trouble. In bear country — which includes most western national parks — improper food storage results in citations, confiscated gear, and bears being euthanized. Take this seriously.
Use the bear box. Most developed campgrounds in bear country have metal bear-proof storage boxes at each site. Everything scented goes in: food, coolers, toothpaste, deodorant, sunscreen, even empty wrappers. Not "most things" — everything.
Hard-sided coolers count as bear-safe in many parks. A cooler that latches securely and is bear-resistant (look for IGBC certification) can stay in your locked vehicle instead of the bear box — but check the specific park's rules. Yellowstone and Grand Teton require bear boxes for all food; some California parks allow hard-sided coolers in vehicles.
The Coleman 316 Series Wheeled Cooler 62qt is a solid choice — it's hard-sided, has decent ice retention (3-4 days), and the wheels make hauling it from car to bear box manageable. For longer trips or hotter parks (Death Valley, Joshua Tree), a rotomolded cooler (YETI, RTIC) is worth the investment.
Never, ever:
- Leave food in your tent
- Cook next to your tent (cook 100+ feet away)
- Store scented items in your car with windows down
- Leave a cooler on a picnic table unattended
For a deep dive on bear behavior and avoidance, read our Bear Safety Camping Guide — it covers bear spray use, bear box strategy, and what to do during an encounter.
Step 4: Camp Kitchen Gear That Actually Works
A national park campground has a fire ring and a picnic table — that's your kitchen. Here's how to equip it.
Primary stove: The Coleman Classic 1-Burner Butane Camp Stove ($29.99) is the most reliable campground stove I've used. Butane is easy to find, the single burner boils water fast, and it packs small. It's one of our top-visited product pages for a reason — campers love it.
For two-burner cooking: The Coleman Bottle-Top Propane Camp Stove ($21.99) gives you a second burner for real meals. If you're cooking for a family, having two burners (one for coffee, one for eggs) transforms the morning.
The wood-burning upgrade: For parks that allow wood gathering (check local rules — many don't), the BioLite CampStove 2 ($199.95) burns twigs and charges your phone via USB. This is genuinely useful in national parks with limited cell service and no firewood sales — you cook on what you find and keep your phone alive for navigation.
Cookware: A nested cook set (Stanley, GSI) saves space. For car camping, you can bring real pots and pans — weight doesn't matter.
Water: Most developed campgrounds have potable water. But if you're day-hiking or visiting a park with seasonal water shutoffs (common in shoulder seasons), bring a water filter. For more on water strategy, see our Camping Water Filtration & Hydration Guide.
Step 5: Sleep System for Cold Mountain Nights
Here's a surprise for first-timers: national park campgrounds are often at elevation. Yellowstone averages 7,000-8,000 feet. Rocky Mountain's campgrounds exceed 9,000 feet. Nights are cold — even in July, expect 40°F or lower.
Sleeping bag: Match your bag to the coldest night you'll face, then go 10°F lower. The TETON Sports Celsius XXL 0-Degree Sleeping Bag ($89.99) is a cold-weather option with generous room for campers who dislike narrow mummy bags. For summer trips in lower-elevation parks (Acadia, Everglades), a 40°F bag is fine — but for mountain parks, choose insulation with a real margin for the forecast.
For kids: The Morrison Outdoors Big Mo 40 Kids Sleeping Bag ($79.95) is purpose-built for ages 2-4 — proper sizing matters because a too-big bag won't keep a small child warm. For toddlers (6-18 months), the Morrison Outdoors Little Mo 40 Baby Sleeping Bag ($69.95) is the only legit option on the market.
Sleeping pad: Don't skip this — a sleeping bag's insulation is useless if you're lying on cold ground with no pad. Aim for an R-value of 4+ for mountain parks. For choosing between pad types, our Sleeping Pad vs Air Mattress Guide breaks down the tradeoffs.
Step 6: Lighting That Won't Let You Down
National park campgrounds have minimal artificial light. When the sun sets, it's dark — headlamps and lanterns are essential, not optional.
Headlamp: The Black Diamond Spot 400 Headlamp ($39.95) is the standard. 400 lumens, waterproof, dual-fuel (AAA or rechargeable). It's the headlamp I recommend without hesitation — it handles everything from midnight bathroom walks to early-morning hikes.
Camp lantern: The Black Diamond Moji Lantern ($24.95) puts out 200 lumens and hangs perfectly from a tent loop or picnic table. Pair it with the Goal Zero Lighthouse Micro Flash Lantern ($29.95), which is USB-rechargeable — ideal when you're already charging devices off a power bank.
For a full breakdown of lighting options, see our Camp Lighting Guide: Lanterns & Headlamps.
Step 7: Footwear and Hiking Gear
You're not just camping — you're there to hike. National parks offer trails from half-mile boardwalks to multi-day backcountry routes. Your footwear determines whether you enjoy them.
Day hikes on maintained trails: The Merrell Moab 3 Waterproof Hiking Shoe ($129.95) is the most recommended hiking shoe in the U.S. for a reason — comfortable out of the box, waterproof, grippy Vibram sole. For ankle support on rougher terrain, the Merrell Moab 3 Hiking Boot ($89.99) is the mid-cut version.
Budget alternative: The Merrell Moab 3 Waterproof Hiking Shoe ($129.95) is a durable alternative with a familiar, supportive fit for long campground loops and day hikes.
For a full hiking footwear guide (choosing shoes vs boots, fit, break-in), see our Best Hiking Shoes 2026 Buying Guide. If you're new to hiking entirely, start with our Hiking for Beginners: Complete Guide.
Step 8: Day Pack and Trekking Poles
Day pack: The Osprey Daylite Commuter Backpack ($65.00) is a compact choice for short day hikes — it carries water, snacks, layers, and a first-aid kit for a 3-4 hour outing. For longer day hikes, a dedicated pack with a hip belt is better.
** Trekking poles:** They reduce knee impact on descents by up to 25% and help with balance on scree and creek crossings — especially useful on the steep, rocky trails of Grand Canyon and Zion.
One date worth circling when you pick your dates: November 11, 2026 is the year's last fee-free national park day. Here is what is actually free on Veterans Day 2026 — and what still costs money.
Step 9: Trip Planning and Park Selection
Not all national parks are equal for first-timers. Here's a quick guide:
Best for first-timers (developed campgrounds, easy logistics):
- Yellowstone — massive, wildlife-rich, multiple campgrounds
- Acadia — compact, stunning coastline, Bar Harbor nearby
- Shenandoah — Skyline Drive access, close to East Coast cities
- Great Smoky Mountains — free entry, no reservations for many campgrounds
Best for families:
- Yosemite Valley — iconic scenery, but reservations are brutal — our Yosemite family camping guide breaks down every campground and the exact release windows for a family trip.
- Grand Canyon South Rim — Mather Campground is well-suited for families
- Rocky Mountain — Trail Ridge Road, elk everywhere
Best for solitude:
- North Cascades — least-visited in the lower 48
- Great Basin — Nevada's hidden gem, Lehman Caves
- Isle Royale — ferry access, true wilderness
The honest alternative: if the park you want is booked solid — which is the normal state of affairs for Yosemite, Zion, and Glacier in season — the state park system is usually the answer. State park campgrounds are closer to major cities, cheaper per night, and much easier to reserve, and the trip itself is nearly the same experience for a weekend. Our State Park Camping Guide covers reservation windows, campsite fees by hookup type, first-come first-served sites, and the rules that catch people at the gate. Plenty of families run one national park trip a year and four state park weekends around it.
For comparing camping styles (national park vs RV vs dispersed), our RV vs Tent Camping Comparison covers the tradeoffs. For a full trip-planning framework, see our Camping Trip Planning Guide.
If your dates are flexible, planning around a fee-free day saves real money — our Constitution Day National Parks Guide explains the September 17 free-entry day and how to stretch it into a long weekend with one personal day.
Seasonal park selection matters more than most first-timers expect, and Acadia in Maine is the classic autumn version of it: Blackwoods and Seawall book through recreation.gov months ahead, so fall is really a cancellation hunt, with Bar Harbor as the base town. Our Camping in Maine guide walks through the Acadia options, the foliage timing by region, and the 35-degree nights that decide the sleep system.
The 5 Mistakes That Ruin First-Timer Trips
1. Booking too late. The #1 reason people don't camp in national parks is they can't get a site. Set a calendar alert 6 months out. If you miss the window, target first-come, first-served sites and arrive at dawn.
2. Underestimating the cold. Mountain parks get cold at night year-round. A 40°F sleeping bag in Yellowstone in August will have you shivering. Check the park's average nighttime lows for your dates and pack 10°F warmer.
3. Bringing a cheap cooler. A $20 cooler won't hold ice for 3 days in 80°F weather. In bear country, a soft cooler on a picnic table is both a violation and a bear magnet. Invest in a hard-sided cooler — the Coleman 316 is the minimum I'd recommend.
4. Forgetting the headlamp. Phone flashlights don't cut it when you're walking to the bathroom at 10 PM in a dark campground. A real headlamp frees both hands. The Black Diamond Spot 400 has never let me down.
5. Not checking fire rules. Many national parks ban wood fires during dry season, or ban gathered wood entirely. Some campgrounds don't sell firewood. Check the park's current fire restrictions before you pack a bundle of wood — or plan to buy it locally (transporting firewood spreads invasive pests and is illegal across many state lines).
Gear Checklist for a National Park Camping Trip
Here's the essential packing list, organized by priority:
Sleep system:
- Tent (with footprint and rain fly)
- Sleeping bag rated 10°F below your coldest expected night
- Sleeping pad (R-value 4+ for mountain parks)
- Camp pillow
Kitchen:
- Camp stove + fuel canisters
- Cook set or real pots/pans (car camping)
- Utensils, plates, mugs
- Hard-sided cooler with ice
- Water bottles or hydration bladder
- Water filter (for parks with seasonal water shutoffs)
Bear country (most western parks):
- Bear canister or bear box (use the campground's if available)
- Bear spray (know how to use it — see our Bear Safety Guide)
- Rope for bear hangs (backcountry only — developed sites have boxes)
If your park has no bear box — or you're heading past the last one into the backcountry — bring your own. The BearVault BV450 Jaunt ($89.99) is IGBC-certified, holds 3-4 days of food in 450 cubic inches, weighs 2.1 lb, and is on the approved list at the Yellowstone, Glacier and Yosemite backcountry permit desks.
Lighting:
- Headlamp per person + extra batteries
- Camp lantern for the picnic table
- USB power bank (for charging phones and lanterns)
Clothing:
- Hiking shoes or boots (broken in before the trip)
- Layers: base, insulating, rain shell
- Extra socks (wool, not cotton)
- Sun hat and beanie (mountain weather swings fast)
Safety:
- First-aid kit (see our Camping First Aid Checklist)
- Sunscreen and bug repellent
- Map and compass (don't rely on cell service)
- Whistle
One park family worth knowing about for a fall trip: Colorado's high-country campgrounds, which have the tightest seasonal window in the country. Our Camping in Colorado guide covers Rocky Mountain National Park's timed entry through October 12, Great Sand Dunes' Pinon Flats and its four-day booking rule, and Black Canyon's South Rim.
Final Thoughts
National park camping rewards preparation and punishes improvisation. The campsites that fill six months out fill for a reason — the scenery, the wildlife, the sense of being somewhere genuinely wild. Spend an evening under stars in Yellowstone with elk bugling in the meadow, and you'll understand why people plan their entire year around these trips.
Start with the reservation calendar. Get the right tent, a real sleeping bag, and a hard-sided cooler. Store your food properly. Bring a headlamp. Do those five things and you've eliminated 90% of what goes wrong.
The other 10% — the part you can't plan for — is why you'll go back.
One state where all four public-land camping systems behave completely differently is Oregon; the Camping in Oregon guide walks the state park portal, the state forests, the national forests and BLM separately.
<!-- AFFILIATE_DISCLOSURE -->Shenandoah is the East's most dog-friendly national park — leashed dogs are allowed on the large majority of its trails — and the camping in Virginia guide covers its four family campgrounds, fees, and season dates.
The Smokies are the busiest park in the system and the clearest example of the parking-tag era: the Tennessee camping guide covers the $5 daily tag, the 10 frontcountry campgrounds, and this year's backcountry permit change.
For a worked example of a park that behaves completely differently in winter, see our Grand Canyon and Arizona camping guide. Big Bend and Guadalupe Mountains both set park-specific rules that catch people out, and the Texas guide covers the no-ground-fires rule and the January-to-April stay cap.
New Mexico is a good test case for all of the above — see Camping in New Mexico 2026 for its six-month state park window, the 14-day BLM dispersed limit, the day-of-only backcountry permit at Carlsbad, and the state trust land exception.
Alabama's national forests are the rare case where almost nothing takes a reservation — Camping in Alabama covers the first-come exception.
For a worked example of how a state system can invert every rule you know, Camping in Louisiana covers the 30-day dispersed limit and the no-campground national parks.
Many park highlights are long paved or packed-gravel walks, which is hard on a sore heel. Best hiking shoes for plantar fasciitis is worth reading before you plan a mileage-heavy park trip.
One planning trap catches almost everyone: the park's season and the campground's season are not the same thing, and closing dates vary by elevation and by which agency manages the land. We break down what closes when — and how to check your own campground in two minutes — in when do campgrounds close for the season.
For a state-level worked example of how BLM, Park Service, state park, and national forest systems layer on top of each other in one trip, see the Camping in Utah guide.
Not every good trip needs a national park. camping in Pennsylvania covers Pennsylvania, where the overnight inventory is mostly state park and state forest land — cheaper, easier to book, and open later in the season.
For the park-by-park reservation mechanics — Yosemite's 7 a.m. release, Joshua Tree's same-day booking, Sequoia's all-season campgrounds — our guide to camping in California goes deeper — camping in California.
The Southeast deserves its own note in that list: our North Carolina camping guide covers Great Smoky Mountains' ten frontcountry campgrounds and the four Cape Hatteras seashore sites, only two of which stay open year-round.
For the repair side of tent ownership — seam sealer, spray-on proofer, groundsheets and mildew cleanup — see our tent leaking repair guide.
For a state that runs four separate camping systems, our Camping in Kentucky guide separates the national forest pass rule from the state park portal and Mammoth Cave's permit system.
If you want a worked example of a twelve-month booking window with a one-night cancellation deposit, see the Arkansas camping guide.
National Park Camping FAQ
For the mechanics that apply everywhere, camping in Wisconsin covers how one state's single reservation system, fee ladder and ground-condition fire rule actually work in practice.
One system worth comparing against this one: our West Virginia camping guide, where the state park rules are identical at every park but the national park campgrounds are free and first-come.
For the system-vs-system version of this question in the Southeast, camping in Georgia walks through five separate booking systems in one state — state parks, Cumberland Island, Corps lakes, the national forest, and the WMAs that are not a camping system at all.
The reservation, safety, and gear questions first-timers ask most.
How far in advance can I book a national park campsite?
Most national park campgrounds open reservations on a six-month rolling window through Recreation.gov, releasing sites at 10:00 AM Eastern (7:00 AM Pacific). A July trip means booking in January. Popular sites can vanish in under a minute, so the preparation matters as much as the timing: have your dates flexible by about two days, your payment method already saved, and your group size decided before the window opens, and bookmark the specific campground page so you are not searching when the clock starts.
Can I just show up and get a site without a reservation?
Sometimes, but plan around it. Roughly 30-40% of national park campgrounds hold back sites for first-come, first-served arrival, which is a legitimate strategy for parks like Zion or Rocky Mountain in peak season — but it requires arriving at dawn, sometimes the night before, to claim a spot. Treat walk-up as a backup plan, not a plan.
Do I need a separate permit for backpacking?
Yes, and it is a completely different system. Backcountry permits are usually issued through their own lotteries — Half Dome, the Enchantments, and the Wave are the famous examples — and they are not the same thing as a campground reservation. If your trip involves sleeping away from a developed campground, you need the permit, not a campsite booking.
Do I really need bear-safe food storage?
Yes — this is the one rule that is genuinely non-negotiable. In bear country, improper food storage gets you cited and your gear confiscated, and it can end with a bear being euthanized. Everything scented goes in the bear box: food, coolers, toothpaste, deodorant, sunscreen, and even empty wrappers. Never leave food in your tent, cook within 100 feet of where you sleep, or store scented items in a car with the windows down. Yellowstone and Grand Teton require bear boxes for all food; some California parks permit a hard-sided, IGBC-certified cooler to stay in a locked vehicle — check the specific park's rules before you rely on it. A Coleman 316 Series Wheeled Cooler 62qt is a workable choice because it is hard-sided, holds ice 3-4 days, and rolls between car and bear box without a second trip.
What sleeping bag rating do I need for national park camping?
Match your bag to the coldest night you expect, then go 10°F lower. National park campgrounds sit at elevation — Yellowstone averages 7,000-8,000 feet, and Rocky Mountain's campgrounds exceed 9,000 — so even in July you should expect 40°F or lower. For mountain parks, the TETON Sports Celsius XXL 0-degree bag at $89.99 gives a real margin and generous room for campers who dislike narrow mummy bags. For low-elevation summer trips in Acadia or the Everglades, a 40°F bag is fine. Do not skip the sleeping pad: a bag's insulation does nothing against cold ground, so aim for an R-value of 4 or higher in mountain parks.
What tent do I need for a developed campground?
Not an ultralight one. National park tent pads are generally 12 × 12 feet or larger, so weight is irrelevant and comfort and setup speed matter instead. For a family or group of three to four, the CORE 6-Person Instant Cabin Tent at $169.99 uses an instant-cabin frame that goes up in about 60 seconds with near-vertical walls — the difference between a tent you tolerate after a long drive and one you actually enjoy. Add a footprint or a $20 tarp underneath: it is the cheapest insurance against punctures from gravel and pinecones on the pad.
What should I bring for kids' sleeping setups?
Use a correctly sized bag, because an oversized bag will not keep a small child warm. The Morrison Outdoors Big Mo 40 kids sleeping bag at $79.95 is purpose-built for ages 2-4, and the Morrison Outdoors Little Mo 40 baby sleeping bag at $69.95 covers 6-18 months.
Do I need a water filter if the campground has water?
Usually not for the campground itself — most developed campgrounds provide potable water. But bring one anyway if you are day-hiking or travelling in shoulder season, when seasonal water shutoffs are common. A Sawyer Squeeze weighs almost nothing and turns an uncertain tap into a non-issue.
Will my stove and cooler really be enough for a family?
For most families, yes, with two burners being the upgrade that matters. The Coleman Classic 1-Burner Butane Camp Stove at $29.99 is the reliable single burner, and adding the Coleman Bottle-Top Propane Camp Stove at $21.99 gives you a second flame so coffee and eggs happen at the same time. If the park allows wood gathering — many do not, so check local rules — the BioLite CampStove 2 burns twigs you collect and recharges your phone over USB, which is genuinely useful where cell service and firewood sales do not exist.
Our camping in Washington state guide documents the three booking systems, the state's own winter-schedule table of per-park closing dates, and the burn-ban levels that decide whether you can have a fire.
For a worked example of how state and federal campground systems differ on the very same piece of land, see the Maryland camping guide — two parks, one barrier island, two booking portals, two season-end dates.