Tent Leaking in the Rain? How to Waterproof a Tent, Fix Seams & Kill Mold (2026)
A tent leaking through seams, a fly that wets out, or mold after a wet weekend — here's the exact order to fix it: diagnose, dry, seal, re-proof. Plus 2026 picks that actually hold up in rain.
Rain shows up on the calendar in late September and October whether or not your tent is ready for it. And the first wet night of fall is usually when people discover the problem: a tent leaking right down the seam over their sleeping bag, a rain fly that suddenly feels soaked through like a sponge, or a faint musty smell that turns out to be tent mildew from a fly that got packed away damp in August.
Here's the good news. Most leaking tents are not damaged tents. In our experience the vast majority are one of four fixable things: water being pushed through stitch holes in an unsealed seam, factory water repellency (DWR) wearing off so the fabric "wets out," a floor being abraded by grit, or condensation you're blaming on the rain fly. All four are fixable in an afternoon for under $40, and one of them — condensation — doesn't need a single repair product at all.
This guide is the order you should work in. Doing it out of order is how people spend $30 on spray and still get wet.
One note before you buy anything: if fall camping with kids is your plan, the tent that leaks is usually the cheapest part of the problem. Warm, dry sleep is a system — the tent, the pad, the bag, and the layers. Our fall camping gear checklist covers the whole kit, and the family camping gear checklist covers the kid-specific pieces. Come back to this page when the tent itself is the thing that failed.
Quick Answer: What to Do About a Leaking Tent
- Rain dripping in a line above a seam, hours into a storm → dry seams or wet-out fabric. Seal the seams, then re-proof the fly.
- Water beading nowhere and the whole fly feels clammy → the factory DWR is gone. A spray-on waterproofer (not a wash-in) is the fix.
- Water pooling on the floor, drips from the walls, worse after everyone's been breathing in there → condensation, not a leak. Ventilation, a fly with an air gap, and a tent fan fix it.
- A soft spot or damp ring on the floor → an abraded floor or a saturated groundsheet. A groundsheet under the tent (sized smaller than the floor) is the fix, plus a seam touch-up.
- A musty, sour smell and black speckles on the fly → tent mildew. Clean it with vinegar or a dedicated tent cleaner, reproof, and stop storing the tent compressed and damp.
- A tear you can see daylight through → GEAR AID Tenacious Tape ($14.39) in 30 seconds. That's not a leak, it's a hole.
- The single best $20 you can spend → Nikwax Tent & Gear SolarProof ($19.95), the spray-on waterproofer used in the re-proofing steps below.
First, Confirm It's Leaking (Not Condensation)
This is the step almost everyone skips, and it's the one that wastes the most money. "Tent leaking" and "condensation" look identical from inside a hooded headlamp at 2 a.m., but they have opposite fixes — and the condensation fix costs nothing.
True leaks leave evidence:
- The drip is localized — the same seam, the same corner, the same spot on the roof, every storm.
- Water arrives after the fabric has been wet for a while (20–60 minutes into steady rain), not immediately.
- You can often trace it to a stitch line, a taped seam edge, or a zipper flap.
- Press a dry paper towel against the inside of the fly above the drip. If it comes back dotted along a seam, that's stitch-hole weeping.
Condensation leaves different evidence:
- Wet walls across a whole panel, not one line — including panels the rain never touches.
- Heavy dampness on a night with no rain at all (cold, still, humid air, three people and a dog in a 4-person tent).
- The inside of the fly is wet while the outside of the fly is beaded and dry.
- It gets worse as the night goes on, exactly as sleeping bodies put more moisture into the air.
The US Search and Rescue-adjacent rule of thumb is simple: a person exhales roughly a liter of water per night. In a fully zipped 4-person tent on a 45°F night, that water has to land somewhere. Usually it lands on the inner wall, shows up as "tent leaking through fabric," and gets blamed on the tent's waterproofing.
The 10-second test: wipe a panel dry inside, wait five minutes with the tent zipped, and see whether the wet reappears across the panel (condensation) or stays dry until it rains again (a leak).
If it's condensation, jump to the ventilation fixes further down and skip the sealant aisle entirely. If it's a genuine leak, read on.
The Five Places a Tent Actually Leaks (and What Each Costs to Fix)
| Failure point | What you'll see | Fix | Real cost |
|---|---|---|---|
| Stitch holes in unsealed seams | Dotted drip line along a seam after ~30 min of rain | Seam sealer (liquid for taped seams, tape for quick jobs) | $10–$15 |
| Worn-out DWR on the fly | Fabric darkens and "wets out," feels clammy inside, no visible drip point | Spray-on waterproofer (Nikwax SolarProof) | $19.95 |
| Abraded or thin floor | Damp ring or soft spot under the pad, worse on gravel | Groundsheet / tarp under the tent, smaller than the floor | $0–$57 |
| Torn fly or mesh | Visible hole, daylight through the fly | Tenacious Tape patch, both sides if it's a tear | $14.39 |
| Zipper flaps and vents | Drip right inside the door in wind-driven rain | Re-proof + pitch with the door away from the wind | $0–$20 |
Notice what isn't on the list: the tent being "old and finished." A quality tent that has been dried properly every trip will outlive three cheap tents that were stored damp.
How to Waterproof a Tent (in the Right Order)
Step 1 — Dry it completely, inside and out
You cannot waterproof a damp tent. Seam sealer won't bond, spray-on proofer won't cure correctly, and any mildew you have will keep spreading. Pitch it (or hang it over a porch rail and a couple of chairs) in shade — not direct sun, which degrades PU coatings and UV-damages the fabric — and let it dry fully, inside and out, including the floor and the fly's underside.
Use a soft sponge or a damp cloth with plain water to knock off dried grit and pine sap. Skip detergent: it strips the remaining DWR and leaves a residue that attracts water. If you're dealing with odor or stains, jump to the mold section below and come back.
Step 2 — Find and mark the leak points
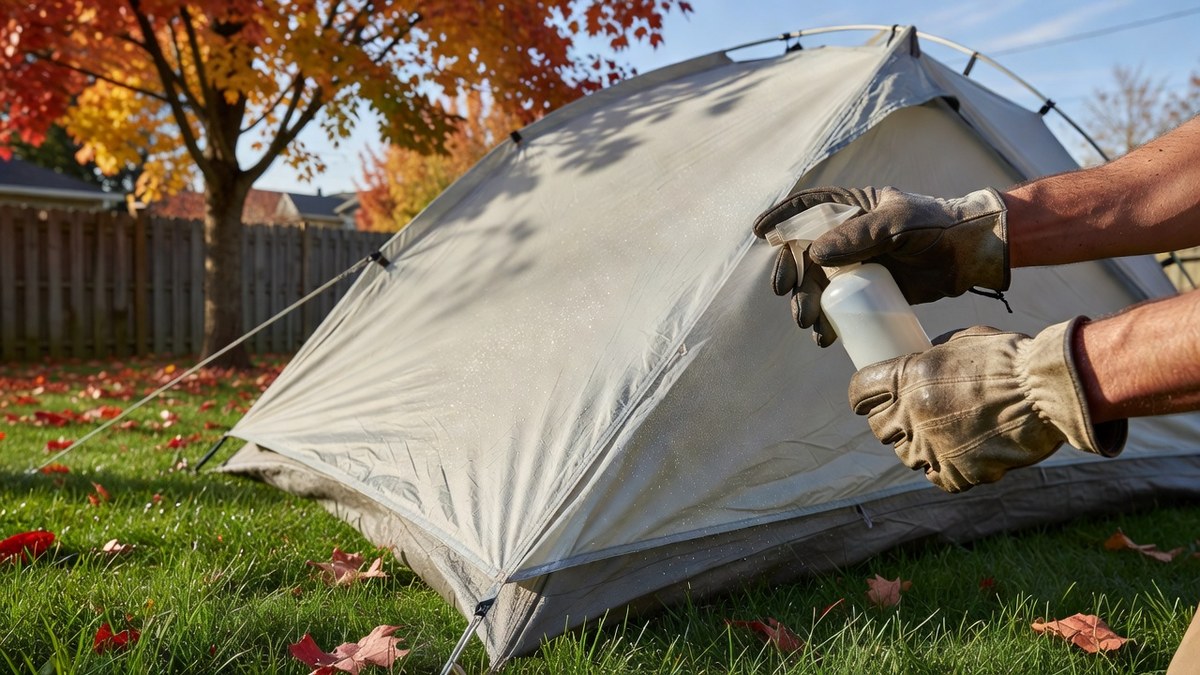
Set the tent up in the yard on a dry day. With the fly on and tensioned, use a spray bottle or a hose on a fine setting and wet the fly from outside, section by section, watching from inside with a headlamp. Mark each drip point with a piece of masking tape on the inside surface. You will usually find one to four, and they cluster around seams, guy-out points, and the top of the door.
This is the step that turns "my tent leaks" into "two stitch lines on the fly and the bottom of the door flap." The second problem is a 20-minute job; the first isn't a job at all.
Step 3 — Seal the seams (from the inside)
Seams on a camping tent are chain-stitched. Every one of those stitch holes is a potential capillary. Better tents come with factory seam tape on the inside of the fly; over years, that tape lifts, wrinkles, or peels, and that's where the drip starts.
The rules that matter:
- Seal from the inside. The coating (polyurethane, silicone, or PE) lives on the inside face of the fabric, so that's the side the sealer needs to bond to. Sealing the outside of a polyurethane-coated tent does almost nothing.
- Liquid seam sealer for taped seams and long runs, applied with the brush in the cap, thinned per the label if the fabric is silicone-treated.
- Tape for fast field repairs and for sealing a small area around a tear.
- Let it cure 24 hours, fully open, before you pack the tent. A tacky seam will glue itself to the fabric folded against it.
If you're resealing a silicone-treated ultralight fly (SilNylon, SilPoly), you need a silicone sealer, not a urethane one — urethane sealer will bead up and peel off a silicone fly. Read the bottle. This is the single most common DIY failure we see.
Step 4 — Re-proof the fly with a spray-on waterproofer
Once the seams are sealed, the fabric itself is next. New tents bead water and shed it because of a factory-applied DWR finish. After a season or two of UV, dirt, sunscreen residue, and folding, that finish is gone — and the result is a fly that "wets out." The fabric darkens uniformly, water stops beading, and the inside of the fly goes clammy. People read this as "tent leaking through fabric." It's not a hole; the fabric is saturated and starting to let moisture migrate.
Fix: a spray-on waterproofer with UV protection, applied to a clean, damp fly, worked in with a sponge, and left to air-dry fully. Nikwax Tent & Gear SolarProof ($19.95) is the one we keep in the gear bin — it's designed for exactly this job (tents, flys, and gear) and it adds UV protection as well as water repellency, which matters for a fly that's been up in the sun all season. One bottle does a 4-person fly and a couple of packs.
Spray-on, not wash-in. Wash-in proofers are made for garments that go through a washing machine, where the water carries the treatment through the whole fabric. Tents don't go in washing machines — the agitation damages coatings and the frame sleeves. Spray-on is the correct product for a fly, a floor, and a backpack.
Step 5 — Fix the floor (groundsheet, not hope)
Floors fail in two ways: abrasion and hydrostatic pressure. Abrasion comes from grit, rocks, and the tent being set up on rough ground; hydrostatic pressure comes from you kneeling on the floor while it's sitting in a puddle, which forces water through fabric that would otherwise stay dry.
Both are solved the same way: a groundsheet under the tent that is slightly smaller than the floor. If the groundsheet sticks out past the tent's footprint, it catches rain and channels it under the tent — you've built a water feature under your sleeping bag. Tucked in, it takes the abrasion and keeps the tent's own floor off the dirt.
For a big tarp setup that doubles as rain cover over a picnic table, a screen porch, or the front of a cabin tent, the OneTigris Bulwark all-season tarp ($56.98) has the size and grommet points to do it properly. And for a big family base camp where the whole point is dry cooking space, a 10x10 pop-up canopy ($139.99) over the picnic table changes the entire trip — everyone cooks, eats, and plays under it while the tents do their job.
Step 6 — Retension the whole tent
A sagging fly touches the inner tent, and the moment fabric touches, water wicks across. Before you call it fixed, re-pitch in the rain configuration: fly taut, guy lines staked out at the correct angle (about 45°), poles fully seated, and the fly's skirt pulled away from the inner walls. Add guylines where the fly has loops for them. Air gap = dry.
Tent Seam Sealer: Tape vs Liquid, Inside or Outside
The phrase "tent seam sealer tape" gets searched a lot, and the honest answer is that they're two different tools.
- Liquid seam sealer is the permanent fix for taped seams and long stitch runs. It flows into the holes, cures rubbery, and is what tent manufacturers use. Budget an hour for a 4-person fly and 24 hours to cure.
- Seam sealing tape is a pressure-applied strip. It's faster, doesn't need to dry, and lives in the repair kit for field use and for small spots. On a fly, tape relies on the coating holding under the adhesive — on a degraded fly, tape can lift in a season.
Inside or outside? Inside for anything with a coating. Outside only for silicone-treated fabric where the coating is on the outer face, or for a quick field patch, and even then the advice on most manufacturers' care pages is interior.
Two more rules: seam seal new tents before their first trip if the fly has untaped seams (it takes 15 minutes and it's free insurance), and never seal over a wet or dirty seam — you'll trap moisture and the sealer will peel off in sheets.
Fixing a Leaking Rain Fly (Replacement, Sticky Fabric, and Poles)
The fly takes the whole storm, so it ages twice as fast as the tent body. Three fly-specific problems come up over and over.
The fly leaks at the seams. Seal and re-proof as above. If the fly has a lot of surface area and the drips move around, you're looking at wet-out, not stitch holes — go straight to the spray-on proofer.
The fly has gone sticky. Old polyurethane coatings hydrolyze over time, especially in humid storage. The fly feels tacky, leaves residue on your hands, and sometimes sheds a chalky white powder onto the tent body. Wash it with warm water and a soft sponge or a dedicated technical-fabric cleaner, dry it fully, then re-proof. If the coating has turned into a sticky film that survives the wash, the fly is done — no spray will bring it back. In that case, contact the manufacturer for a replacement fly (many sell them as a spare part for current models) or use a properly sized tarp over the tent as a rain cover until you replace it.
The fly touches the inner tent. That's a pitch problem, not a fabric problem: retension, add guylines, and give the fly its gap back.
Why Your Tent Feels Wet: Condensation vs Leaking
If your "leak" showed up in the condensation column earlier, this section is your fix list — and it's free.
- Ventilate deliberately. Open both door vents and the high vent in the fly. Cross-flow beats a single cracked zipper every time.
- Stop cooking and boiling water inside. A single pot of pasta adds a surprising amount of water vapor to the air, and it has to condense somewhere.
- Get gear off the walls. Packs and jackets pressed against the inner wall create a cold bridge; condensation forms right there and runs down onto your bag.
- Move air. A small rechargeable camping fan clipped to a gear loop is the single most effective anti-condensation tool for a tent with people and a dog in it. It's also the reason the same tent feels dramatically drier on night two.
- Pitch for airflow. Under tree cover the fly stays wet on the outside all morning; the more air moves over the fly, the less condenses inside. Our tent condensation guide goes deeper on the physics and the site-specific fixes.
- Wet gloves, wet socks, wet dogs. Every damp item inside the tent is a moisture source. Dry the dog with a microfiber towel before it climbs in and keep wet layers in the vestibule.
None of these need a product, which is why diagnosing first matters so much.
Tent Mold and Mildew: How to Clean a Moldy Tent
Mildew is the one tent problem that gets worse while the tent is in storage, and it's the most common reason a perfectly good tent gets thrown out. It shows up as a sour, musty smell, then as grey-black speckles along the fold lines of the fly. The smell is the real problem — mildew damage to the coating is permanent, but the smell and the live spores can be handled.
The fix:
- Pitch and dry it first. Every hour the tent spends wet gives the mildew more time. Full sun on a dry day is fine for canvas and for drying, but don't leave a coated nylon fly baking all afternoon.
- Clean with white vinegar and water (1:1) on a soft sponge or a spray bottle, working along the stains; or use a dedicated tent-and-gear cleaner made for technical fabrics. Vinegar kills surface mildew and neutralizes the smell without destroying the coating.
- Do not use bleach, detergent, or a pressure washer. Bleach destroys PU coatings and seam tape. Detergent leaves residue that strips DWR and attracts water. A pressure washer will punch holes in a fly.
- Rinse with clean water, wipe, and dry completely — both sides, including the corners where water hides.
- Re-proof once dry, because cleaning removes the remaining DWR (see Step 4).
- Store it loose, dry, and out of the bag. This is the step that decides whether you do this again next spring. Hang the tent loosely in a closet or a dry garage, or store it in a large breathable cotton or mesh bag. Never store a tent compressed in its stuff sack, and never store it damp.
If you're already dealing with rain on the trip itself, the practical companion fixes are in our rainy-day hiking and camping gear guide. And if the tent stinks but the forecast is clear, treat the cleaning as a garage job and don't rush it — a rushed job means you'll be re-doing it in two weeks.
Which Tents Actually Hold Up in Rain (2026 Picks)
Waterproofing a fly is one thing; buying a tent that doesn't fight you from day one is another. Here's how the waterproofing story breaks down across what's worth buying right now, in rough order of how much rain they'll shrug off.
Full-coverage fly, best value for two: Night Cat 2-Person Backpacking Tent ($53.99) and the Forceatt 2-Person ($57.18) both use full-coverage flies with aluminum poles — the configuration that actually matters when rain comes in sideways. For a lightweight 2-person tent at this price, that's the feature to pay for.
The classic family dome: the Coleman Sundome with Rainfly ($153.49) is a fair-weather family workhorse — the fly covers the top, so in sustained wind-driven rain you'll want seam sealing and good pitch. If you want the same formula with better coverage and a fast pitch, the Coleman Skydome 4-Person with LED lighting ($122.99) has a pre-attached pole set that pitches in about five minutes, which matters a lot when you're setting up in the rain with kids in the car.
Cabin tents with a real top rainfly: the UNP 4-Person Cabin Tent ($115.99) and the CAMPROS 8-Person with room divider ($159.98) are the family-camping answer — standing height, room for cots, and a fly that covers the roof properly. Add a canopy over the table and you've got a rainy weekend that still works.
Budget tents that out-perform their price in rain: the UNP 6-Person 4-Season Dome ($39.99) and the CAMEL CROWN dome ($34.99) both ship with full flies at prices that make them sensible car-camping spares. The Amazon Basics 3-Season Dome ($41.99) is the same idea for a casual first tent.
Four-season and hot-tent territory: when the forecast is genuinely bad — or you want to camp in November — the Naturehike Massif hot tent with stove jack ($299.00) is a different class of shelter: heavier fabric, a stove jack, and the structure to hold snow. For backpacking in wet, cold shoulder-season conditions, the MSR Access 2 ($727.95), NEMO Kunai 3–4 season ($749.95), NEMO Hornet OSMO 2P ($479.95), Big Agnes Copper Spur HV UL2 ($549.95), and Kelty Late Start 2P ($159.95) are all built with taped, seam-sealed flys from the factory — you're paying for exactly the thing this article is about.
Instant and pop-up tents — read this before you buy for rain: the Londtren 4-Person pop-up ($84.99), CORE 6-Person instant cabin ($169.99), CORE 9-Person instant cabin ($299.99), Coleman instant cabin ($180.00), Golabs 2–3 person ($30.66), and the EVER ADVANCED 6-Person blackout ($169.99) are outstanding for a dry summer weekend and for setup speed. Their hub-and-pole geometry gives rain more places to pool and their flys hug the body more tightly, so in sustained rain they need seam sealing and careful pitch more than a standard dome does. If your family's fall trips are locked to rainy weekends, that's a real trade-off to weigh.
Why "weatherproof" on the box isn't the whole story: a tent's rain resistance is largely about hydrostatic head (the mm rating of the fly coating) and coverage. Roughly: 800mm handles drizzle; 1,500–2,000mm is a typical 3-season tent and handles steady rain with a good pitch; 3,000mm+ and a fully taped fly handles sustained, wind-driven rain; 4-season tents and hot tents go beyond that. The number is on the spec sheet far less often than it should be, which is why fly coverage and seam tape are better buying signals than marketing language.
Keep It From Happening Again
- Dry the tent after every trip, even a dry one. Condensation alone is enough to start mildew. Pitch it in the yard for an hour when you get home.
- Store loose, never compressed. A stuff sack is a transport container, not a storage container.
- Seam-seal untaped seams on day one. Fifteen minutes on a new fly saves a wet night in October.
- Re-proof once a season if the tent lives in the sun, or whenever water stops beading.
- Groundsheet every time, sized smaller than the floor.
- Wash the floor, not the coating. Plain water and a soft sponge. No detergent.
- Keep the repair kit in the car: seam sealer, a roll of Tenacious Tape ($14.39), a spare guyline, and a couple of extra stakes. A repair you can make at camp in five minutes is the difference between a wet night and a trip you remember for a better reason.
- Small dry-camp comfort wins: waterproof matches in a floating case (UCO Stormproof kit, $12.99) so the fire actually lights on a wet evening, and a 12-volt heated blanket ($31.99) for a cold, damp night where the goal is just to get everyone warm and asleep.

Tent Waterproofing FAQ
Can you waterproof a tent that already leaks?
Yes — in almost every case. Diagnose the leak point first, then work in order: dry the tent fully, seal the seams from the inside, re-proof the fly with a spray-on waterproofer, and fix the floor with a properly sized groundsheet. The only unfixable case is a fly whose coating has broken down into a permanently sticky film; no sealer or proofer will bond to that, and the fly needs replacing.
Do I seal tent seams from the inside or the outside?
From the inside for any coated fabric, because the waterproof coating and the factory seam tape are on the inside face. Sealing the outside of a polyurethane-coated fly does very little. If you're working with silicone-treated fabric (SilNylon or SilPoly), use a silicone-specific sealer and follow the manufacturer's direction — urethane seam sealer will bead and peel off silicone fabric.
Why is my tent leaking through the fabric when there's no hole?
That's wet-out, not a leak. The factory DWR finish has worn off, the fabric saturates with water, and moisture starts migrating through the weave. It usually happens uniformly rather than as a single drip line. The fix is a spray-on waterproofer with UV protection, applied to a clean, damp fly and allowed to air-dry fully.
How do I tell a leaking tent from condensation?
Condensation shows up as even dampness across whole panels, gets worse as the night goes on, and appears on still, humid nights with no rain at all. A leak is localized, repeats in the same spot every storm, and arrives once the fabric has been saturated for a while. The paper-towel test settles it in about a minute.
How do I clean a moldy tent?
Pitch and dry it, then clean the affected areas with a 1:1 white vinegar and water solution or a dedicated technical-fabric tent cleaner. Never use bleach, laundry detergent, or a pressure washer. Rinse with clean water, dry completely, re-proof, and store the tent loose and dry — compressed damp storage is what caused the mildew in the first place.
Do pop-up and instant tents hold up in rain?
Less well than a standard dome in sustained or wind-driven rain, because fly coverage is often tighter to the body and the geometry gives water more places to collect. They're excellent for dry weekends and setup speed. For a rainy fall weekend, seam-seal the fly, use a canopy over the camp kitchen, and pitch with the door out of the wind.
How often should I re-waterproof a tent?
Once a season if the tent lives in the sun, or whenever water stops beading on the fly. UV, dirt, and folding degrade DWR steadily; a fly that darkens and feels clammy has already told you it's time. After any mildew cleanup, re-proofing is mandatory because cleaning strips the remaining finish.
Is it worth waterproofing a cheap tent, or should I just replace it?
If the fabric and frame are sound, waterproof it — $35 in sealer and proofer will outperform a new low-end tent that has the same thin fly and the same untaped seams. Replace the tent instead when the coating has gone sticky, the floor is abraded through, or the frame and fly don't match the tent's actual geometry anymore.
Bottom Line
The most useful thing you can do with a leaking tent is refuse to buy anything until you know which of the four problems you have. Line-of-drip above a seam means seam sealer. Uniform clamminess means spray-on proofer. Damp floor means a groundsheet. Wet walls on a dry night means ventilation and nothing else.
Then do the work in order — dry, diagnose, seal from the inside, re-proof the fly, groundsheet the floor, and store it loose and dry for good. A tent that gets that treatment will still be keeping your family dry when the cheap tents that skipped it have been thrown out.
If you're heading into fall camping season with kids, pair this with the fall family camping guide and the fall camping gear checklist, and go check your tent's fly seams this weekend while it's still dry enough to work outside.
For the Pacific Northwest version of this packing list — rain management first, insulation second — see our Camping in Oregon guide.
<!-- AFFILIATE_DISCLOSURE -->TrailMapz earns a small commission when you buy through links on this page, at no extra cost to you. Prices are current as of September 2026 and may change on Amazon.
Our camping in Washington state guide documents the three booking systems, the state's own winter-schedule table of per-park closing dates, and the burn-ban levels that decide whether you can have a fire.