How to Winterize an RV or Camper: Step-by-Step 2026
Protect your RV or camper from frozen pipes: a complete winterization checklist covering antifreeze, water heater bypass, batteries and the mistakes that cost $800.
In this article · 10 sections
- Quick Answer: The RV Winterizing Kit
- When Exactly Should You Winterize?
- What Actually Breaks (So You Know What You're Protecting)
- The Complete RV Winterization Checklist (Step by Step)
- Keep Camping Instead: The Heated Hose Setup
- Common Winterization Mistakes (Learn From Mine)
- What Winterizing Actually Costs
- The 30-Second Version
- RV Winterization Questions, Answered in Search Order
- RV Winterization FAQ
The campground emptied out after Labor Day weekend. Site 14 was quiet, the fire rings were cold, and I was standing in the wet grass with a neighbor who'd just opened the access panel under his travel trailer.
"Water pump's cracked," he said, holding up a piece of white plastic that used to be a pump housing. "I thought I drained everything. Didn't know about the water heater."
That was October, and his spring repair bill was $850.
Here's the thing nobody tells first-time RV owners: an RV's water system is the most expensive thing you own that's full of water — and water expands about 9% when it freezes. A single overnight freeze below 28°F can crack the water pump, split pex lines inside your walls, destroy the water heater tank, and wreck the toilet seals. All of it hidden until you hook up in April and water pours out of places it shouldn't.
The good news: winterizing your RV takes about 20 minutes and roughly $40 in gear. This guide is the exact checklist I use every fall — what to drain, what to bypass, how much antifreeze, and what you genuinely need to buy. If you're new to RV plumbing, our RV water system setup guide explains the three circuits this process touches, and the RV camping for beginners setup guide covers the big picture of owning a rig.
Quick Answer: The RV Winterizing Kit
- Best if your rig has no winterizing valve: Camco Permanent Pump Converter Kit — $17.99. Adds a 3-way valve so you draw antifreeze straight from the jug.
- If you would rather not touch the pump: Camco RV Antifreeze Hand Pump Kit — $26.99. Pushes antifreeze in through the city water inlet.
- Level the rig before you settle in: RVMATE 12-Pack RV Leveling Blocks — $32.87. Cheap insurance for the fridge and the water lines.
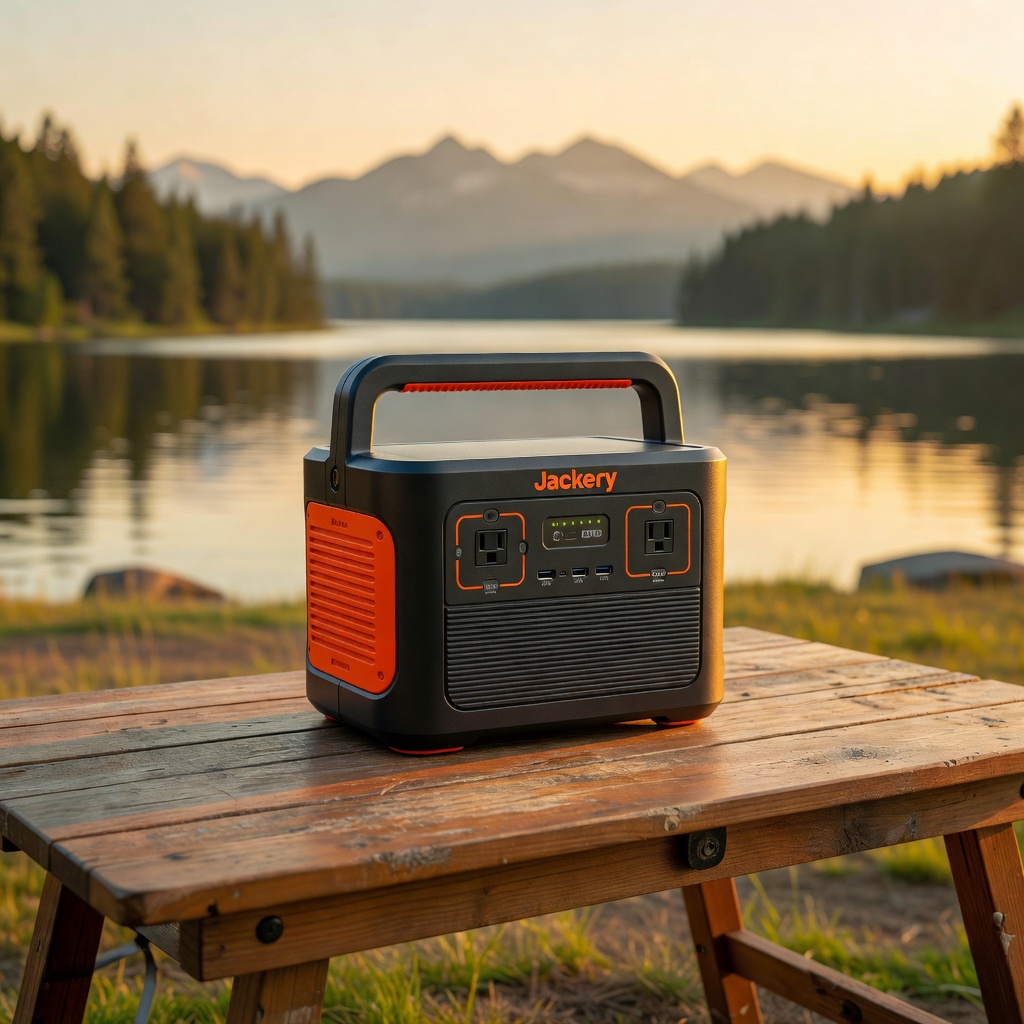
- Power for a cold, unplugged night: Jackery Explorer 300 — $199.00. Runs a CPAP or furnace fan overnight with no generator.
- Budget alternative with the same job: EF ECOFLOW RIVER 2 — $169.00. 256Wh and lighter, if you do not need the extra capacity.
When Exactly Should You Winterize?
The rule is simple: winterize before the first overnight low below 32°F — and don't wait for the forecast to look scary. Freeze damage doesn't need a hard freeze; a light frost inside an unheated rig is enough to crack a plastic pump housing.
Regional timing for 2026:
- Northern states and mountain west (Montana, Colorado, Maine, Minnesota): late September through mid-October. If you camp above 5,000 feet, make it early October, no exceptions.
- Midwest and mid-Atlantic: mid-October to early November.
- South and Southwest: November to December — many owners in Texas and Arizona run a "winterize only if you skip winter trips" policy and keep the rig heated instead.
- Full-timers and heated-storage owners: you may not need antifreeze at all — but you still need to protect your hose connections and batteries. We'll cover that in the winter-camping section below.
If you plan to keep camping into December (or live somewhere it barely freezes), skip ahead to the heated-hose option — winterizing and winter camping are different games, and you can do both in the same season — the RV winter camping guide covers the keeping-it-in-service half, from heated hoses to battery temperature.
What Actually Breaks (So You Know What You're Protecting)
Winterizing is just plumbing triage. These four components fail first, and knowing them makes the checklist below obvious instead of mysterious:
- The water pump — the diaphragm and housing crack when water freezes inside them. This is the most common failure and the one my neighbor hit. If your pump is already misbehaving when you test it, our RV water pump troubleshooting guide walks the priming and no-pressure cases before you buy a replacement.
- The water heater tank — a full tank of frozen water expands and splits the tank wall. You can't see it until you refill and it leaks into the compartment. Always drain it AND bypass it.
- Pex lines and fittings — the pipes inside your walls. Cracked pex is the expensive one because the leak shows up in the floor, the cabinets, or the underbelly, months later.
- Toilet and shower seals — rubber seals dry out and crack over a dry winter. A gallon of antifreeze flushed through the toilet and traps keeps them alive.
Everything else — batteries, tires, the fridge — is storage maintenance, not freeze protection. The checklist below handles both.
The Complete RV Winterization Checklist (Step by Step)
Print this or screenshot it. It's the exact order that takes 20 minutes and zero guesswork.
Step 1 — Drain the fresh water tank and lines
Turn off the water pump, open every faucet (hot and cold), and let the lines run dry. Open the low-point drains under the rig — usually two valves, one per supply line. Open the fresh tank drain valve on the bottom of the tank and let it empty completely.
Step 2 — Drain the water heater (and learn the bypass)
Find the water heater access panel on the outside of the rig. Remove the anode rod or drain plug, and let the tank drain — this is where my neighbor went wrong. Once it's empty, close the drain and engage the bypass valves (usually a small set of valves behind the access panel or under a cabinet near the heater). If your rig doesn't have a bypass kit, buy one — it's a $20-30 retrofit and it's non-negotiable: without bypassing, you'd pump 6 gallons of antifreeze into the heater tank where it does nothing.
Which is also why the spring version of this mistake exists: the valve you closed in October has to go back in April, and a heater left in bypass runs cold water forever without leaking a drop. If that is already your situation, RV water heater not working walks the bypass position, the DSI fault and the element test in the order a tech checks them.
Step 3 — Pump pink antifreeze through every line
This is where the antifreeze actually goes. Two ways to do it:
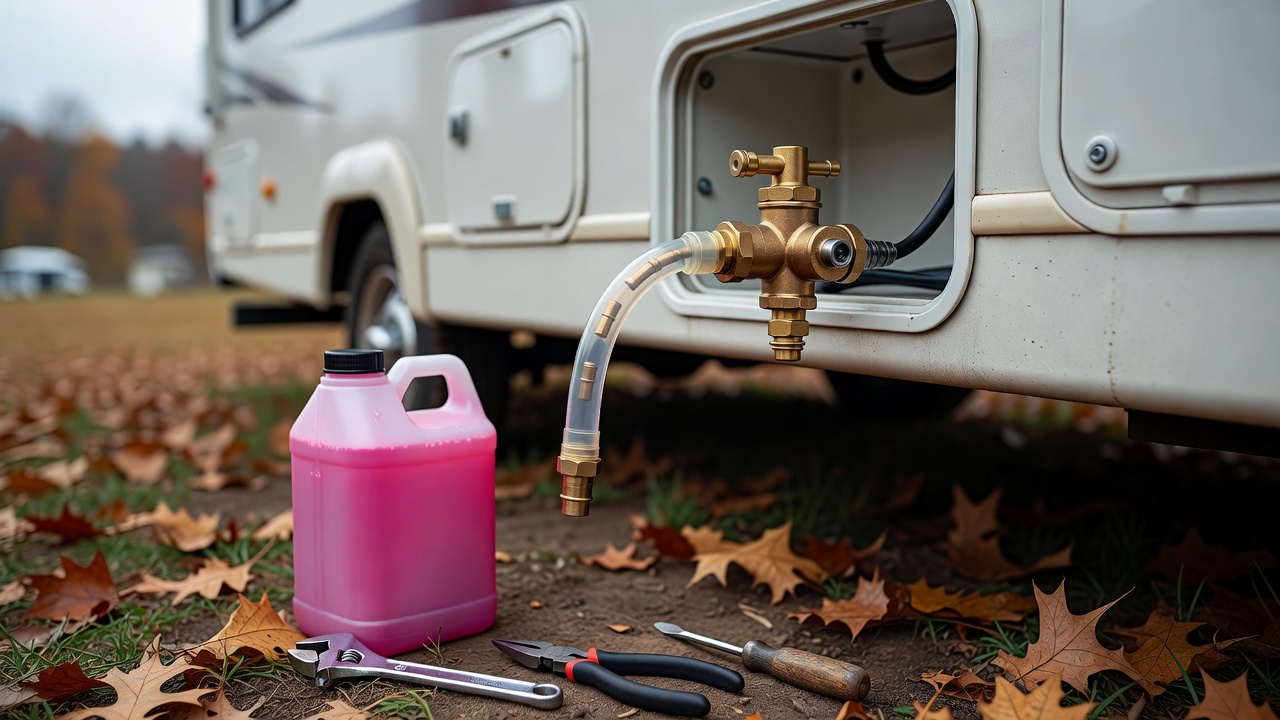
- Hand pump kit (cheapest): The Camco Antifreeze Hand Pump Kit (around $27) is a siphon hose and hand pump that draws antifreeze straight from the jug into the city-water inlet. You pump until pink liquid runs out of each faucet, then close the faucet and move to the next one.
- Pump converter kit (best for repeat winterizers): The Camco 36543 Pump Converter Winterizing Kit installs permanently with a 3-way brass valve. You flip one valve, drop the siphon hose into the antifreeze jug, and the rig's own water pump does the work. It's a one-time 30-minute install, and it makes every future winterization a 10-minute job.
Grab 2-3 gallons of pink RV antifreeze rated to -50°F — any major brand works (Camco's Full Timer's Choice and RecPro are the most common), and it's around $5-8 per gallon. Do not use automotive antifreeze — it's toxic, it's not rated for potable systems, and it'll ruin your water lines. RV antifreeze is propylene-glycol based, food-safe, and biodegradable.
Work faucet by faucet: kitchen sink, bathroom sink, shower (open both valves), toilet, and the outside shower if you have one. Then pour a cup down each drain trap — sinks and the shower drain — plus the toilet bowl. You should smell the pink when you're done.
Step 4 — Don't forget the low-flow parts
The washing machine hookup (if you have one), the ice maker line, and the black-tank flush connection all hold water. Run antifreeze through each, or blow them out with an air compressor at 30 PSI if you prefer the dry method.
Step 5 — Protect the batteries and electronics
Disconnect the house battery (or batteries) and store them somewhere above freezing if you can — a cold garage works. If they must stay in the rig, charge them fully and disconnect the negative terminal; a battery that sits all winter at half charge will sulfate and die. This is also the season to think about portable power for next spring — the Jackery Explorer 300 ($199) and EF ECOFLOW RIVER 2 ($169) are the two most popular LiFePO4 units we track, and both hold a charge through a storage winter far better than a lead-acid house battery ever will.
Step 6 — Tires, leveling, and the exterior
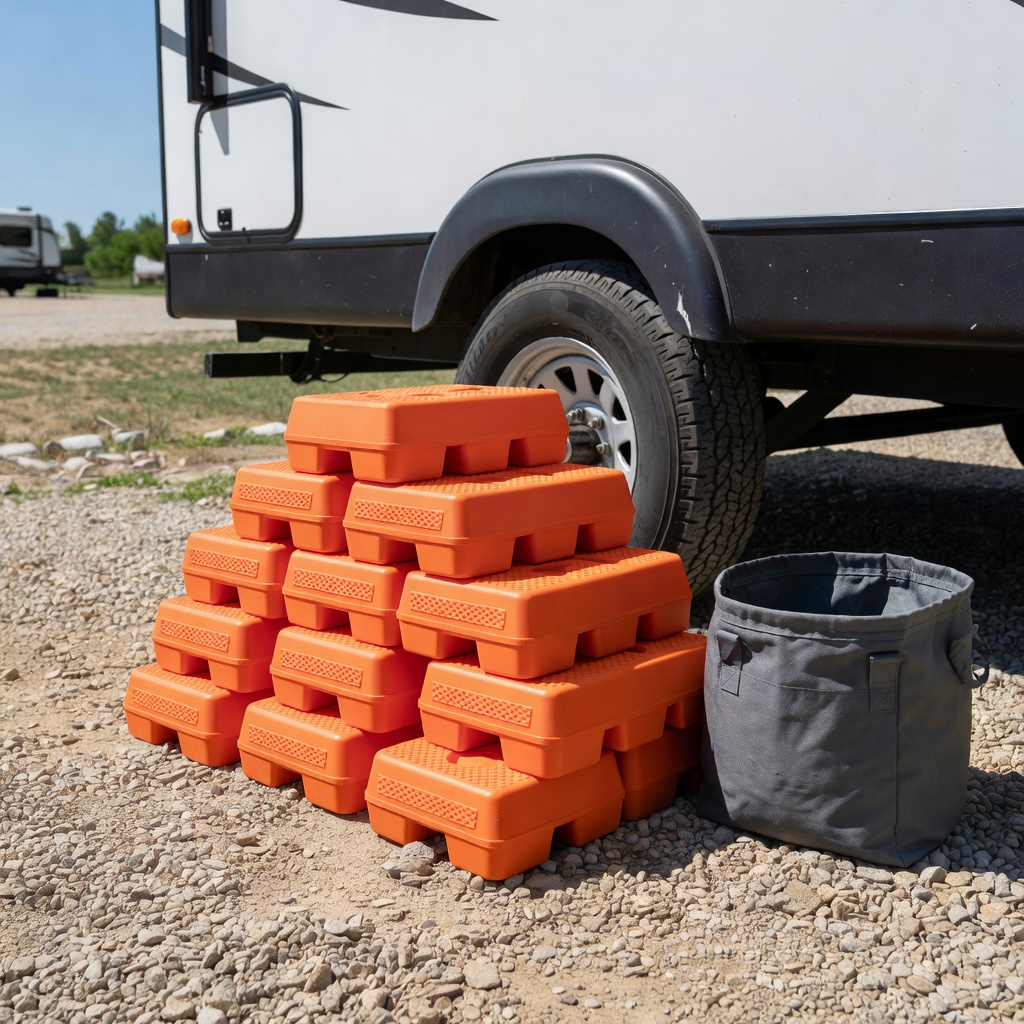
Inflate tires to the max cold pressure stamped on the sidewall, and if the rig sits on its tires all winter, use RVMATE 12-Pack RV Leveling Blocks ($32.87) to get it level — an unlevel rig flexes the frame and seals all winter long. Chock the wheels, close the roof vents, and cover the tires if they'll see direct sun.
Step 7 — The sewer system
Dump and rinse the black and grey tanks one last time, then add a tank treatment like the Camco TST MAX Drop-Ins ($14.67) so nothing sits and dries into a smell you'll meet in April. Leave valves closed. If you use a sewer hose setup like the Camco RhinoFLEX 20-Ft Complete Sewer Hose Kit ($60.02), disconnect it, rinse it, and store it — a frozen sewer hose is a spring tragedy.
Step 8 — Label everything and log it
Put a "WINTERIZED" tag on the water heater access panel and the fresh tank valve. You will forget what you did by spring — everyone does. A photo of the final valve positions on your phone beats a memory every time.
One date that justifies delaying the winterization by a week: Veterans Day, November 11, 2026 is the last fee-free national park day of the year.
Keep Camping Instead: The Heated Hose Setup
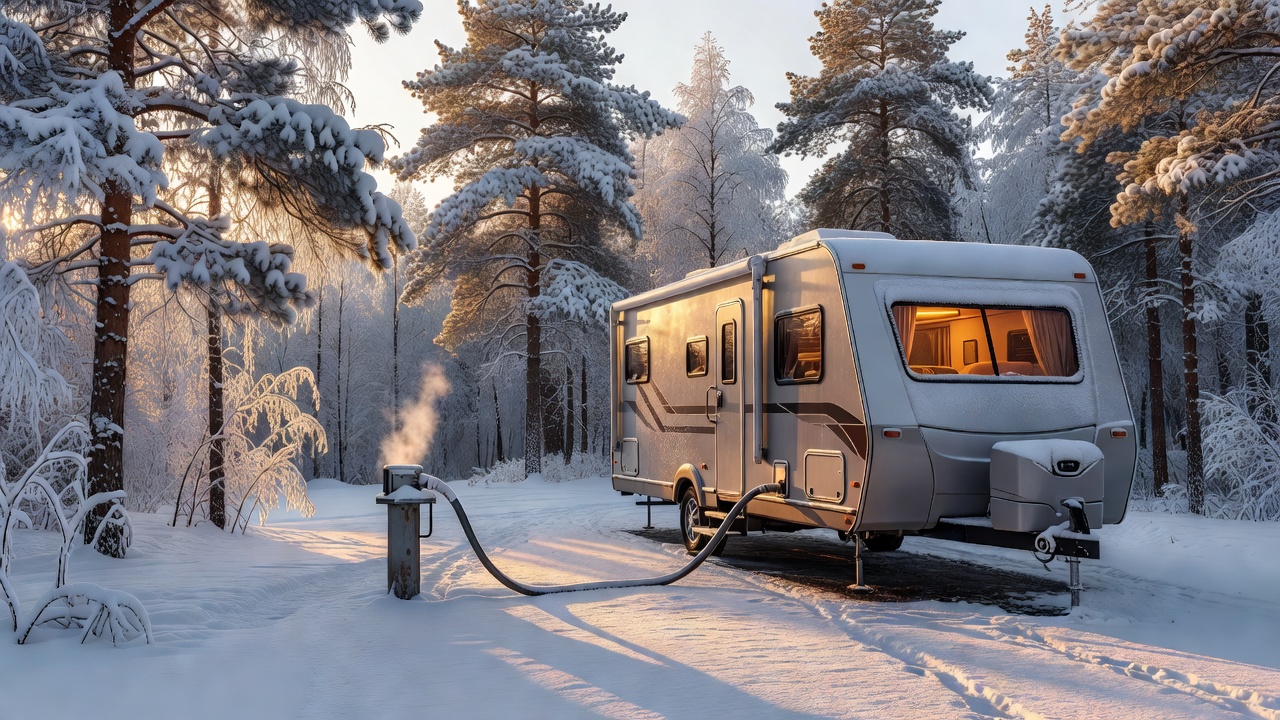
Winterizing isn't the only option. If you want to keep taking the rig out through the shoulder season (or you live somewhere freezing but can't stand the off-season), the heated-hose route keeps your water flowing down to serious cold — without antifreeze in the system.
The gold standard is the Camco 25-Foot Heated Drinking Water Hose (Camco 22922) — a self-regulating thermostat cable wrapped in a drinking-water-safe hose that keeps water flowing down to -40°F. It only draws power when the temperature drops, so it's cheap to run. On a budget, the Wufoty 25FT Heated Water Hose does the same job for less money — about $79 — with a thermostat, a drinking-water-safe liner, and a 3-year service window.
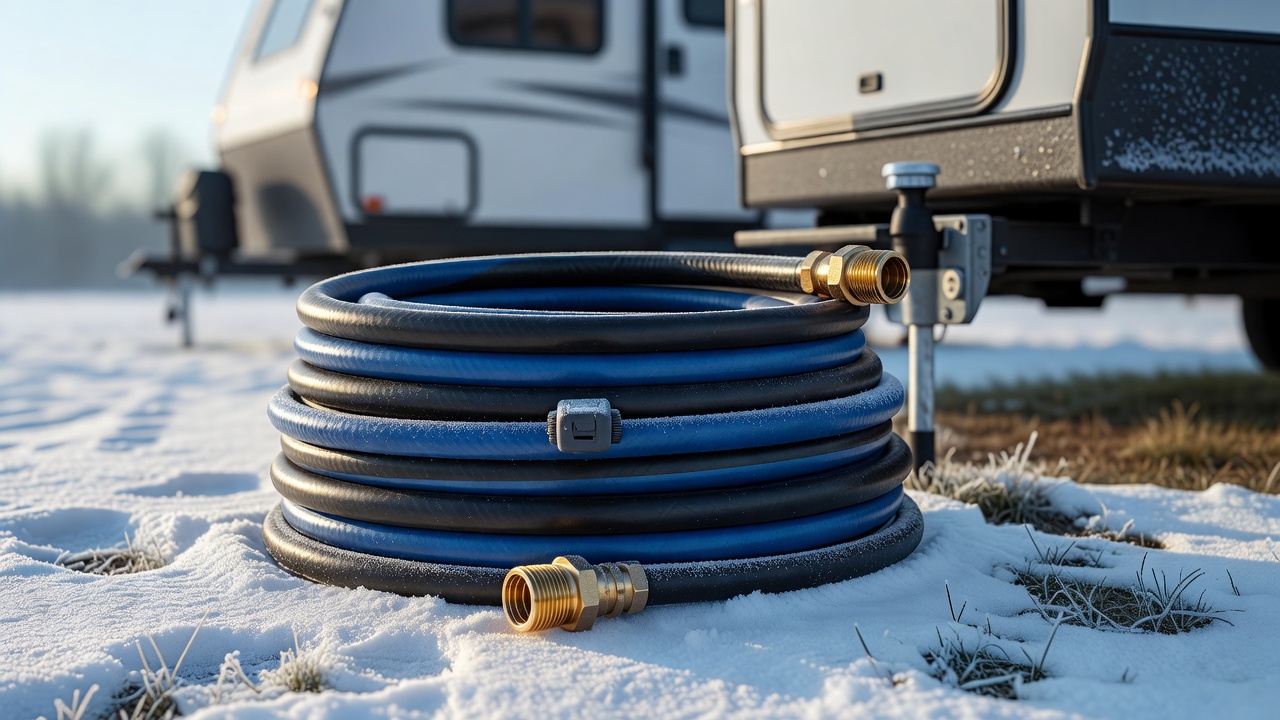
But a heated hose only protects the hose. The rig's own pipes still need heat:
- Pair the heated hose with the Camco TastePURE 25-Ft RV Drinking Water Hose ($13.97) as your spares-and-links stash — heated hoses are stiff and hard to coil when it's freezing.
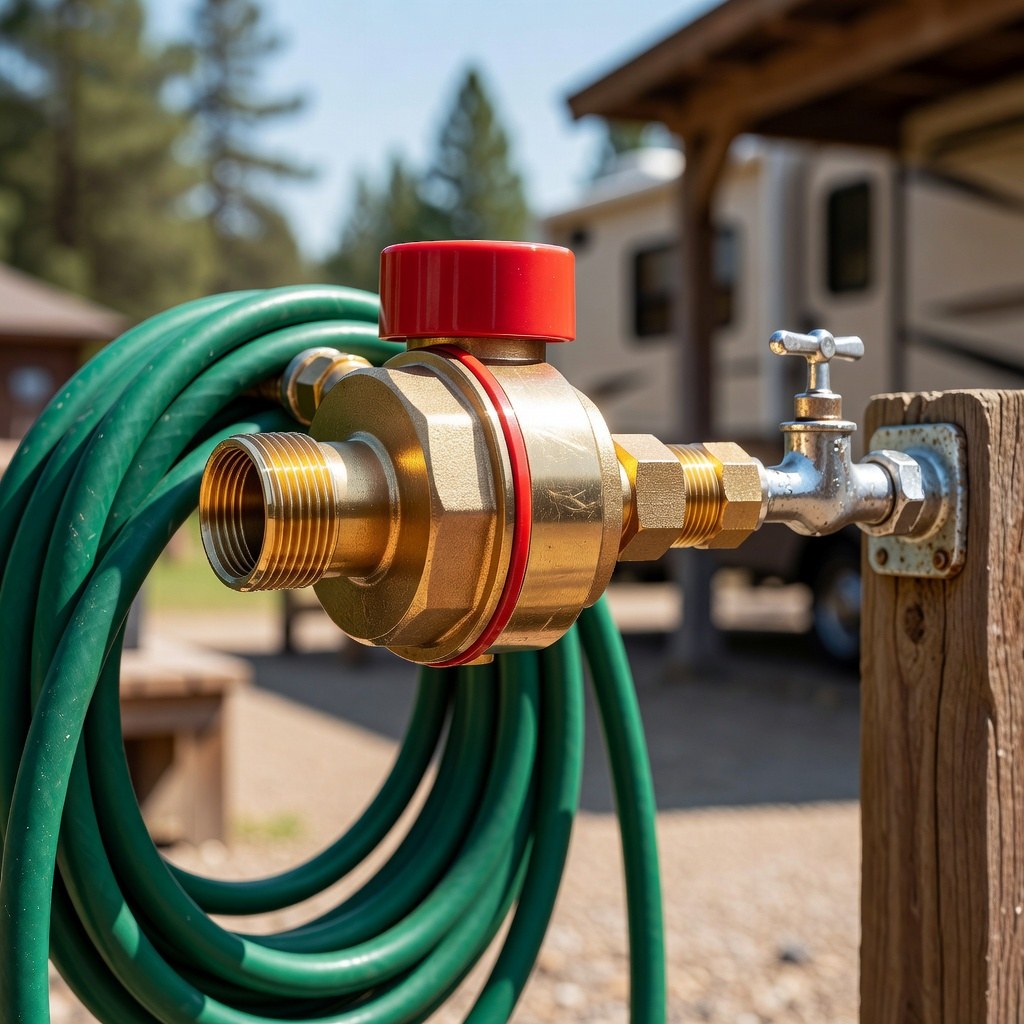
- Protect the connection point with the Camco 40055 Brass Water Pressure Regulator ($16.99) and the Camco TastePURE Inline Water Filter ($17.99) — the same gear from our water system guide, winter-rated.
- Keep the interior warm enough that underbelly pipes stay above freezing — an electric space heater with a thermostat on the low setting is the standard move, and it protects the water pump, which is the part most exposed to cold air. For nighttime warmth without running the furnace, a Sealy 12-Volt Heated Car Blanket at $31.99 plugs straight into the RV's 12V outlet (or a portable power station), warms up in minutes with three heat levels and a 4-hour auto-off, and its two USB ports charge phones while you sleep — much cheaper than propane heater burn through.
- Skip the fresh tank entirely in freezing temps. Hook to city water only, and drain the tank after every trip. A tank of water under the floor is a tank of ice waiting to happen.
Winter camping has its own full gear list — our winter camping gear checklist and winter camping for beginners guide cover the rest of the rig and the humans inside it. And if you're boondocking through the cold, the boondocking guide has the power and water math you'll need.
Common Winterization Mistakes (Learn From Mine)
I've made every one of these. They're in order of how expensive they are:
- Skipping the water heater bypass. Pumping antifreeze through an un-bypassed heater wastes 6 gallons and leaves the tank full of water anyway. This is the #1 cause of "I winterized and it still froze."
- Using automotive antifreeze. It's toxic, it eats rubber seals, and one contaminated system means replacing every line. Pink RV antifreeze only.
- Forgetting the low-point drains. The fresh tank drain is obvious; the two little valves under the rig aren't. An un-drained low point is where a freeze always finds you.
- Trusting "I drained everything" over a checklist. My neighbor drained the tank and the lines and missed the water heater. Print the checklist. Use it.
- Storing the battery in the rig, connected, at half charge. Dead by March. Disconnect it and charge it.
- Winterizing in November in Montana. By then the damage is done. The 40°F overnight rule — not the calendar — is the trigger.
What Winterizing Actually Costs
The honest budget, one-time and yearly:
- Year one: hand pump kit ($12) or pump converter kit ($30) + 3 gallons antifreeze ($15-24) + bypass kit if your rig lacks one ($20-30) = roughly $50-85 total.
- Every year after: just the antifreeze = $15-24 per season.
- The alternative: one cracked pump or water heater = $300-900 in parts and labor, plus a ruined spring trip.
That's the whole argument. Twenty minutes and forty bucks now, or a Saturday in April with a wrench and a credit card.
The 30-Second Version
If you remember nothing else: drain the tank and lines → drain AND bypass the water heater → pump pink antifreeze through every faucet, trap, and the toilet → disconnect the battery → log it. Done. The essential RV accessories checklist covers the gear that makes the rest of the rig winter-safe, and when spring comes, our RV water system setup guide is the first page to reopen. See you on the road next season.
We also keep a snow camping guide for the nights the ground is frozen rather than just cold.
<!-- AFFILIATE_DISCLOSURE -->If winterizing makes you want to drive somewhere warm instead, our Arizona camping guide covers the state where winter is the camping season. If you are heading south for the winter instead, the Texas camping guide covers the Winter Texan RV coast where the heated hose actually earns its price.
New Mexico is a good test case for all of the above — see Camping in New Mexico 2026 for its six-month state park window, the 14-day BLM dispersed limit, the day-of-only backcountry permit at Carlsbad, and the state trust land exception.
If you are winterizing the rig and heading south, Alabama's coast is one of the closest mild-winter destinations — see Camping in Alabama.
For a worked example of how a state system can invert every rule you know, Camping in Louisiana covers the 30-day dispersed limit and the no-campground national parks.
Cold-weather camping plans live or die on whether the gate is still open, so it is worth knowing the actual dates before you pick a destination. Our when do campgrounds close for the season roundup covers every published 2026 closing date and the year-round fallbacks.
RV Winterization Questions, Answered in Search Order
These are the winterization queries this page gets asked in search, and the short answer from the checklist above. If a row matches what you typed, the answer is the row.
Air or pink antifreeze: which method, and what changes
| what people search | the short answer |
|---|---|
| rv winterizing antifreeze or blow out | Pick one, not both: pump pink through every line, or blow the lines dry with air. Both work; antifreeze is what covers the traps and the toilet. |
| rv winterizing air vs antifreeze | Air is faster and leaves nothing to flush out in spring. Antifreeze covers the drain traps, the toilet seal and the pump, which a compressor cannot reach. |
| rv winterize blowout vs antifreeze | Same trade: the blow-out method protects the pipes, the pink method also protects the traps, seals and pump. |
| winterize rv compressed air or antifreeze | Compressed air is the dry method at about 30 PSI. Pink antifreeze is the wet method that leaves the system filled with a -50°F liquid. |
| can you just blow out rv water lines | Yes for the supply lines, but you still have to pour a cup of antifreeze down each drain trap and into the toilet bowl. |
| winterize rv no antifreeze | Doable with air only if the rig sees mild winters. In a hard freeze the traps and the pump still hold water that air never reaches. |
| how to winterize an rv without antifreeze | Blow the lines at 30 PSI with the pump off and every faucet open, then hand-dry the traps instead of pouring pink. |
| blowing out rv water lines psi | 30 PSI is the number this checklist uses — enough to move water, low enough not to burst a fitting. |
| how much psi to blow out rv water lines | Stay at or under 30 PSI. Most RV plumbing is not rated for shop-compressor pressures. |
| how much pressure to blow out rv water lines | 30 PSI and no more. Higher pressure buys you nothing and risks a cracked fitting. |
| max air pressure to blow out rv water lines | Treat 30 PSI as your ceiling, not your target. The water heater and pump seals are the parts that fail first. |
| best air compressor to blow out rv water lines | A small portable unit with a regulator is enough. You need adjustable pressure, not tank size. |
| what size air compressor to blow out rv water lines | Any compressor with a working regulator can hold 30 PSI. A 6-gallon pancake model is plenty for a trailer. |
| winterize rv air compressor | Air first, traps second: blow every line at 30 PSI, then pour antifreeze down the drains and the toilet. |
| how to winterize an rv with air compressor | Pump off, water heater drained and bypassed, faucets open, 30 PSI at the city inlet, one line at a time. |
| how to winterize an rv without air compressor | Use the hand pump kit instead. It pushes pink antifreeze through the city water inlet with no compressor at all. |
| winterizing rv blow out method | The dry method: no antifreeze in the supply lines, so spring is just a flush and go. |
| air fitting to blow out rv water lines | A screw-on blow-out plug with a quick-connect end turns the city water inlet into an air port. |
The kit, valves, adapters and fittings people search by name
| what people search | the short answer |
|---|---|
| rv winterization kit | A kit is either a hand pump that pushes pink in through the city inlet, or a permanent 3-way valve at the pump. |
| rv winterizing kit with pump | The $27 hand pump kit draws straight from the jug. The permanent converter kit lets the rig's own pump do the work. |
| rv winterizing hand pump kit | Siphon hose plus hand pump — the cheapest route with no tools and no permanent install. |
| rv winterizing pump kit | Camco's pump converter installs a brass 3-way valve so every future winterization takes about ten minutes. |
| rv winterize pump kit | Same job, different brands: a valve at the pump so one lever draws antifreeze instead of city water. |
| rv winterization adapter | Adapters split into two families: blow-out plugs for the air method, siphon fittings for the pink method. |
| rv winterizing air compressor adapter | A blow-out plug screws onto the city water inlet and takes your compressor hose or a quick-connect fitting. |
| rv winterize blowout adapter | This is the cheap part that turns the city inlet into an air port. Without it you cannot use the dry method. |
| rv winterizing blow out plug | Screw it into the city water inlet, set the regulator to 30 PSI, and open each faucet in turn. |
| rv winterizing blow out kit | Usually just the plug plus a quick-connect. Skip the kit if you already own the right fitting. |
| rv winterizing bypass valve | The single most important valve in the job — it keeps antifreeze out of the water heater tank. |
| rv winterizing bypass kit | A $20-30 retrofit that pays for itself the first time you do not waste six gallons of antifreeze. |
| rv antifreeze bypass valve | Same part, named by what it does: it diverts flow around the heater so the tank drains and stays empty. |
| rv antifreeze bypass kit | Buy the kit if your rig has no bypass. The heater holds about six gallons that would otherwise swallow your antifreeze. |
| rv winterizing diverter valve | Diverter and bypass are the same idea: one position isolates the heater, the other lets water back through in spring. |
| rv water pump winterization valve | Mounts at the pump intake so the pump pulls pink antifreeze from a jug instead of from the fresh tank. |
| rv winterizing hose adapter | Matches the hose to the city inlet or the pump fitting. Measure the thread before you order. |
| rv winterizing suction hose | Another name for the siphon hose on a hand pump or a permanent converter kit. |
| rv winterizing siphon hose | Keep it in a zip bag with the pump kit so you are not hunting for it the first cold night. |
| rv winterizing tee | A tee splices the winterizing valve into the existing pump line instead of replacing the line. |
| rv winterizing air fitting | One end takes your compressor hose, the other screws into the city water inlet. |
| rv winterizing tube | Usually the dip tube that reaches the bottom of the antifreeze jug so the pump does not run dry. |
Step order, timing and the checklist itself
| what people search | the short answer |
|---|---|
| rv winterization steps | Drain tank and lines, drain and bypass the heater, pump pink through everything, handle the low-flow parts, then batteries, tires and sewer. |
| rv winterization process | It is plumbing triage in a fixed order. The order matters more than the speed. |
| rv winterizing instructions | Work top to bottom: fresh tank, water heater, fixtures, traps, then the storage items. |
| rv winterizing list | Print it and tick it off. The two steps people skip are the heater bypass and the low-point drains. |
| rv winterizing how to | About twenty minutes and roughly forty dollars in gear, start to finish. |
| rv winterizing basics for beginners | Three circuits matter: fresh supply, the water heater, and the drains. Everything else is storage maintenance. |
| rv winterizing for beginners | The first-timer mistake is draining the tank and calling it done. The heater, the traps and the pump still hold water. |
| rv winterizing made easy | The permanent pump converter valve is what makes it easy — one flip instead of a hand pump. |
| rv winterizing diagram | Trace your own three circuits before you start: fresh tank to pump, pump to fixtures, heater behind its bypass. |
| rv winterizing tips | Log the final valve positions with a photo. You will not remember them in April. |
| what is rv winterization | Removing every drop of water from the rig's plumbing and storage systems before the first freeze. |
| winterize rv meaning | It means the water system is empty or filled with pink antifreeze, and the battery and tanks are storage-ready. |
| how to winterize an rv for storage | Winterization plus storage: tires off standing water, vents closed, battery disconnected, sewer hose stored dry. |
| how to winterize an rv and still use it | Winterize the water system and keep using the rig dry — carry water in jugs and use the campground bathhouse. |
| how to winterize an rv for winter living | Full-time winter means heat, skirting and a heated hose rather than antifreeze, because the water stays live all season. |
| how to winterize a camper for winter | Same checklist, smaller system: drain the heater, pump pink through the fixtures, then handle the traps. |
| when to winterize rv | Watch the ten-day overnight low, not the daily high. The moment it touches 32°F you are on the clock, and at 28°F the pump and the pex lines are already at real risk. |
| when to winterize rv temperature | The trigger is the overnight low. 32°F means start now; 28°F means you are already late — a single night is enough to crack a plastic pump housing. |
| when to winterize camper | Same temperature rule as a motorhome. A camper's pump housing and pex lines are no more forgiving than a big rig's. |
| when to winterize motorhome | Same rule, more water in more places. Give a motorhome a full weekend of margin instead of a single afternoon. |
| when should i winterize my rv | Before the first overnight freeze in your own region: late September to mid-October in the mountain west, November to December along the Gulf coast. |
| when to winterize rv in colorado | If you camp above 5,000 feet, early October at the latest — the high country freezes weeks before the Front Range does. |
| rv winterization checklist | Drain the tank and lines, drain and bypass the water heater, pump pink through every fixture, then handle the traps, batteries, tires and the sewer. |
| rv winterizing checklist | Same list, same order. The two steps owners skip are the water heater bypass and the low-point drains. |
| rv winterization checklist pdf | Print this page, or screenshot the checklist and the step tables below — the whole routine fits on one sheet. |
The parts that freeze: heater, tank, drains and lines
| what people search | the short answer |
|---|---|
| how to winterize an rv water heater | Drain it, close the drain, then engage the bypass. The tank has to be empty and isolated. |
| how to winterize an rv hot water heater | Pull the anode rod or drain plug outside the rig, let it empty, then bypass before you pump antifreeze. |
| winterize rv water heater | Two moves: drain the tank, then bypass it so antifreeze never enters. |
| winterize rv bypass water heater | The bypass is the difference between three gallons of antifreeze and nine. |
| how to winterize rv without water heater bypass | Drain the heater fully and accept the extra antifreeze, or retrofit a $20-30 bypass kit before the freeze. |
| how to winterize an rv tankless water heater | Tankless units hold little water but still trap it. Drain the unit and run pink through the hot side until it appears. |
| winterize rv tankless water heater | No tank to bypass, so the job is flushing the unit itself with antifreeze. |
| how to winterize an rv on demand water heater | On-demand is the same family as tankless: kill the power, drain the unit, and flush until pink runs. |
| winterize rv on demand water heater | Skip the bypass valves, there is no tank. Just purge the unit and its short runs. |
| how to winterize rv fresh water tank | Open the drain on the bottom of the tank and let it empty completely, then leave the valve open. |
| winterizing rv antifreeze in fresh water tank | You do not need pink in the fresh tank. Drain it dry and put the antifreeze in the lines instead. |
| winterizing rv using fresh water tank | That is the old method: fill the tank with antifreeze and pump it through. It costs more and wastes gallons. |
| winterize rv low point drains | Two small valves under the rig, one per supply line. Open them with the faucets open and leave them open. |
| how to winterize rv lines | Faucet by faucet until pink appears: kitchen, bath, shower on both valves, toilet, then the outside shower. |
| how to winterize your rv water lines | Hand pump or permanent valve, whichever you have. The test is pink at every fixture. |
| winterizing rv lines | Expect to smell the pink when you are done. If you do not, a line is still holding water. |
| how to winterize an rv water pump | Let it run dry after the tank is drained, and put a cup of pink through the pump housing if it is accessible. |
| rv winterize water pump | The pump is the most common freeze casualty. Drain the tank first, then run the pump dry and pink the housing. |
| how to winterize an rv without a pump | Use the hand pump kit at the city inlet, or blow the lines out at 30 PSI with the rig's pump switched off. |
| how to winterize rv city water connection | The inlet holds water too. Blow it out at 30 PSI or push pink through until it appears at the faucets. |
| winterizing rv city water inlet | Disconnect the hose, drain the inlet screen, then treat it as one more line in the purge. |
| how to winterize an rv toilet | Flush pink through it and leave a cup in the bowl with the valve closed so the seals stay wet. |
| how to winterize rv holding tanks | Dump and rinse black and grey, leave the valves closed, and leave a tank treatment in so nothing dries into a smell. |
The water system, line by line — and rig by rig
The two parts that actually freeze are the supply lines and the pump that feeds them. Here is the same job named the way people search it, and the same answers applied to a trailer, a camper and a motorhome.
| what people search | the short answer |
|---|---|
| winterize rv water system | Empty the fresh tank, drain and bypass the water heater, then get every line wet — either with 30 PSI of air or with pink antifreeze. |
| winterizing rv water lines | One line at a time with every faucet open, working from the farthest fixture back toward the pump. |
| winterizing rv water lines with air | Pump off, heater drained and bypassed, 30 PSI at the city inlet, then open each fixture until it sputters dry. |
| winterizing rv water lines with antifreeze | Draw pink from the jug with the rig's own pump or a hand pump, and stop only when it runs solid pink at every hot and cold tap. |
| winterize rv water lines | Supply lines first, then the drain traps and the toilet bowl — the parts air never reaches. |
| winterizing rv hot water lines | Hot and cold are separate runs. Open the hot side at every fixture, or the loop behind the heater stays full of water all winter. |
| winterize camper water lines | Smaller system, identical order. The under-sink low-point drains are the ones campers forget. |
| winterize travel trailer water system | Trailer, fifth wheel or toy hauler — three circuits, one checklist. The outside shower is the fixture most often missed. |
| winterize camper water system | Drain the fresh tank, bypass the heater, then protect the fixtures and the traps. Nothing else holds water. |
| winterize motorhome water system | Add the washer, the ice maker and any residential-fridge line to the trailer checklist — a motorhome has more places to hide water. |
| how to winterize an rv trailer | Drain, bypass, pump pink, then do the traps. A trailer has no engine to service, so the water system is the entire job. |
| how to winterize an rv camper | The same routine as a trailer. The only difference is where your low-point drains and pump access panel are located. |
Two pieces of gear cover almost the whole water system:
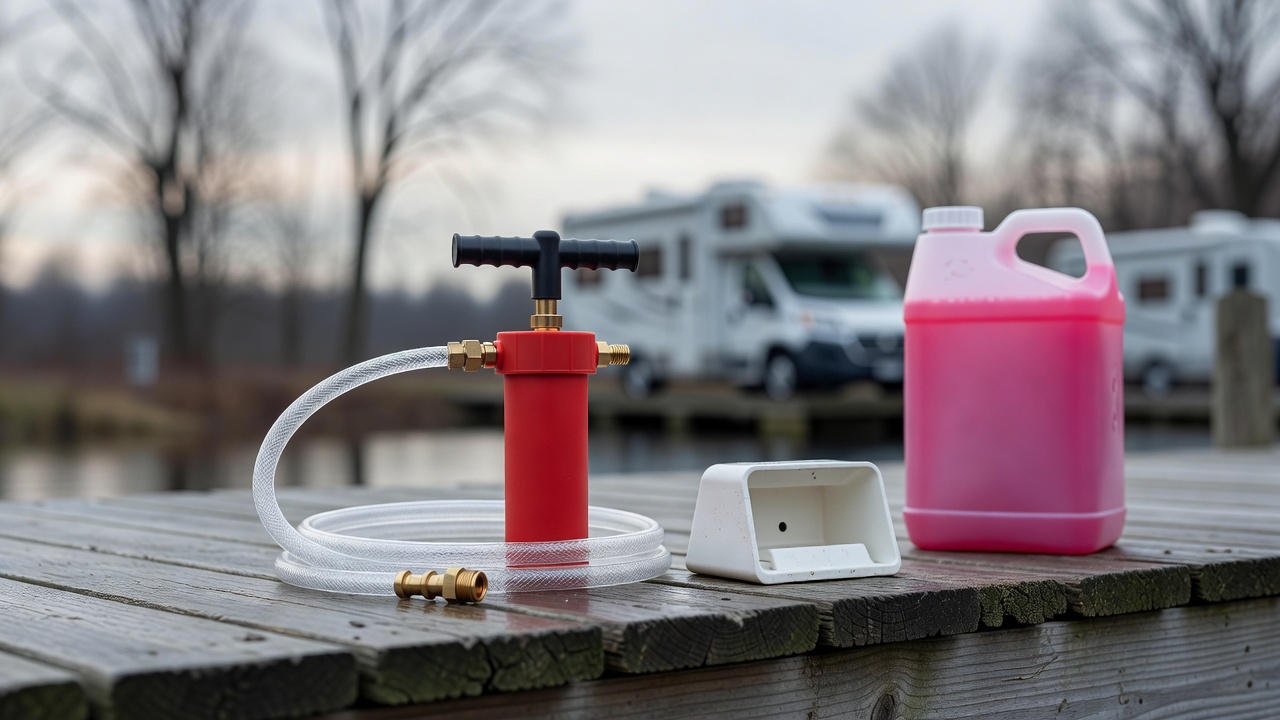
- No tools, no install: Camco RV Antifreeze Hand Pump Kit — $26.99. Pushes pink straight in through the city water inlet.
- Permanent, ten-minute winters from now on: Camco Permanent Pump Converter Kit — $17.99. Adds a 3-way valve so the rig's own pump draws antifreeze instead of you pumping by hand.
- If you choose the air method instead, keep the pressure honest with a Camco brass water pressure regulator — $16.99 — rated for the 30 PSI ceiling this checklist uses.
What it costs, DIY versus paying a shop
| what people search | the short answer |
|---|---|
| rv winterization cost | DIY is roughly $40 in gear plus $15-24 of antifreeze. A shop typically charges a few hundred. |
| rv winterization price | Expect several times the DIY number if you pay someone. The parts are cheap, the labor is not. |
| rv winterizing service cost | A service call buys convenience, not protection. The work is the same checklist. |
| how much does it cost to winterize a travel trailer | Year one lands around $50-85 with a pump kit and a bypass. Every year after is just antifreeze. |
| winterize rv cost | Twenty minutes of your own time and about $40 of gear, versus a $300-900 freeze repair. |
| camper winterization cost | The gear is the same at any size: a pump or a plug, antifreeze, and a bypass kit if the heater lacks one. |
| travel trailer winterizing cost | Budget the bypass kit as part of year one. It saves six gallons of antifreeze you would otherwise pour into the heater. |
| winterizing a camper cost | Antifreeze is the only annual line item, roughly $15-24 a season. |
| rv winterization service | Worth it only if you cannot reach the water heater panel. The checklist itself is not difficult. |
| winterize rv service | Ask what they charge for the bypass and the traps. Those are the two steps that get skipped. |
| rv winterizing prices | Prices track the antifreeze count. A rig without a heater bypass costs more to winterize. |
| rv winter storage cost | Storage is a separate bill from winterization, and indoor heated storage can cost more than the service. |
| camper winter storage cost | If you pay for storage, do the winterization yourself first. They are two different jobs. |
| how to winterize a camper for beginners diy | Buy the hand pump kit, three gallons of pink, and a bypass kit if you need one. That is the whole shopping list. |
Antifreeze type, amount and dilution
| what people search | the short answer |
|---|---|
| how much antifreeze is needed to winterize an rv | Plan on 2-3 gallons for a trailer or motorhome, and double that if the water heater is not bypassed. |
| how much antifreeze do i need to winterize my rv | Three gallons covers most rigs with a bypass. Buy four if you have a washer or an ice maker line. |
| how many gallons of antifreeze to winterize an rv | Two to three with a bypass, six to nine without one. |
| winterize rv how much antifreeze | The number is driven by the heater: bypassed it is 2-3 gallons, un-bypassed it swallows about six. |
| rv antifreeze how much to use | Enough to see pink at every fixture and to fill each drain trap, usually 2-3 gallons. |
| how much antifreeze to winterize a travel trailer | Three gallons is a safe buy. You will use less if the heater is bypassed and there is no washer. |
| how to winterize rv with pink antifreeze | Pink is the only kind to use: propylene glycol rated to -50°F, food-safe and biodegradable. |
| rv winterizing fluid | Pink RV antifreeze, not automotive coolant. The two look similar and do opposite things. |
| rv winterizing solution | Any -50°F pink brand works. Camco and RecPro are the common ones at $5-8 a gallon. |
| rv winterization liquid | Same product, plain phrasing: propylene-glycol antifreeze rated for potable water systems. |
| rv winterization coolant | Do not reach for engine coolant. Automotive antifreeze is toxic and it will ruin the lines. |
| winterize rv fluid | Only pink RV antifreeze goes in. Anything green or orange belongs in a radiator. |
| rv antifreeze alcohol free | Alcohol-free is the safer pick for a potable system, and it is what the food-safe labeling refers to. |
| rv antifreeze concentrate | Concentrate needs mixing to the label's ratio. Pre-mixed jugs are simpler for a once-a-year job. |
| rv antifreeze dilution chart | Follow the jug's chart. Diluting past the rated point is how lines still crack at -20°F. |
| rv antifreeze boiling point | Not the number that matters here. You care about the freeze rating, which is -50°F on standard pink. |
Dewinterizing in spring
| what people search | the short answer |
|---|---|
| rv de winterization | Spring reversal: flush the pink out, reopen the heater bypass, then sanitize before anyone drinks from it. |
| rv de winterizing checklist | Reconnect the heater, flush every line clear, refill and check for leaks, then sanitize the fresh system. |
| rv de winterizing instructions | Close the low-point drains first, then refill and run each fixture until the water runs clear. |
| how to de winterize an rv water system | Flush until no pink remains, then sanitize the tank and lines before the first trip. |
| how to de winterize an rv hot water heater | Close the bypass, refill the tank, and check the anode rod before you fire the heater. |
| how to de winterize a camper water heater | Put the bypass back to normal and let the tank fill before the burner or the element comes on. |
| how to de winterize rv water lines | Every fixture, hot and cold, until the water is clear. The toilet and the outside shower are the ones people forget. |
| when to de winterize rv | When the ten-day low stays safely above freezing, not on the first warm afternoon. |
| when is it safe to de winterize rv | After the last hard freeze risk in your region. A refilled system that freezes is worse than one left winterized. |
Appliances and the rest of the rig
| what people search | the short answer |
|---|---|
| winterize rv dishwasher | Treat it as a low-flow part: run pink through it or drain the supply line, because it holds water. |
| how to winterize an rv dishwasher | Cycle pink through on a short wash, or disconnect and drain the supply line if the unit cannot take antifreeze. |
| winterize rv ice maker | Shut off the supply, empty the tray, and clear the line behind the fridge. That thin line freezes first. |
| how to winterize rv refrigerator ice maker | Kill the water supply to the fridge, run the ice maker until the mold is empty, then purge its line. |
| winterize rv residential refrigerator | Same answer as any fridge: nothing inside it freezes, but the ice maker line still needs purging. |
| how to winterize an rv refrigerator | Leave it clean, dry and propped open. Put your antifreeze effort into the water line behind it. |
| winterize rv washing machine | Run a short cycle with pink until you see it in the drum, then leave the door open. |
| how to winterize an rv washing machine | Cycle antifreeze through the supply and the pump, then drain the lint filter if it has one. |
| how to winterize an rv washer dryer combo | Combo units still hold water in the pump and the drain hose. Cycle pink through and drain the filter. |
| how to winterize rv clothes washer | Same routine: a short cycle with antifreeze, then leave the drum and the door dry. |
| how to winterize rv generator | Fuel stabilizer, fresh oil, and a run under load every month keep it ready. The generator has no water to drain. |
| winterize rv roof | Clear the roof and the drains so meltwater cannot pool, and check the sealant before the freeze-thaw cycle starts. |
| rv winterizing skirt | Skirting keeps the underbelly warmer, which helps the pump bay and the tanks if you are camping rather than storing. |
| winterize rv air conditioner | Nothing to drain, the AC is sealed. Clean the filter and cover the shroud if you want to keep debris out. |
| rv fridge winter storage | Clean it, dry it, prop the doors open, and leave a box of baking soda inside. |
| rv refrigerator winter storage | Same routine, and unplug it. A fridge that sits closed all winter grows a smell you will meet in April. |
| winterizing rv slide out | Retract the slides for storage so the seals are not stretched, and check the topper for trapped water. |
Nevada is the extreme version of that same problem: camping in Nevada walks through five land systems that share no booking portal, and it is the cleanest illustration of why the agency, not the state, sets the rule.
"Camper" and "travel trailer": the same eight steps, different words
Plenty of people never say "RV." If your rig is a camper, a travel trailer, a fifth wheel, a toy hauler or a motorhome, the checklist above is unchanged — the words in search are what differ, so here are the forms this page is asked in and the row that answers each one.
| what people search | the short answer |
|---|---|
| winterizing a camper checklist | The same eight steps: drain the fresh tank and low points, drain and bypass the water heater, pump pink through every faucet, trap and the toilet, then the low-flow parts, the battery, tires and the sewer. |
| winterizing a camper with antifreeze | Two to three gallons of pink propylene glycol rated to -50°F, drawn in through the city-water inlet with a hand pump kit or a pump converter. Never automotive antifreeze. |
| winterizing a camper with compressed air | Blow the lines at about 30 PSI with every faucet and the low-point drains open, then still pour a cup of pink down each trap and the toilet — air cannot protect a drain trap or a toilet seal. |
| winterizing a camper to live in | Full-timing is the heated-hose route, not the antifreeze route: keep water in the system, protect the hose and the pump bay, and drain the fresh tank between trips. |
| winterizing a camper while living in it | Same idea, and it is a different job from storage: heat in the underbelly, city water only, no pink in the lines, and a plan for the first night below zero. |
| winterizing a camper trailer | A travel trailer is usually the simplest rig to do: one fresh tank, one water heater, and often no washing machine, dishwasher or ice maker line to chase. |
| winterizing a camper with on demand water heater | Skip the bypass step — a tankless unit has no tank to isolate — but do pull its drain plug and follow the maker's freeze-drain procedure for the heat exchanger. |
| how to winterize a travel trailer with antifreeze | Buy the pink, hook the hand pump or converter kit to the city-water inlet, and run each faucet, the shower, the toilet and the outside shower until pink comes out. |
| how to winterize a travel trailer without antifreeze | The dry method: blow the lines at 30 PSI, then treat the traps and the toilet seal with a splash of RV-safe antifreeze. It is a substitute for the lines, not for the traps. |
| how to winterize a travel trailer with air compressor | 30 PSI is the ceiling, every faucet and low-point drain open, and stop when nothing but mist comes out — higher pressure starts popping fittings. |
| how to winterize a travel trailer without an air compressor | Use the hand pump kit or the permanent pump converter; both siphon straight from the jug with no compressor and no borrowed shop tool. |
| how to winterize a travel trailer water system | Tank, pump, lines, water heater, faucets, shower, toilet, the outside shower, and any ice maker, washer or black-tank flush connection. |
| how to winterize a travel trailer for storage | Winterize it as if you were parking it for the season, then add the storage layer: tires at max cold pressure, battery disconnected and charged, fridge propped open, WINTERIZED tag on the panel. |
| how to winterize a travel trailer to live in | The opposite of storage: keep the system wet and warm on purpose with a heated drinking-water hose and heat in the pump bay, and winterize only if the rig will sit empty. |
| how to winterize a travel trailer while living in it | Keep the water on, insulate or heat the underbelly, and drain the fresh tank after every fill — a tank under the floor is a block of ice waiting to happen. |
| how to winterize a travel trailer with a tankless water heater | No tank to bypass, so the job is shorter: drain the unit, run its freeze-drain procedure, and put your antifreeze effort into the lines downstream of it. |
| rv winterization valve | The valve being searched for is the water heater bypass — a 3-way valve behind the heater access panel, or a pair of valves on the lines. Without it, six gallons of antifreeze disappear into the heater tank and the tank stays full of water. |
RV Winterization FAQ
For the mechanics that apply everywhere, camping in Wisconsin covers how one state's single reservation system, fee ladder and ground-condition fire rule actually work in practice.
One system worth comparing against this one: our West Virginia camping guide, where the state park rules are identical at every park but the national park campgrounds are free and first-come.
The questions RV owners ask every fall, answered from the checklist above.
When exactly should I winterize my RV?
Winterize before the first overnight low drops below 32°F — and do not wait for the forecast to look alarming. The damage threshold is lower than most owners assume: a single overnight freeze below 28°F can crack the water pump and split PEX lines inside the walls, and those lines are behind cabinets, not in the open where you could catch a leak early. Watch the ten-day low, not the daily high, and treat the first brush with freezing as your deadline. Shoulder-season camping is worth it, but only if the system is protected.
How long does winterizing actually take?
About 20 minutes, plus the time to buy antifreeze. The order matters more than the speed: drain the fresh water tank and lines, drain the water heater, pump pink antifreeze through every line, handle the low-flow parts, then protect batteries, tires, and the sewer system. Work the checklist in sequence once and it becomes a routine you can knock out on a Sunday afternoon.
What does it cost compared to skipping it?
The gear runs roughly $40, plus 2-3 gallons of antifreeze. Skipping it is how owners end up with an $800 repair bill for a cracked pump and split lines — the exact number owners report when a hard freeze catches a wet system. The math is not close.
Do I have to bypass the water heater to winterize?
Yes, and it is non-negotiable. A Camco pump converter winterizing kit or a dedicated water heater bypass kit costs about $20-30. Without bypassing the heater, you would pump roughly 6 gallons of antifreeze into the heater tank where it does nothing useful — triple the antifreeze you actually need, for zero protection. Bypass the tank, then drain it separately.
What antifreeze should I use, and how much?
Pink RV antifreeze rated to -50°F, and plan on 2-3 gallons for a typical trailer or motorhome. Never use automotive antifreeze — it is toxic and it will contaminate your fresh water system. If you would rather not hand-pump, the Camco antifreeze hand pump kit is the standard tool for the job.
Can I skip winterizing and just keep camping?
You can, and for some owners that is the better answer. The continuous-use setup is a Camco 25-foot heated drinking water hose with a Camco water pressure regulator and inline filter upstream, plus enough power to keep things running. Pair a Jackery Explorer 300 or EF ECOFLOW RIVER 2 with a Sealy 12-volt heated blanket and you have a livable shoulder-season rig. Below about 20°F, most people pack it in regardless.
Do I need to do anything to the batteries and electronics?
Yes — this is Step 5, and it is the step owners skip. Batteries lose capacity in cold and can be permanently damaged if they freeze while discharged. Disconnect and store them properly, and if you want to keep power available for maintenance trips, a portable power station is the clean solution: the Jackery Explorer 300 or EF ECOFLOW RIVER 2 both store indoors and come back out ready.
What about the sewer system and tires?
Both are on the checklist for good reason. Add Camco TST MAX drop-ins to the tanks so residual liquid does not freeze into a block, and confirm the Camco RhinoFLEX sewer hose is drained and stored dry. For tires, park on RVMATE leveling blocks rather than bare ground to keep them out of standing moisture through the winter.
Our camping in Washington state guide documents the three booking systems, the state's own winter-schedule table of per-park closing dates, and the burn-ban levels that decide whether you can have a fire.
How to winterize an RV while living in it
You do not fill the lines with pink antifreeze. Instead you keep the water system live and protect it: the heated-hose setup from the section above, plus heat in the pump bay so the most exposed part of the system never sees a hard freeze. Owners who stay in the rig all winter treat antifreeze as the wrong tool and guarding the hose and the pump compartment as the right one.
How to winterize an RV with a tankless water heater
You skip the bypass step, because there is no tank to isolate. Kill power to the unit, drain it at its own drain plug, then push pink through the hot side until it appears at the hot faucet. The short run between the heater and the first fixture is the part that catches people out.
How to winterize a camper for full time living
Full-time means the system stays wet, so the job is protection rather than antifreeze: a heated drinking-water hose, a pressure regulator and inline filter upstream of it, and enough power to keep the furnace fan and the pump bay above freezing. Below about 20°F most full-timers move south or switch to jug water.
How long does it take to de winterize an RV
About thirty minutes if the rig was winterized properly. Close the low-point drains, reconnect the heater bypass, refill, then run every fixture until the water is clear. Sanitizing the fresh system adds time, and the toilet and outside shower are the fixtures people forget to flush.
How much does it cost to de winterize an RV
Usually nothing beyond water and a little sanitizer if you did the fall work yourself. Paying a shop for the spring flush costs about the same as paying them in the fall, which is why most owners who winterize themselves also dewinterize themselves.
What temperature do you winterize an RV at?
Treat 32°F as your starting gun and 28°F as your hard deadline. The 32°F figure is the air temperature at which an unprotected system begins to be at risk; the 28°F figure is where a single overnight low is enough to crack a plastic pump housing or split pex behind a cabinet. Watch the ten-day overnight low rather than the daytime high, because a 55°F afternoon tells you nothing about the 3 a.m. reading that does the damage.
When should I winterize my RV in Colorado?
If your camping happens above 5,000 feet — Leadville, Telluride, most of the high passes — plan on early October and treat late September as safer. The Front Range and the Western Slope around Grand Junction get several more weeks and can usually wait until late October. High-altitude rigs are the ones that get caught, because the freeze arrives while the valley forecast still looks mild.
How do you winterize an RV water system?
Four steps, in this order: drain the fresh water tank and open the low-point drains, drain the water heater and close its bypass, then get every line wet with either 30 PSI of air or pink antifreeze drawn from the jug. Finish by pouring antifreeze down each drain trap and into the toilet bowl, since those are the only holdouts air cannot reach.
How do you winterize an RV trailer?
A trailer is the simplest rig to winterize, because there is no engine, transmission or washer to think about. Drain the fresh tank and lines, drain the water heater and engage the bypass, pump pink antifreeze through every hot and cold fixture, then handle the traps, the toilet seal and the batteries. The whole job is the water system plus storage.
Is there an RV winterizing checklist I can print?
Yes — the step-by-step checklist and the step tables on this page are written to be printed or screenshotted as a single sheet. The order is what matters: fresh tank, water heater, every fixture, low-flow parts, then batteries, tires and the sewer system. Owners who print it tend to skip fewer steps.
When is it too late to winterize an RV?
It is too late the morning after the first hard freeze. If a below-28°F night has already passed, winterize anyway — the routine still protects what has not cracked yet — and then watch for leaks when you refill in spring, checking the pump housing, the heater compartment and the underbelly first.
Once the temperature drops, food handling changes: winter camping food walks through freezing, fuel, and one-pot meals.