RV Camping for Beginners: Complete Setup & Gear Checklist (2026)
RV camping for beginners: water hookups, 30- vs 50-amp power, black tank dumping, leveling, and the packing list that prevents a ruined first trip.
Your first RV trip shouldn't start with learning how to hook up a sewer hose in the dark while your family waits in the rain. But that's what happens when you treat RV camping like car camping with a bigger tent — there are systems to understand, connections to make, and one mistake with water pressure that can flood your entire rig.
I learned this the expensive way. On my second trip, I skipped the pressure regulator because "the campground said their water was fine." An hour later, I was mopping up a burst fitting behind the kitchen sink, a $300 repair and a very quiet dinner. The gear on this checklist isn't optional — each item prevents a specific disaster I've either experienced firsthand or watched happen to someone two sites over.
This guide covers the three systems every new RVer needs to understand — water, power, and waste — plus the camping gear that transforms a parking spot into a comfortable basecamp. Whether you're in a 40-foot Class A or a pop-up camper, the setup sequence is the same. Let's get you connected right the first time.
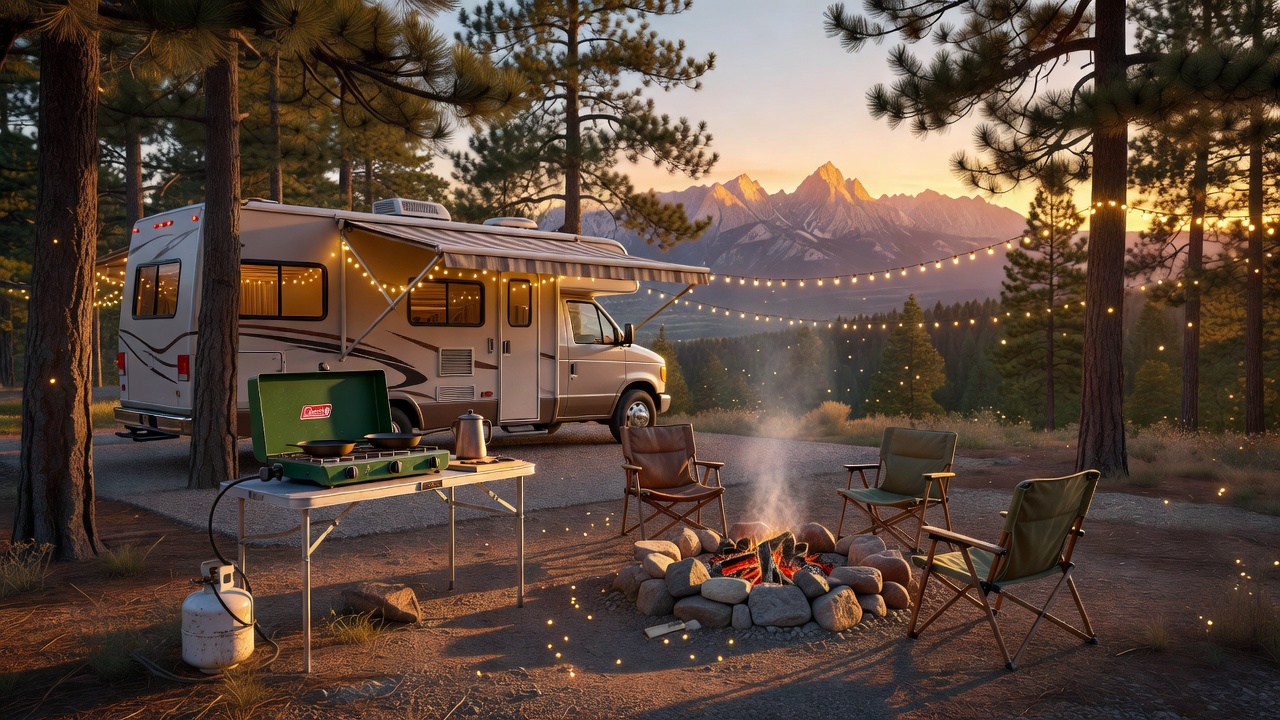
Quick Answer: Four Systems, Four Parts
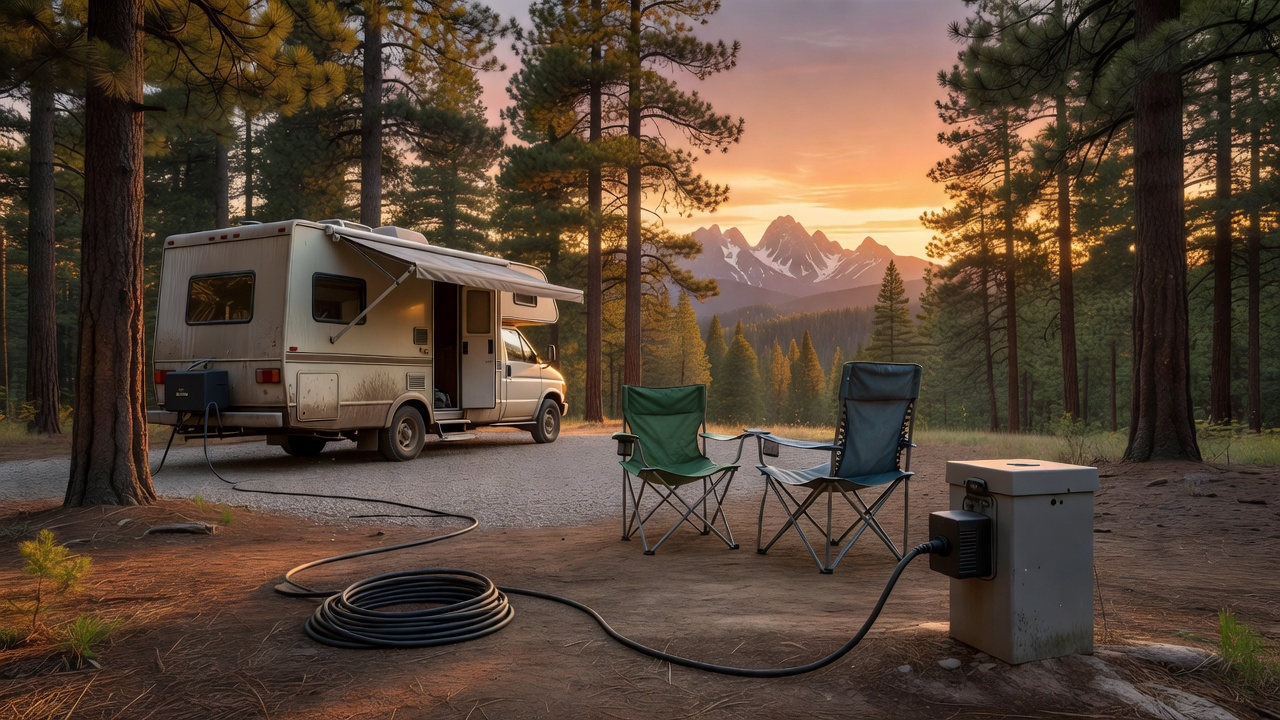
- Water first: Camco 40055 RV Water Pressure Regulator — $16.99. A brass regulator holds campground water at a safe 40-50 PSI. It is the cheapest part on this list and the one that prevents a four-figure repair.
- Power second: Camco Power Defender 30-Amp RV Surge Protector (55301) — $69.99. A 30-amp surge protector ($69.99) plus the circuit analyzer dogbone ($54.99) to test the pedestal before you plug anything in.
- Waste third: Camco RhinoFLEX 20-Ft Complete RV Sewer Hose Kit - Made in the USA — $60.02. A complete 20-ft sewer hose kit ($60.02) and TST MAX drop-ins ($14.67) so the tank does not become the reason nobody wants to be inside.
- Level, then chock: RVMATE 12 Pack RV Leveling Blocks — $32.87. Leveling blocks ($32.87) and wheel chocks ($12.99) protect the fridge, the slides, and the rig from rolling.
- Camp kitchen and comfort: Coleman 316 Series Wheeled Cooler 62QT — $84.99. The bottle-top stove ($21.99) and a 62QT wheeled cooler ($84.99) turn a parking spot into a basecamp.
Connect in this order every time and the systems stop being intimidating. The laminated sequence and the mistakes to avoid are below.
RV Camping Checklist for First-Timers: What Changes After Tent Camping
Upgrading from a tent? The mental shift is this: tent camping is about carrying things, RV camping is about connecting them. Your existing gear still works, but four systems now sit between you and dinner — so before the connections, here is the honest decoder for the beginner wordings. A first time RV camping checklist, an RV camping checklist, an RV setup and teardown checklist and a camping in an RV checklist all describe the same eight steps, just written by different people.
| What you searched for | What it actually means |
|---|---|
| first time rv camping checklist | the 8-step arrival sequence further down, plus the reverse order at departure |
| rv camping checklist | level, chock, unhitch, power, water, sewer, propane, awning — in that order |
| rv setup checklist | the arrival half; an rv setup and teardown checklist adds the packing-out half |
| rv setup and breakdown checklist | the same list — teardown is setup in reverse, plus the tanks |
| camping in an rv checklist | the same list, with a bedding and cooking plan added |
| rv camping essentials for beginners | regulator, surge protector, sewer kit, blocks, chocks — five parts |
| rv camping tips for beginners | test the pedestal before you plug in; keep the gray valve closed |
| rv camping 101 for beginners | start with water and power; waste can wait until you have dumped once |
| rv setup for beginners | connect water last so you are not standing in mud doing the electrical |
| camping in rv essentials | linens, dish kit, coffee, cooler ice — rental RVs rarely include these |
| camping in rv packing list | food, bedding, toiletries, a small tool kit, and a hose you would drink from |
| must haves for rv camping with kids | chocks in before the doors open, plus a mat at the step |
| rv camping with family | the same setup, run 20 minutes slower and with more snacks |
Two notes that save first-timers the most grief. A garden hose is not a drinking water hose — RV water hoses are lead-free and NSF-certified, and a garden hose left in the sun can leach lead and grow algae. And you do not need everything on day one. Rent once with the five essentials above and you will learn which upgrades your family actually cares about.
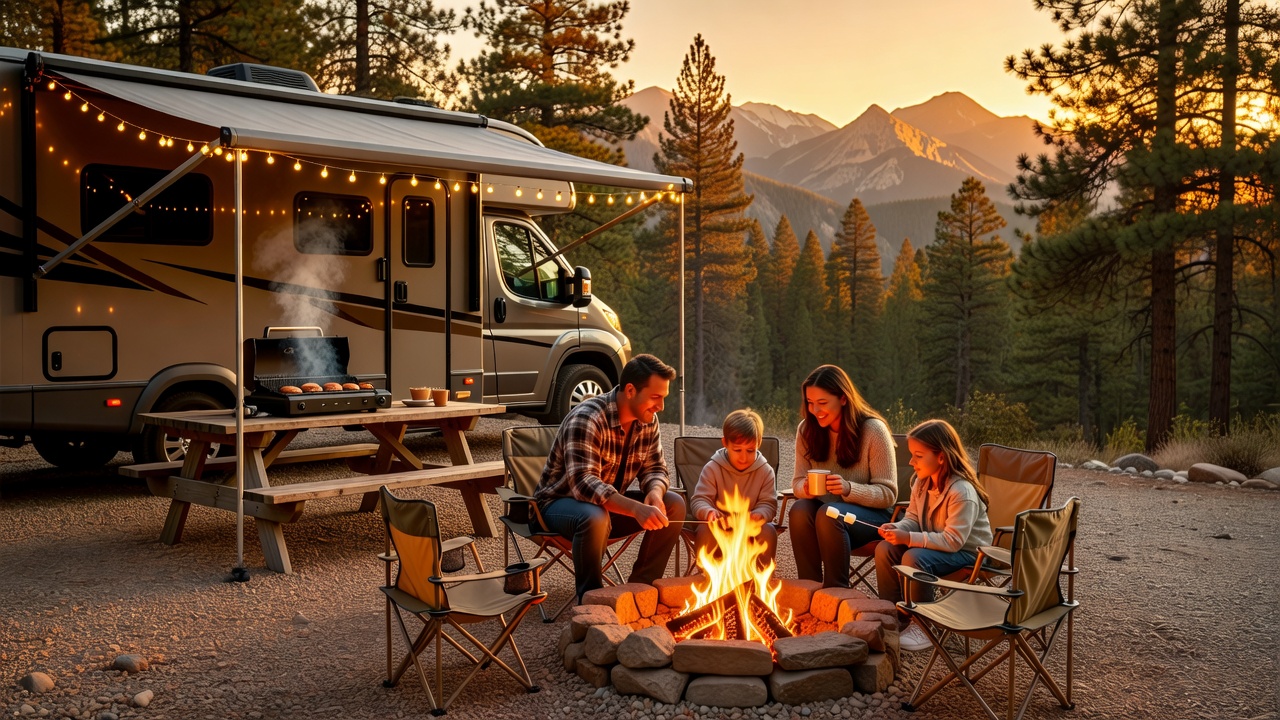
Water System: The First Connection You Make
Water is the simplest system to connect and the easiest to get catastrophically wrong. Two pieces of gear separate a smooth setup from a flooded floor.
The Pressure Regulator (Non-Negotiable)
Campground water pressure varies wildly — some sites push 100+ PSI through spigots designed for commercial use. Your RV's plumbing is rated for 40-50 PSI. Without a regulator, that extra pressure finds the weakest fitting and blows it open, usually behind a cabinet where you can't see the leak until water runs across the floor.
The Camco 40055 Brass RV Water Pressure Regulator ($16.99) is the cheap insurance every RVer needs. Solid brass construction (not plastic, which cracks after a season of sun exposure), pre-set to hold campground water at a safe 40-50 PSI. Screw it onto the campground spigot FIRST, then connect your hose. This 10-second habit has saved me from two blown fittings.
Specs: Solid brass · 40-50 PSI preset · Built-in gauge · 4.6 stars (2,500+ reviews)
The Water Filter (Your Taste Buds Will Thank You)
Campground water is technically potable but frequently tastes like chlorine, iron, or the inside of a 30-year-old pipe. A good inline filter solves this before the water enters your tank.
For most weekend campers, the Camco TastePURE KDF RV Water Filter ($44.99 for a 2-pack) is the sweet spot. KDF media reduces chlorine, heavy metals, and the "campground taste" — each filter lasts about 3 months of regular use. The 2-pack means you always have a spare when the current one starts tasting off mid-trip.
If you're full-timing or have sensitive stomachs, the Camco EVO Premium RV & Marine Water Filter ($48.46) adds 5-micron sediment filtration on top of the chemical reduction — it catches the silt and rust flakes that shorter filters miss. Worth the upgrade if you drink tank water rather than bringing bottled.
Connection order matters: Spigot → Pressure Regulator → Water Filter → Hose → RV. This protects the filter from over-pressure too. For the full walkthrough — sanitizing the fresh tank, flushing the lines, and winterizing before storage — see our complete RV water system setup guide, or jump straight to the step-by-step RV winterization checklist if you're putting the rig away for the season.
RV Water Hookup: The Diagram, the Parts, and Why the Order Matters
"RV water hookup diagram" is one of the most-searched phrases among new owners, and the reason is that the parts look interchangeable but are not. The correct order is a straight line:
Campground spigot → pressure regulator → filter → drinking water hose → RV city water inlet.
Read that as a diagram and every label matters. The spigot is the park's supply — usually 3/4-inch garden thread, sometimes a commercial 1/2-inch fitting that needs a small adapter. The regulator is the pressure ceiling. The filter is taste and sediment. The hose is the only part carrying water you will actually drink. The inlet is where your rig takes over, and its check valve stops water flowing back out of the tank.
RV water hookup parts list
- RV water hookup pressure regulator — Camco 40055 Brass RV Water Pressure Regulator ($16.99). Screws onto the spigot first and holds the line at 40-50 PSI. Still the most important part on the list.
- RV water hookup hose — the Camco TastePURE 25-Ft RV Drinking Water Hose ($13.97) is lead-free, BPA-free and NSF-certified. Buy 25 feet first and add a second only if your pedestal is genuinely far away — every extra 25 feet costs you flow rate.
- RV water hookup filter — the Camco TastePURE Inline Water Filter ($17.99) mounts between hose and inlet and takes the chlorine and the iron taste out of park water.
- RV water hookup adapter — carry two: a 3/4-inch to 1/2-inch reducer for older park spigots, and a 90-degree elbow that keeps the hose from kinking against the side of the rig. A few dollars each, and they turn "this doesn't fit" into a 10-second fix.
- Heated hose (cold weather only) — the Camco 25-Foot Heated Drinking Water Hose ($134.53) is thermostatically controlled and keeps the line from freezing below 32°F. It only helps while you are on city water, and it needs a live GFCI outlet at the pedestal.
What "RV water hookup kit" usually means
If you searched for an RV water hookup kit, you are looking at a bundle: a short hose, a regulator, and sometimes a filter in one box. Kits are convenient, but the regulator is usually plastic and the hose is often shorter than you need. Buying the three parts separately costs about the same, and a brass regulator outlasts a plastic one by several seasons.
Using the fresh tank instead of city water? The same parts build your fill setup — regulator and filter on the spigot, then the hose into your gravity fill or pressurized inlet. Everything downstream of the filter is safe to drink. For tank sanitizing, line flushing, and putting the rig away at the end of the season, our complete RV water system setup guide walks the whole loop.
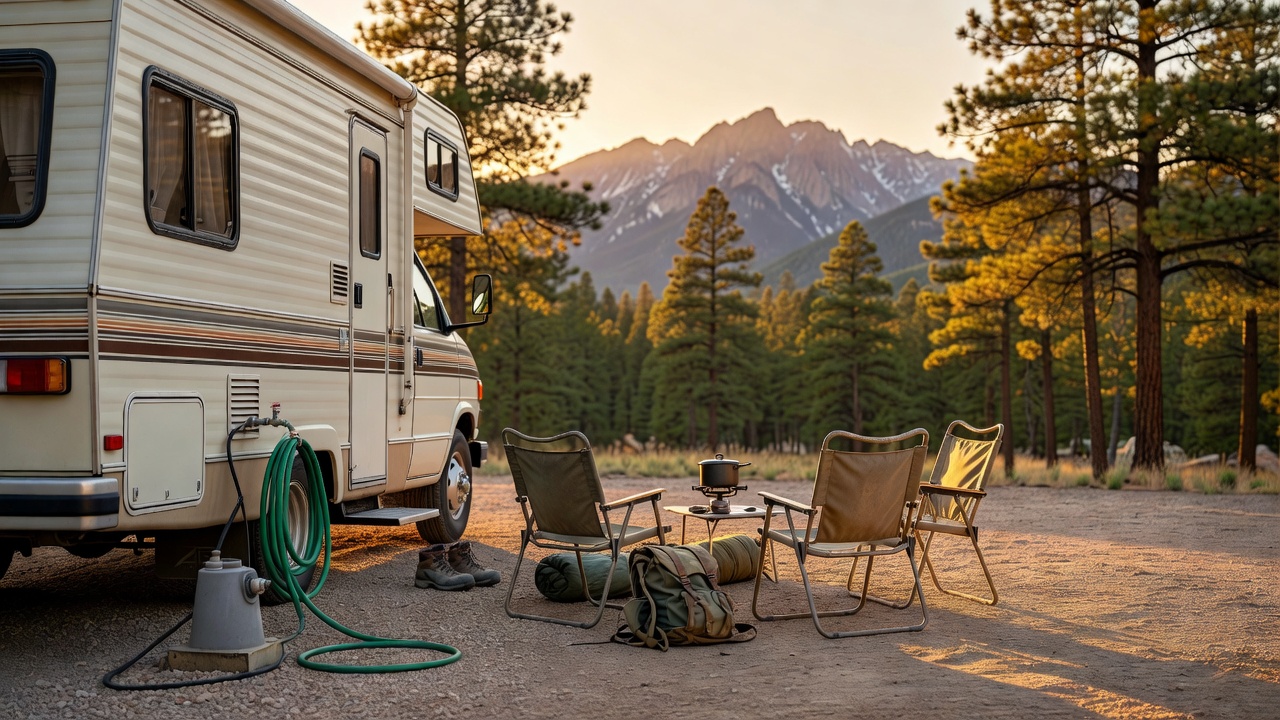
Electrical System: Don't Fry Your Electronics
RV park power is famously unreliable. Low voltage brownouts, miswired pedestals, and open grounds are common — especially at older campgrounds and state parks. Plugging in without checking can destroy your converter, refrigerator control board, or air conditioner.
Surge Protector (RV-Specific, Not a Home Power Strip)
A home surge protector handles spikes — an RV surge protector handles spikes PLUS low voltage, open neutrals, reverse polarity, and miswired grounds. These are the real killers. Low voltage (under 104V) causes your air conditioner compressor to draw more amps than the wiring can handle, slowly cooking the motor until it seizes.
Choose based on your RV's amperage:
-
30-amp RVs (most travel trailers, pop-ups, smaller Class C): The Camco Power Defender 30-Amp Surge Protector ($69.99) covers all the basics — surge suppression to 2,100 joules, automatic disconnect on low/high voltage, and weather-resistant housing. 4.7 stars from 9,000+ reviewers who've watched it save their rigs.
-
50-amp RVs (larger fifth wheels, Class A motorhomes): The Camco Power Grip 50-Amp Voltage & Surge Protector ($147.06) handles the higher load and adds a diagnostic LED that tells you exactly what's wrong with the pedestal before you ever plug in your cord. Worth every penny when you're at a campsite built in 1972.
The 10-second diagnostic habit: Before connecting your RV cord, plug in the Camco 30-Amp Circuit Analyzer Dogbone ($54.99). It reads the pedestal and lights up green/yellow/red patterns that tell you if the wiring is correct. Red lights = find a different site or call the camp host. This replaces guessing with information — the single best $55 insurance policy in RV camping.
RV Hookups Explained: 30 Amp vs 50 Amp, Cords, Boxes and Costs
The pedestal at your site is a small power distribution panel: a 30-amp RV outlet (TT-30R), a 50-amp outlet (NEMA 14-50), and often a standard 20-amp household duplex. Knowing which one your rig wants — and what it can actually run — prevents the two most common electrical surprises: a breaker that trips at dinner, and a cord that is too short.
RV 30 amp vs 50 amp: the real difference
In search terms, RV 30 amp vs 50 amp service comes down to one line: 3,600 watts versus 12,000 watts.
| 30-amp service | 50-amp service | |
|---|---|---|
| Voltage and wiring | 120V, 3-wire (hot, neutral, ground) | 240V split, 4-wire (two hots, neutral, ground) |
| Total capacity | 3,600 watts | 12,000 watts |
| Typical rigs | pop-ups, travel trailers, smaller Class C | larger fifth wheels, Class A motorhomes |
| What runs together | air conditioner plus one other high-draw appliance | two air conditioners, microwave and water heater element at once |
| Cord gauge | 10-gauge | 6-gauge |
| Pedestal outlet | TT-30R (three flat pins) | NEMA 14-50 (four flat pins) |
The practical test is the 30-amp rule of two: run the air conditioner plus one other heavy draw, not three. If your family trips the pedestal breaker every night at dinner you are not doing anything wrong — you are simply at 3,600 watts. Turn the A/C off for the ten minutes the microwave runs, or move to a 50-amp site.
Two more details that matter. Cord length: standard RV cords run 25 to 30 feet, and a 50-foot extension adds voltage drop, so buy only what you need. Adapters go one direction only — a 50-to-30 adapter lets a 30-amp rig use a 50-amp pedestal safely, because the rig still draws only what it needs. Never build up to more load than the outlet is rated for.
RV hookup box, outlet, adapter and cord — the naming confusion
- RV hookup box usually means the pedestal on the campsite, but in search results it often means the residential box you mount at home. That box is a weatherproof enclosure with a TT-30R receptacle on a dedicated 30-amp breaker and 10-gauge wire — a licensed electrician's job.
- RV hookup outlet is that receptacle. If you want to run the air conditioner at home, you need the dedicated 30-amp circuit; a standard 15-amp household outlet trips the moment the compressor starts.
- RV hookup adapter is the puck-shaped 50-to-30 or 15-to-30 piece that lets two different standards meet. Keep one in the rig even if your service matches your usual campground — you will eventually land on a site wired for something else.
- RV hookup cord is the 30- or 50-amp power cord itself. Twist-lock connectors at the RV end lock it in place; check the twist each season, because a loose connection is where heat builds up.
- RV hookup for home is the same job at a smaller scale: charge the batteries, cool the fridge on propane, and skip the A/C unless you installed the 30-amp circuit above.
Our 30-amp circuit analyzer dogbone ($54.99) sits between the pedestal and your cord specifically to test both before the rig sees them.
RV surge protector 30 amp and 50 amp — and where an EMS differs
Match the protector to your rig. A 30-amp rig takes the Camco Power Defender 30-Amp RV Surge Protector ($69.99). The RV surge protector 50 amp version in the same Camco line covers the higher load. Using a 30-amp protector on a 50-amp rig means the rig's full load passes through a device that was never rated for it.
RV surge protector vs EMS is the distinction worth understanding before you buy. A surge protector clamps voltage spikes and, on the better RV units, disconnects on low or high voltage. An EMS (electrical management system) goes further: it also watches frequency, open neutral, open ground and reverse polarity, and it delays reconnect after an outage so your air conditioner compressor is not hit mid-cycle. Camp mostly at modern full-hookup parks and a surge protector plus the analyzer covers you. Camp at older state parks with questionable wiring and the EMS earns its price the first time it refuses to let you plug in.
RV hookup cost per month — what full hookups actually cost
Budget ranges for a full-hookup site (water, 30/50-amp electric, sewer), as of 2026 and heavily region-dependent:
- Nightly, public or state park: roughly $25–$60, often with electric included
- Nightly, private RV resort: roughly $50–$90, higher near destinations and in season
- Monthly, private park: roughly $400–$900, and many parks meter electricity separately at about $0.12–$0.20 per kWh
- Seasonal or long-stay rates: usually the cheapest per night, but they ask for a multi-month commitment
The line item beginners miss is electricity on monthly stays. Running the air conditioner around the clock in a warm climate can add $60–$150 to the bill. Ask whether the rate is metered or flat before you sign — it changes the math more than the site fee does.
Waste System: The Part Nobody Wants to Talk About
RV toilets work by dropping waste into a black tank treated with enzymatic chemicals that break down solids and control odor. Skip the treatment and you'll know within 24 hours — the smell backs up through the toilet seal.
The Camco TST MAX RV Toilet Treatment ($14.67 for 30 drop-ins) is the simplest system: toss one drop-in packet into the toilet after dumping, add water, done. The citrus scent actually smells pleasant rather than like chemical masking. Each packet treats a 40-gallon tank for up to 7 days. The 30-pack covers a full season of weekend trips.
Tent campers need a different plan: campground facilities are not always nearby, clean, or open. Our camping toilet and sanitation guide explains how to choose a portable toilet, manage waste responsibly, and keep the whole campsite cleaner when you are outside the RV system.
Key rules for first-timers:
- Always add water to the black tank after dumping — a dry tank creates a solid pyramid that's nearly impossible to clean out
- Use RV-specific toilet paper (it dissolves faster than household TP and won't clog your sensors)
- Dump black first, then gray (the gray water flushes the hose)
- Wear gloves. Always.
RV Dump Station and Sewer Hose Setup: Support, Storage and Fittings
Dumping is the part new owners dread and experienced owners finish in ten minutes. Three things make the difference: a complete hose kit, a support, and a way to store the hose without contaminating anything else.
RV sewer hose support — the piece everyone skips
A sewer hose lying on the ground sags into low spots, and every sag holds a puddle of waste that has to be pushed uphill at the next dump. A support holds the hose at a consistent slope — about one inch of fall per four feet of run — so everything drains by gravity instead of pooling. Supports come as telescoping channels or snap-together cradles, and both do the same job. Cable the hose through the support before you open the valve, not after.
The Camco RhinoFLEX 20-Ft Complete RV Sewer Hose Kit ($60.02) is the kit most beginners should start with: a 20-foot hose with the standard 4-lug bayonet fittings on both ends, plus the elbow and cap you need to finish cleanly.
RV sewer hose fittings: what the standard actually is
- Bayonet fitting — the 4-lug twist-lock coupler, 3-inch, is the near-universal RV standard. Every hose, elbow, and extension uses it.
- Clear elbow — a 45- or 90-degree clear plastic elbow at the campground connection. It costs almost nothing and lets you see when the water runs clear, which is how you know when to stop.
- Donut or threaded adapter — for older parks with a 4-inch threaded inlet, or a 3-inch inlet without threads. Staff at first-time-friendly parks usually know exactly what theirs needs; ask.
- Extension hose — only if your outlet is more than 20 feet from the park connection. Measure before you buy.
RV sewer hose storage: keep it away from your drinking water
Rinse the hose at the end of every dump by closing the black valve and letting gray water flush it, then cap both ends, then store it in a sealed tote or the dedicated bumper tube. Never store the sewer hose in the same bin as your drinking water hose or your camp kitchen gear. This single habit prevents the most common first-season hygiene mistake in RV camping, and it costs nothing but a $15 tote.
Finding a dump station
Most RV parks and many public campgrounds include a dump station — usually free for guests and roughly $10–$25 for non-guests. Rest areas, fairgrounds, and some truck stops have them too. An RV dump station map in any of the common RV apps will show the nearest one, but calling ahead is still faster than arriving at a locked gate. Carry your own hose and support so you can use any station properly instead of borrowing what someone left behind.
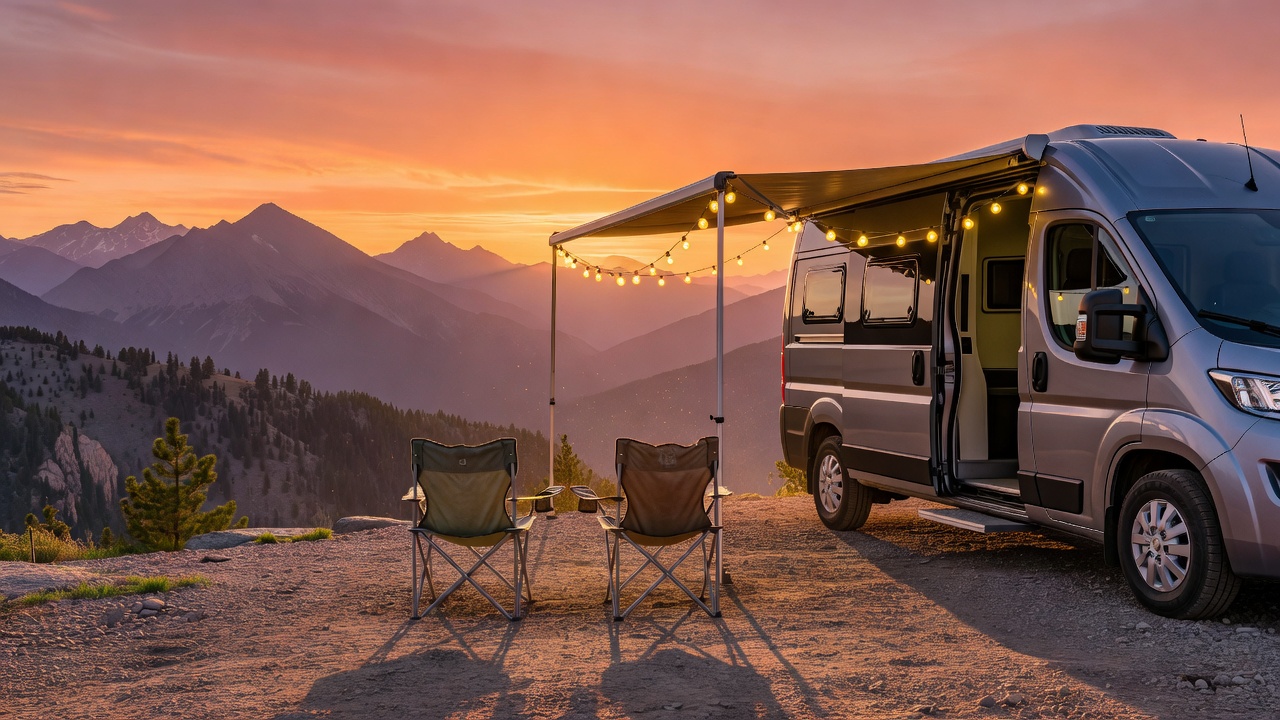
Camp Kitchen Setup: Eating Well at the Campsite
RV kitchens are compact. A good camp kitchen setup expands your cooking surface outdoors where the mess stays and the views are better. Start with three pieces:
The Stove
For RV camping, you want a stove that runs on the same propane your RV already carries — no separate fuel canisters to track. The Coleman Bottle Top Propane Camp Stove ($21.99) screws directly onto a standard 1-pound propane bottle and delivers 10,000 BTUs with real flame control (not just high/off like cheaper stoves). At under 3 pounds, it lives in a cabinet until dinner and takes 30 seconds to deploy.
For groups or families, check our best budget camp stoves guide for 2-burner options that handle multiple pans simultaneously.
The Workspace
The Coleman Pack-Away 4-in-1 Folding Camp Table ($99.99) adjusts to four different heights — kitchen counter, dining table, coffee table, or standing prep station. The aluminum slat top wipes clean with a sponge and the whole thing folds flat into a carry bag smaller than a camp chair. 4-in-1 isn't marketing — I've used all four heights in a single trip and it's the table that never stays in the RV because you keep finding new places for it.
The Cooler
The Coleman 316 Series Wheeled Cooler (62QT) ($84.99) holds ice for 4 days, features a have-a-seat lid rated for 250 lbs, and has wheels that actually work on gravel driveways and dirt paths. At 62 quarts it fits a family weekend worth of food and drinks. The 316 Series is Coleman's premium rotomolded line — it's not a Yeti, but at half the price it performs within 10% and doubles as an extra seat around the fire.
For the full kitchen picture — pots, pans, utensils — see our camp kitchen setup guide.
Comfort Gear: The Difference Between Camping and Glamping
The RV provides the hard shelter. These pieces provide the "I could stay here forever" feeling.
The Camp Chair
The Helinox Chair One Original ($109.95) is the chair that ruined all other camp chairs for me. It packs down to the size of a loaf of bread, weighs 2.1 pounds, and — here's the part that matters — doesn't sag after one season. The aluminum frame uses shock-corded poles (like a tent) that snap together in 30 seconds, and the seat fabric is actually tensioned so you sit IN it rather than ON it. Expensive for a camp chair? Yes. Worth it when you've thrown away three $30 chairs that collapsed after a year? Absolutely.
What we'd actually put on the mat. The Helinox is the pack-small pick, but an RV mat holds more than one chair and nobody is carrying it anywhere. Three catalog chairs cover the same ground at each price point:
- The chair that survives the kids: Coleman Portable Camping Chair with 4-Can Cooler ($39.99, 4.6★, 25,000 ratings). A cushioned quad chair with a 4-can cooler and mesh cup holder built into the armrest, a 24-inch seat height, and a 325-pound capacity. This is the one to buy three of, because the failure mode in this price band is a hinge that quits after a season, and this frame is the one that has not.
- The oversized seat for the tall adult: SUNNYFEEL XXL Oversized Camping Chair ($99.98, 4.2★). A 500-lb-rated steel frame and a 28x42x41-inch padded seat, so a 6-foot-4 adult sits in it instead of perching on it. Honest caveat: only 27 ratings, so you are trusting the spec sheet more than the score — but nothing else in the catalog is rated for this size.
- A kid-sized chair with its own shade: Kelsyus Youth Outdoor Canopy Chair ($37.99, 4.6★). The canopy tilts to block sun from any angle, it holds up to 100 pounds, and it folds small enough for a kid to carry it. At most campgrounds the "deploy the awning" step and the kids' seating step are the same step — this puts the smallest one in shade without moving a second umbrella.
- If the Helinox packability was the whole point: NEMO Moonlite Reclining Camp Chair ($169.95, 4.2★). 2 lb 2 oz, folds to about the size of a two-liter bottle, and genuinely reclines via a pulley stitched into the armrest straps. Same "packs tiny, sits properly" idea, with a real back angle for stargazing after the fire dies.
How many chairs? One per person plus one spare — the spare is the chair that gets used when the neighbors wander over. If you would rather sort by style than price, our best camping chairs guide compares packable, reclining, and low-sling chairs side by side.
The Sleeping Pad
Even with an RV mattress, a proper sleeping pad underneath transforms the bed from "passable" to "genuinely comfortable." The Therm-a-Rest NeoAir XLite NXT ($209.95) is the gold standard — 3 inches of air suspension with an R-value of 4.5 (warm enough for three-season use). It weighs 12.5 ounces and rolls up smaller than a Nalgene bottle, but the real magic is the Triangular Core Matrix baffles that eliminate the "bottoming out" feeling of cheaper pads. Whether the RV mattress is the original 15-year-old foam or a memory foam upgrade, this pad underneath makes you stop thinking about the bed and start sleeping.
For more sleeping comfort options, our best camping sleeping pads guide covers everything from ultralight backpacking pads to plush car-camping options.
RV Leveling Blocks, Ramps, Jacks and Pads: What to Buy First
Leveling gets its own section because it is the one setup step that damages the rig quietly when you skip it. Absorption refrigerators stop cooling past about three degrees off-level, and doors, slides and drains all behave better when the rig sits flat.
RV leveling blocks: how to use them
The RVMATE 12-pack of interlocking leveling blocks ($32.87) is the standard first purchase. The method:
- Park, chock nothing yet, and check side-to-side with a small bubble level on the floor or a leveling app on your phone.
- Stack blocks under the low-side tires only — one layer per inch you are short.
- Pull or reverse onto the stack slowly, then re-check. Add one layer at a time rather than two.
- Only then chock the wheels and unhitch.
- Level front-to-back with the tongue jack, then drop the stabilizers for motion control.
How high is too high? Most manufacturers cap block stacks at around four inches, and stacks get less stable as they grow. If you need more than that, reposition the rig or find a flatter pad — there is nothing to win by stacking six layers under a 6,000-pound trailer.
RV leveling ramps vs blocks vs jacks vs pads
- RV leveling ramps are a single curved piece you drive onto — fast for a few inches of correction, and only useful when the low side is one axle. Blocks are more flexible because you build the exact height each side needs.
- RV leveling jacks come in two very different kinds. Stabilizer jacks stop the rig rocking; they are not for lifting, and forcing them to lift can twist a frame. Tongue jacks on travel trailers and hydraulic or electric systems on motorhomes are the ones that actually raise the rig. If your trailer has a hand-crank tongue jack, a cordless drill with the right socket turns a workout into a 20-second task.
- RV leveling pads go under jacks and stabilizer feet. On gravel and soft ground they spread the load so a foot does not sink overnight; without them you will re-level in the morning.
Pair blocks with wheel chocks ($12.99 for a two-pack) — chocks go in before the trailer is unhitched, every time.
RV Camping Setup Sequence (Laminated Checklist)
When you pull into a site, follow this order. Every time. The sequence prevents the most common first-timer disasters:
-
Level the RV side-to-side — use leveling blocks under the low-side tires before unhitching. An unlevel RV means your refrigerator won't cool properly (absorption fridges need to be within 3 degrees of level).
-
Chock the wheels — chocks go in BEFORE you unhitch. Every year someone skips this step and watches their trailer roll.
-
Unhitch and level front-to-back — use the tongue jack to level lengthwise, then drop stabilizer jacks for motion control (not for lifting).
-
Connect power — circuit analyzer first → surge protector → RV cord. Check the analyzer lights before plugging into your RV. Green across the board = proceed. Any red = find the camp host.
-
Connect water — pressure regulator on spigot → water filter → drinking-safe hose → RV. Run water for 30 seconds before connecting to flush campground pipe sediment.
-
Connect sewer — clear elbow fitting → sewer hose → campground connection. Keep the gray tank valve CLOSED until it's full — an open gray valve lets campground sewer gas back up into your rig.
-
Turn on propane — check for leaks with soapy water at every connection. The nose test isn't reliable.
-
Deploy awning LAST — set the tilt so rain runs off, stake it down. Awnings catch wind like a sail; if you're leaving for the day, retract it.
Dry Camping in an RV, Winter RV Camping, and Meals on the Road
Dry camping in an RV
Dry camping on public land — boondocking — means no water, power, or sewer connection. The RV does not change; your consumption habits do:
- Water: your fresh tank is the entire supply. Navy showers and a bowl instead of a running tap stretch a 40-gallon tank from one day to three.
- Power: a single group-27 house battery runs lights, the water pump, and the fridge control board for roughly two to three days. The furnace is the biggest 12-volt draw, so heat with sleeping bags at night.
- Solar: when two or three days isn't enough, a folding panel is the cheapest way to stretch a stay without running the generator — our off-grid solar charging guide covers the panel wattage that actually keeps a group-27 topped up through a cloudy weekend.
- Fridge: run it on propane, not the 12-volt element — that element is a battery killer.
- Sewer: your tanks are the limit, not the campsite. Dump on the way out.
For longer than a weekend, a portable power station keeps phones, a CPAP, and a laptop off the house battery. The Anker SOLIX C300 ($329.99) and the smaller EF ECOFLOW RIVER 2 ($169.00) both recharge from the rig, a folding solar panel, or the pedestal. For the full off-grid plan — tank math, battery math, and generator etiquette — see our RV boondocking for beginners guide.
Winter camping in an RV
Two things freeze: your water line and your dump valves. Both have standard fixes.
- Heated drinking water hose — the Camco 25-Foot Heated Drinking Water Hose ($134.53) keeps city water flowing below freezing. It needs a live outlet, so it suits a full-hookup site rather than a 15-amp household plug you have already loaded with a space heater.
- Antifreeze and a winterizing kit — for storage, not for camping. The Camco antifreeze hand pump kit ($26.99) pushes pink propylene glycol through the lines, and the permanent pump converter kit ($17.99) adds a three-way valve so the fall ritual takes ten minutes.
- Condensation is the unglamorous winter problem: propane heat plus breathing adds liters of water to the air, which shows up as ice on the inside of the windows. Crack a vent, and run the range hood and bathroom fan while cooking and showering.
Do not leave a full fresh tank through a hard freeze, and do not leave the sewer hose connected in freezing weather. The full sequence lives in our step-by-step RV winterization guide.
Camping in RV meals
RV meals work best when they use the fuel the rig already carries and the cooler you already packed. A bottle-top stove plus a folding table turns the picnic table into the outdoor kitchen, and the inside galley handles the rain days. Plan three dinners you can cook in one pan, one breakfast that survives a cold morning, and a lunch that never needs cooking. Our camp kitchen setup guide covers the pot, pan and utensil minimum, and the 62QT wheeled cooler above holds four days of ice if everything goes in cold.
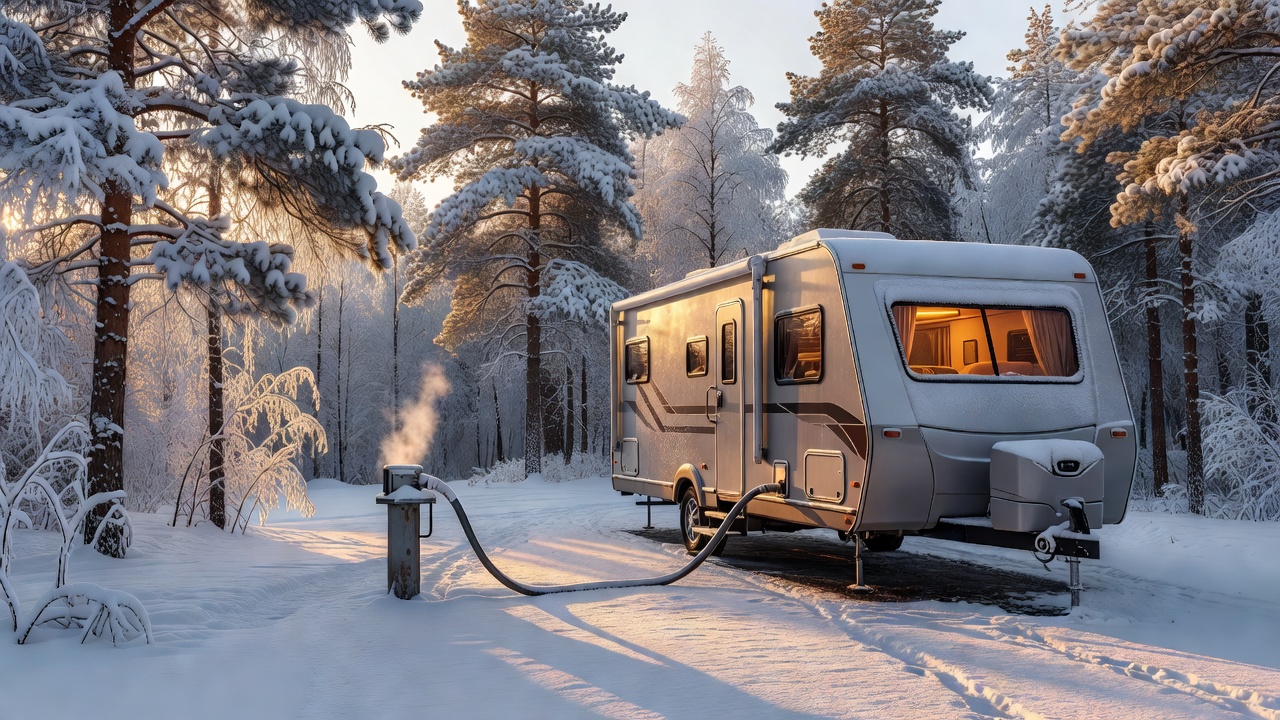
Common RV Camping Mistakes (Learn From Mine)
Skipping the pressure regulator. I've done it. "The campground said their water was fine." It wasn't. $300 repair. Use the regulator.
Not checking pedestal power before plugging in. An open ground or reversed neutral at the pedestal can energize your entire RV chassis — you become the ground path. The circuit analyzer catches this in 5 seconds.
Leaving the gray tank valve open. Seems convenient — water drains continuously. But the open valve becomes a direct pipe for sewer gas from the campground system into your RV. Keep it closed until the tank is full, then dump.
Running the refrigerator off-level. Absorption fridges (the kind in most RVs) use gravity-fed ammonia — more than 3 degrees off-level stops the circulation and permanently damages the cooling unit. Level before you turn on the fridge.
Forgetting wheel chocks. At best, a rolling RV damages your leveling blocks. At worst, it rolls into someone else's rig or downhill. Chocks are $12.99 and take 3 seconds. Never skip them.
RV Camping With Kids and Family: What Changes
RV camping with family is easier than tent camping with the same crew — a real bed, a door, and a bathroom at 2 a.m. — but the setup order matters more, because kids are usually out of the vehicle before you have finished leveling. Here is the RV camping with kids checklist we actually follow:
- Level and chock before anyone gets out. Kids wait in the cab or at the picnic table until the rig cannot move.
- Set the step and a mat at the door — a damp towel inside the entry catches most of the dirt that would otherwise end up in the bunks.
- Unlock the bunk windows and confirm the latches work. Once per trip, not once per season.
- Plug in power and test the pedestal (analyzer first) before kids plug anything in themselves.
- Deploy the awning, chairs, and outside kitchen last — that is where the family actually spends the day.
Must haves for RV camping with kids, beyond the five connection essentials:
- Something warm for each bunk — RV bunks sit against the exterior wall and get cold first. A 12-volt heated blanket ($31.99) plugs into a 12V outlet or USB, draws only a few amps, and is a fair trade for a kid who sleeps through the night.
- A screen-free activity bin — cards, a ball, chalk, and two board games. The campground loop is the activity for the rest of the day.
- Bikes — most family campgrounds have a loop worth riding. A hitch rack keeps them out of the interior; our best hitch bike rack guide covers the ones that still tilt for hatch access with a loaded vehicle.
- A headlamp for every kid — the walk to the bathroom after dark is the trip's least popular errand.
- The one we actually order for kids: Black Diamond Wiz Kid Headlamp ($24.95, 4.6★, 650 ratings). 40 lumens on a soft, eye-friendly beam, a child-safe battery closure that needs the opening tool molded into the strap adjuster, a breakaway safety strap, and USB-C charging with a two-hour auto shut-off. It is the difference between a kid who can find the bathroom loop alone and a kid who wakes you up to walk it.
- One always-accessible snack bin — so nobody unpacks the entire galley looking for a granola bar.
RV camping with kids activities that work at most campgrounds: the swim beach or pool, the playground, the bike loop, ranger programs at state and national parks, and the firepit marshmallow routine. If your kids need a defined mission, give each one a job in the setup sequence — the child who hands you leveling blocks will remember the order next trip.
When RV Camping Beats Tent Camping
After covering the setup, the honest question: is RV camping right for your trip style? We dive deep in our RV vs tent camping comparison, but the short version: RV camping wins for multi-day basecamps, rainy destinations, trips with small kids or seniors, and anywhere you want a real bed without sacrificing the outdoor experience. If you're camping with older family members, our senior-friendly camping setup guide covers the tent-camping upgrades that keep everyone comfortable. Tent camping wins for backpacking, remote sites without hookups, and the raw simplicity of sleeping on the ground.
If you're new to camping entirely and deciding between tent and RV, our backpacking vs car camping comparison helps narrow down your style before you invest in gear.
RV Camping Setup by Rig Type: Motorhome, Camper and Class C
The sequence above is the same for every rig. What changes is the hardware: motorhomes and most Class C units level with built-in jacks, travel trailers and pop-ups level with blocks and a tongue jack. Here is the arrival routine written the way people actually search for it.
- how to hook up a motorhome at a campground — Same order as a trailer, plus one choice: park so you can leave forward, level with the built-in jacks if you have them, then power, water, sewer, and the awning last.
- how to hook up cable to rv at campground — Coax from the pedestal's cable port to the RV's cable inlet, set the TV input to Cable, then run a channel scan. No park cable? The rooftop antenna usually pulls in a dozen channels.
- how to hook up camper at campground — Level and chock first, then connect in this order: circuit analyzer, surge protector, power cord, water (regulator, filter, hose), sewer, propane.
- how to hook up rv at campground — Level side to side, chock, unhitch, power, water, sewer, propane, awning. Doing it in that order is what makes a first trip boring in the best possible way.
- how to hook up rv sewer at campground — Clear elbow into the park inlet, hose into the elbow, and keep the black valve closed until the tank is about two-thirds full. Open black first, then gray, so gray water rinses the hose.
- how to set up a class c rv at a campground — A Class C levels with its front jacks, but the camp-side rules do not change: check the pedestal with the analyzer before your cord touches it, and drop stabilizers for motion only.
- how to set up camper at campground — Blocks under the low-side tires before you unhitch, chocks in before the hitch comes off, then power, water and sewer. Awning last, because wind arrives unannounced.
- how to set up motorhome at campsite — Pull through or back in so your hookup bay faces the pedestal, level it, then connect power with the analyzer first. The water bay takes the same regulator-filter-hose chain as a trailer.
- how to set up rv at campsite — Level, chock, unhitch, then power, water, sewer, propane, awning. If you only remember one step, make it the circuit analyzer before the cord — it is the cheapest insurance in RV camping.
- rv camper setup — Four connections and one leveling job: side to side with blocks, front to back with the tongue jack, then power, water and sewer. Everything after that is comfort, not function.
- rv camper setup checklist — Blocks, chocks, circuit analyzer, surge protector, cord, pressure regulator, water filter, drinking hose, sewer hose, gloves and a small level. Pack those and no arrival surprises you.
- rv camping setup checklist — The eight-step sequence above is the checklist. Print it and tape it inside a cabinet door for your first season — the order matters more than the speed.
- rv campsite setup — Back or pull in with the pedestal on your hookup side and the door facing the shade or the view, then level before you unhitch. Moving an unhitched trailer to chase the view is not a thing.
- rv camping outdoor setup — Outdoor setup is the awning, a mat at the door, camp chairs and a folding table for the stove. The inside galley handles the rain days instead.
- rv camping setup ideas — The upgrade that pays back fastest is two dedicated bins: one for every water part, one for every sewer part. Nothing gets confused after dark, and nothing gets cross-contaminated.
- small rv campsite setup ideas — In a small rig, use the picnic table as the kitchen, hang the awning shade screen for privacy, and keep the leveling blocks in the bumper tube where they belong.
- camper camping tips — Run water at the spigot for thirty seconds before you connect, so campground pipe sediment never reaches your filter or your tank.
- trailer camping tips — Chock before you unhitch, then re-check the hitch latch by lifting the tongue jack an inch. Cheapest habit there is, and it prevents the worst day there is.
- trailer camping tips and tricks — Keep the bubble level in the trailer, not in the truck. You level at every stop, and the level is never where you left it.
RV 30-Amp and 50-Amp Cords, Plugs, Adapters and Outlets
This is the naming maze that eats an afternoon in the parts aisle. Once you know which end of the chain a part belongs to, the whole shelf sorts itself out.
- rv 30 amp adapter — Three adapters cover almost everything: a 15-to-30 for a household outlet, a 50-to-30 for a pedestal wired only for 50 amp, and a 90-degree elbow for tight pedestal boxes.
- rv 30 amp cord — A 30-amp cord is 10-gauge, three-wire, and ends in the TT-30 plug with three flat pins. Standard lengths run 25 to 30 feet.
- rv 30 amp extension cord — Buy an extension only if the pedestal is genuinely far away. Every added 25 feet costs you voltage, and low voltage is what cooks air-conditioner compressors.
- rv 30 amp outlet — On the pedestal that is a TT-30R, the three-flat-pin receptacle. At home the equivalent is a TT-30R on a dedicated 30-amp breaker and 10-gauge wire.
- rv 30 amp plug — The RV end is usually a twist-lock; the pedestal end is the TT-30. Check the twist every season, because a loose connection is exactly where heat builds.
- rv 30 amp power cord — Match the cord to the rig, not to the pedestal. A 50-amp pedestal with a 50-to-30 adapter feeds a 30-amp cord safely, because your rig draws only what it needs.
- rv 30 amp surge protector — The Camco Power Defender 30-Amp RV Surge Protector ($69.99) covers 30-amp rigs with surge suppression plus automatic disconnect on low or high voltage.
- rv 30 amp to 110 adapter — A 15-to-30 adapter — the one people call a 110 adapter — lets you plug into a household duplex for battery charging and the fridge. Never for the air conditioner.
- rv 30 amp to 50 amp adapter — This is the safe direction: it lets a 30-amp rig draw from a 50-amp pedestal. Never build the other way, from a smaller outlet up to a bigger load.
- rv 50 amp — Fifty-amp service is 240-volt split, four-wire and 12,000 watts — enough to run two air conditioners plus the microwave without a thought.
- rv 50 amp cord — A 50-amp cord is 6-gauge and ends in a NEMA 14-50 with four flat pins. It is heavy: coil it loosely, keep the contacts clean, and never yank it by the jacket.
- rv 50 amp extension cord — Same rule at twice the current. A 50-foot extension on a 50-amp rig drops voltage enough to notice, so buy the shortest cord that actually reaches.
- rv 50 amp outlet — On the pedestal that is a NEMA 14-50, four flat pins. The 50-amp protector in the same Camco line covers the higher load your rig will pull through it.
- rv 50 amp plug — Four flat pins, 6-gauge wire, twist-lock at the RV end. After a long run on a hot day, feel the plug: warm is normal, hot means a bad connection.
- rv 50 amp power cord — Keep one 50-to-30 adapter in the rig. Parks and privately owned pedestals are not standardised, and the adapter is what turns "this does not fit" into a ten-second fix.
- rv 50 amp receptacle — At home that receptacle is a NEMA 14-50 on a dedicated circuit — an electrician's job, and not the same thing as the four-prong dryer outlet it resembles.
- rv 50 amp surge protector — Match the protector to the rig. A 30-amp protector on a 50-amp rig passes the full load through a device that was never rated for it.
- rv 50 amp to 110 adapter — A 50-to-15 adapter is for storage and battery maintenance only. Loaded with a space heater it will trip, and the adapter plug is always the weak point.
- rv 50 amp to 30 amp adapter — Down-adapting a 50-amp pedestal to a 30-amp rig is safe and common. The reverse — asking a 30-amp outlet to feed a 50-amp load — is the mistake.
RV Electrical Hookup: Diagram, Post, Plug and Home Setup
Everything on the power side is one line, and reading it as a diagram prevents the expensive version of the mistake.
- rv electrical hookup 30 amp — Ten-gauge wire, TT-30R receptacle, 3,600 watts — and the 30-amp rule of two: the air conditioner plus one other heavy draw, never three.
- rv electrical hookup 50 amp — Six-gauge wire, NEMA 14-50, 12,000 watts. Two air conditioners plus the microwave and water heater at once is what you are paying for.
- rv electrical hookup at home — At home a standard 15-amp outlet runs the fridge and charges batteries. Running the air conditioner needs the dedicated TT-30R circuit, and nothing else will do.
- rv electrical hookup diagram — Read the chain rather than the picture: spigot, regulator, filter, hose for water; pedestal, analyzer, protector, cord for power. Two lines, no crossing.
- rv electrical hookup installation — A home hookup is a weatherproof box, a TT-30R receptacle, 10-gauge wire and a dedicated 30-amp breaker. Licensed electrician, not a weekend project.
- rv electrical hookup plug — The plug at the RV end is a twist-lock — turn it until it seats, then test it by pulling the cord down. A half-locked plug is a heat source.
- rv electrical hookup post — The post is the pedestal. Plug the analyzer in first and read its lights before your cord ever touches the outlet.
- rv electrical hookup requirements — Thirty amp for most trailers and pop-ups, fifty amp for larger fifth wheels and Class A motorhomes. Anything installed at home needs its own breaker and the matching gauge.
- what is the standard rv electrical hook up — TT-30R for 30-amp rigs, NEMA 14-50 for 50-amp, plus the 20-amp household duplex that most pedestals also carry.
RV Black Tank, Sewer Hose and Dump Station Questions
The systems nobody puts on a brochure. All of it is manageable in ten minutes once you know where each fitting goes.
- rv black tank cleaner — Two kinds: an enzymatic treatment you drop in after each dump, or a physical wand down the toilet to knock solids off the sensors. Most people need the treatment weekly and the wand twice a season.
- rv black tank cleaner wand — A wand is a long tube with a spray head that goes down through the toilet to rinse the tank walls and the level sensors. Use it with the valve open and the hose dedicated to waste only.
- rv black tank flush — Many rigs have a flush inlet on the outside wall — hose on, valve open, ten minutes of spray. Without one, the wand does the same job from above.
- rv black tank flush kit — A flush kit adds a spray nozzle and an exterior inlet so rinsing happens from outside the rig. Install it once and dump days stop being unpleasant.
- rv black tank hose — The flush hose is the one hose that never touches drinking water. Give it its own colour and its own bin, and store it nowhere near the fresh-water hose.
- rv black tank treatment — The Camco TST MAX drop-ins ($14.67 for 30) treat a 40-gallon tank for up to seven days each. One packet after dumping, add water, done — the citrus scent actually smells like citrus.
- rv black tank valve — The gate valve stays closed until the tank is about two-thirds full. Full tanks drain fast and clean; a trickle never carries the solids out.
- rv sewer hose adapter — The near-universal standard is a 4-lug bayonet fitting, 3 inches. Older parks sometimes want a threaded donut or a 3-inch inlet adapter, and park staff usually know which.
- rv sewer hose extension — Only if your outlet sits more than 20 feet from the park connection. Measure the distance before you buy, because two hoses joined at a sag is a worse dump, not a longer one.
- rv sewer hose holder — A support holds the hose on a slope of about one inch of fall per four feet, so gravity does the work instead of a puddle you push uphill next time.
- rv sewer hose storage tube — Cap both ends of the hose after rinsing, then store it in the bumper tube or a sealed tote. Never in the same bin as the drinking water hose or the camp kitchen gear.
- rv tank cleaner — For the gray tank, the cleaning is free: close the valve, let it fill with sink and shower water, then dump. The gray tank rinses itself if you let it.
- rv tank treatment — Enzymatic treatment breaks down solids and controls odour. Skip it for one trip and you will know within 24 hours, because the smell backs up through the toilet seal.
- rv tank heaters — Twelve-volt pads bonded to the tank bottoms that keep the contents liquid in freezing weather. They draw real current, so they belong on a hookup, not on battery alone.
- rv tank sensors — The level lights read through probes inside the tank, and toilet paper or sludge stuck to a probe reads as a false three-quarters. A wand rinse is the usual fix, not a new panel.
- rv dump station finder — Any of the common RV apps maps them, but call ahead anyway. Most RV parks and many public campgrounds have one, and rest areas, fairgrounds and some truck stops do too.
- rv dump stations — Expect free for park guests and roughly $10 to $25 for non-guests. Carry your own sewer hose kit and support so you can use any station properly.
RV Leveling and Awning Questions
Leveling is the step that damages the rig quietly, and the awning is the step that damages itself loudly in wind. Both are quick once they are habits.
- rv leveling app — A phone inclinometer is accurate enough for side-to-side — set it on the floor, not the counter. Level the side-to-side first, because the tongue jack only fixes the other axis.
- rv leveling blocks how to use — Stack under the low-side tires only, one layer per inch you are short, pull on slowly, re-check, and only then chock and unhitch. Most manufacturers cap stacks near four inches.
- rv leveling kit — A starter kit is blocks, chocks and pads: the RVMATE 12-pack ($32.87) plus wheel chocks ($12.99) covers a trailer for years.
- rv leveling system — Motorhomes and some fifth wheels use hydraulic or electric levelers that lift the rig themselves. Stabilizer jacks are not that — they control rocking, and forcing them to lift can twist a frame.
- rv awning cleaner — Mild soap and a soft brush on the underside first, then the top. Skip bleach, skip the pressure washer, and never roll it up wet — that is how the stitching rots.
- rv awning fabric — Replacement fabric is ordered by the awning's length and the roller's groove type, not by the model year. Measure the fabric, not the rig.
- rv awning fabric replacement — A two-person job: slide the old fabric out of the roller groove and the rail, then feed the new one in. Do it on a windless day, and pin the roller springs before you start.
- rv awning lights — Clip-on LED strips avoid drilling into the roller and come off for travel. String lights under the awning are the single biggest upgrade to a campsite at night.
- rv awning parts — The parts list is short: fabric, roller tube, spring arms, the rail on the RV wall, and the hardware. Identify which one failed before you shop — they do not fail together.
- rv awning repair — Pin holes and small tears get a fabric patch; pulled stitching gets restitched with UV thread; a bent arm gets replaced rather than straightened. Keep the patch kit in the rig.
- rv awning replacement — Full replacement means fabric plus, usually, the arms. If the roller still tensions correctly you can replace the fabric alone and save most of the cost.
- rv awning screen room — A screen room zips to the awning and drops to the ground, turning the patio into a bug-free room. It needs a calm site and staking, and it comes down before any real wind.
- rv awning shade screen — A shade screen hangs from the roller at an angle and blocks the low sun without walling you in. It is the version that survives a breezy afternoon, unlike the full screen room.
RV Water Hookup Details: Connectors, Leaks, Filters and Fill Adapters
The parts on the water side look interchangeable and are not. These are the ones people search for by name.
- rv water hookup connector — The inlet is usually a 3/4-inch garden thread, sometimes a commercial 1/2-inch fitting. Carry both a 3/4-to-1/2 reducer and a 90-degree elbow — together they fix most parks in seconds.
- rv water hookup leaking — Ninety percent of leaks are a missing or dried-out washer at a quick-connect, or a hose kinked hard against the side of the rig. Check the washers before you suspect the plumbing.
- rv water hookup replacement — Replace the hose first, the regulator second, the inlet check valve last. That is the order of how often each one actually fails.
- rv water hookup valve — The city water inlet has a check valve that stops water flowing back out of the tank. If water pours back out when you disconnect, that check valve is the part to replace.
- rv fresh water fill adapter — For a gravity fill port you want a short hose with a tapered nozzle; for a pressurised inlet it is the same hose you use on city water. Regulator and filter still go on the spigot first.
- rv fresh water hose — A lead-free, NSF-certified drinking water hose ($13.97 for 25 feet), never a garden hose. Buy 25 feet first and add length only when the pedestal demands it.
- rv water filter cartridge — Cartridge life is measured in gallons and in time, not just use — replace it at the start of a season even if it only saw two trips. The inline filter is a screw-off swap.
- rv water filter replacement — Swap the cartridge when flow drops or taste changes, usually every season for weekend campers. Store a spare inside the rig so a campground's iron-heavy water never ruins a trip.
- rv water filter system — A two-stage canister system handles sediment and carbon separately and lasts longer than the inline pucks. For a tighter shower from the same tank, the Oxygenics BodySpa handheld head ($31.99) is the standard swap.
First-Trip Checklists, Supplies and What to Pack
The questions that come before the questions. Build the kit once and every trip after the first one is a packing exercise, not a shopping trip.
- first rv trip checklist — Two lists: the connection kit (blocks, chocks, analyzer, protector, cord, regulator, filter, hoses) and living supplies. Pack the first list the day you buy the rig, not the day you leave.
- first rv trip with family — Pick a full-hookup park within two hours of home for trip one, with a bathhouse and a playground. The point of the first trip is a boring success, not a story.
- rv camping checklist for beginners — Level, chock, power, water, sewer, propane, awning. That is the setup half; the packing half is food, bedding, chairs and the connection kit above.
- rv camping checklist with kids — Add helmets, a bin of outdoor-only toys, a nightlight and a change of clothes per kid per day. Kids generate laundry at twice the adult rate in a small rig.
- rv camping essentials checklist — Blocks, chocks, analyzer, surge protector, cord, pressure regulator, filter, drinking hose, sewer hose, gloves, level, flashlights. That is the essentials list.
- rv camping essentials list — Beyond the connection kit: bedding that fits the berths, a cooler that fits the bay, a small tool kit, first aid, and a mat for the door so the floor stays livable.
- rv camping list with kids — Same list, plus snacks they can reach themselves and one activity per rainy afternoon. A bored kid at a campsite is a weather problem, not a discipline problem.
- rv camping supplies — You need far less than the internet suggests. Buy the connection kit and the bedding first, then add gear one trip at a time based on what you actually missed.
- rv camping tips and tricks — Fill the fresh tank at home before you leave, keep the black tank closed, and book full-hookup sites for the first season. Those three habits remove most of the stress.
- what to bring rv camping — Connection kit, bedding, food and a cooler, camp chairs, a folding table, lighting and the tools you would want if the rig misbehaved an hour from a town.
- what to pack for rv camping — Pack for the bay, not the cabinet: know the height of your storage compartments and buy bins that fit before you buy anything else.
- motorhome camping essentials — A motorhome adds two items to a trailer's list: a toad or bike rack decision, and a copy of your rig's height and weight for low bridges and scales.
- rv camping gear — The gear that earns its space: a pressure regulator, a drinking water hose, a sewer hose support, leveling blocks and chocks. Everything else is preference.
- rv camping guide — Start with this page for setup, then branch: water system for tank care, winterization before your first freeze, and boondocking when you want to leave the hookups behind.
- rv camping guide usa — For route planning, book the destination parks early and treat the long driving days as one-night hookup stops. Public campgrounds are cheaper and closer together than resorts.
RV Propane Systems: Alarms, Detectors and the Fridge
Propane is the quiet system. It needs a leak check on arrival, an alarm that actually works, and a fridge that respects the rules of physics.
- rv propane alarm — LP gas is heavier than air, so the detector mounts low near the floor. Test it monthly and replace the unit every five to seven years — the sensor dies silently before the alarm does.
- rv propane detector — A working detector is the only thing standing between a slow leak and a bad night. Test it on arrival at every site, and check the connections with soapy water after you turn the tank on.
- rv propane refrigerator — An absorption fridge runs on propane and needs the rig level within about three degrees to cool properly. It also takes hours to pull down, so start it the night before you leave.
- rv propane tank cover — The cover protects the regulator, pigtails and tank valve from UV and road spray. Check underneath it once a season — that is where a cracked pigtail hides.
RV Camping for Beginners FAQ
What do I actually need to hook up at an RV site?
Four things: water, power, sewer, and leveling. In practice that means a drinking-water hose, a surge protector, a sewer hose kit, and wheel chocks — plus leveling blocks so the fridge and shower drain properly. A Camco RhinoFLEX sewer hose kit and 12-pack of leveling blocks cover the most commonly forgotten pieces.
Do I really need a water pressure regulator?
Every time you hook up to city water. Campground spigots regularly run 60-80 PSI, and RV plumbing is rated around 40-50 — a surge at a poorly regulated pedestal can blow a fitting inside a wall. A Camco brass water pressure regulator is a $10 part that prevents a four-figure repair.
How do I stop the RV from smelling?
Treat the black tank with every dump and never leave the black tank valve open — you want liquid in there to break down solids. A Camco TST Max drop-in treatment controls odor for the whole trip.
What's the first thing to check when you arrive at a site?
The pedestal, before you plug in. A Camco 30-amp circuit analyzer tells you in seconds whether the outlet is miswired or has an open ground — far better to find that out than to have your electronics find it for you. Then plug the surge protector in between.
Can I run the RV on a 15-amp household outlet at home?
You can, with an adapter, but accept the limits: no air conditioner, no microwave plus coffee maker, and nothing that draws a heavy continuous load. Charge the batteries, run the fridge on propane, and save the heavy loads for a 30-amp pedestal.
Is 30-amp or 50-amp better?
Neither is better; it depends on the rig. Thirty-amp service gives you 3,600 watts at 120V and runs one air conditioner plus one other high-draw appliance. Fifty-amp service gives you 12,000 watts across two legs and runs two air conditioners with the microwave and water heater element going. If you camp in hot climates with a large family, 50-amp sites are worth the small nightly premium.
What is the difference between an RV surge protector and an EMS?
A surge protector clamps voltage spikes, and the better RV units also disconnect on low or high voltage. An EMS adds monitoring for open neutral, open ground, reverse polarity and frequency, plus a delay before reconnecting so the air conditioner compressor is not hit mid-cycle. Choose a surge protector for modern full-hookup parks, and an EMS if you favor older state parks with aging wiring.
How much does an RV hookup cost per month?
For a monthly full-hookup site, budget roughly $400–$900 depending on region and season, with electricity often metered separately at about $0.12–$0.20 per kWh. Heavy air conditioning adds roughly $60–$150 to the monthly bill. Ask whether electric is metered or flat before you commit — it changes the total more than the site fee.
Can I hook an RV up at home?
Yes, with limits. A standard household outlet plus an adapter will charge batteries and run the fridge on propane, but it trips as soon as the air conditioner starts. A dedicated 30-amp circuit with a TT-30R outlet on a weatherproof box, installed by an electrician, is the only way to run the A/C at home.
How do I find a dump station?
Most RV parks and many public campgrounds include one — usually free for guests and roughly $10–$25 for non-guests. Rest areas, fairgrounds and some truck stops have them too. Call ahead rather than trusting an app listing, and carry the complete sewer hose kit plus a support so you can use any station properly.
Do I need a special hose to fill my RV water tank?
Yes — a lead-free, NSF-certified drinking water hose, never a garden hose. The Camco TastePURE 25-ft drinking water hose ($13.97) is built for this, and it should be stored in a different bin from the sewer hose.
RV accessories are one of the least discount-sensitive categories in outdoor retail — our camping gear deals guide explains which gear to buy when you need it and which categories are genuinely worth waiting for a sale.
<!-- AFFILIATE_DISCLOSURE -->One planning trap catches almost everyone: the park's season and the campground's season are not the same thing, and closing dates vary by elevation and by which agency manages the land. We break down what closes when — and how to check your own campground in two minutes — in when do campgrounds close for the season.
The Bottom Line
RV camping looks intimidating because every system is visible — water hoses, power cords, sewer connections, leveling jacks. But each system has one or two key pieces of gear that prevent 90% of problems, and the setup sequence never changes.
A brass pressure regulator, an RV surge protector, a circuit analyzer, and toilet treatment cover the four systems that cause the most expensive disasters. The camp kitchen gear and comfort pieces are what make the trip enjoyable rather than just survivable. Connect in the right order, check your power before you plug in, and keep the gray tank closed.
If your RV weekends also include trailhead shuttles or campground bike loops, do not leave bike transport as an afterthought. A loaded cooler, sewer tote, and folding table already eat most of the rear cargo zone, so a stable hitch rack can be the difference between a relaxed setup and a frustrating round of bike-Tetris at every stop. Our best hitch bike rack 2026 guide compares platform and hanging racks for RVs, SUVs, and family haulers — including which ones still let you tilt for hatch access when the rest of camp is packed in tight. If you have already narrowed it to the premium tier, our Thule Epos 2 hitch bike rack review covers the one rack in that class that survived 40-mph gravel with e-bikes loaded, plus the receiver-size mistake that sends a lot of RV owners straight back to the returns desk.
If the bikes on that rack are e-bikes, the arithmetic is different again — per-bike weight ratings, hitch class ceilings and ramp and fender fit are all worked through in our e-bike hitch rack guide.
For the complete checklist version of every essential RV accessory — surge protector specs, circuit analyzer diagnostics, and holding-tank treatment compared side by side with prices and what to skip — see our essential RV accessories setup checklist.
Once you've done the setup sequence three times, it becomes muscle memory — and everything after that is just camping with better coffee and a real mattress. Happy trails from the TrailMapz team.
TrailMapz is reader-supported. When you buy through links on our site, we may earn an affiliate commission at no additional cost to you. All prices and ratings are accurate as of June 2026.