Best Camp Coffee Makers for 2026: AeroPress, French Press & Stove Setup
Camp coffee in 2026: AeroPress vs French press picks, percolator and cowboy coffee how-tos, plus cold brew for fire-ban mornings when you have no heat.
A campsite morning has a particular kind of urgency: the tent is damp, the trailhead is an hour away, and everyone wants a warm drink before anyone wants conversation. The good news is that you do not need a generator, disposable pods, or a suitcase-sized espresso machine to make coffee you actually look forward to.
The best camp coffee maker depends on your trip, not on a single “best” product. For backpackers, ounces and cleanup matter most. For a family campground, brewing enough coffee before the kids wake up matters more. And if you are using a stove in cool weather, fuel choice can decide whether water boils quickly or becomes a long, frustrating wait.
This guide compares two excellent compact brewers—the AeroPress Original Coffee Press and the Snow Peak Titanium French Press—then matches them with a practical stove and water routine.
Coffee is only half of camp breakfast — camping breakfast ideas pairs every brewer here with the morning meal it belongs to.
Lunch is the other half you have to pack in advance — camping lunch ideas covers 25 no-cook, make-ahead and hot midday meals that survive a cooler.
Quick Answer: The Best Camp Coffee Setup by Trip
- Best overall for most campers: AeroPress Original ($39.95) — thirty seconds to a clean cup, and no paper-filter fuss at 6 a.m.
- Best for a crowd: GSI Outdoors 8-Cup Enamelware Percolator ($34.95) brews enough for a whole family before the kids wake up.
- Best ultralight for backpacking: Snow Peak Titanium French Press ($65.00) gives you full-bodied coffee at titanium weight.
- The step nobody plans for: your water is only as fast as your stove, so pair any of these with an ultralight MSR PocketRocket 2 ($49.95) and use isobutane in cool weather.
Start With the Water: Your Stove Matters More Than You Think
Camp coffee is only as good as the water you can heat predictably. A frantic, wind-blown boil followed by a scorched pot does not help even the best brewer. Choose your stove around the trip and the fuel conditions first; our camp-stove fuel guide explains the propane, butane, and isobutane trade-offs in depth.
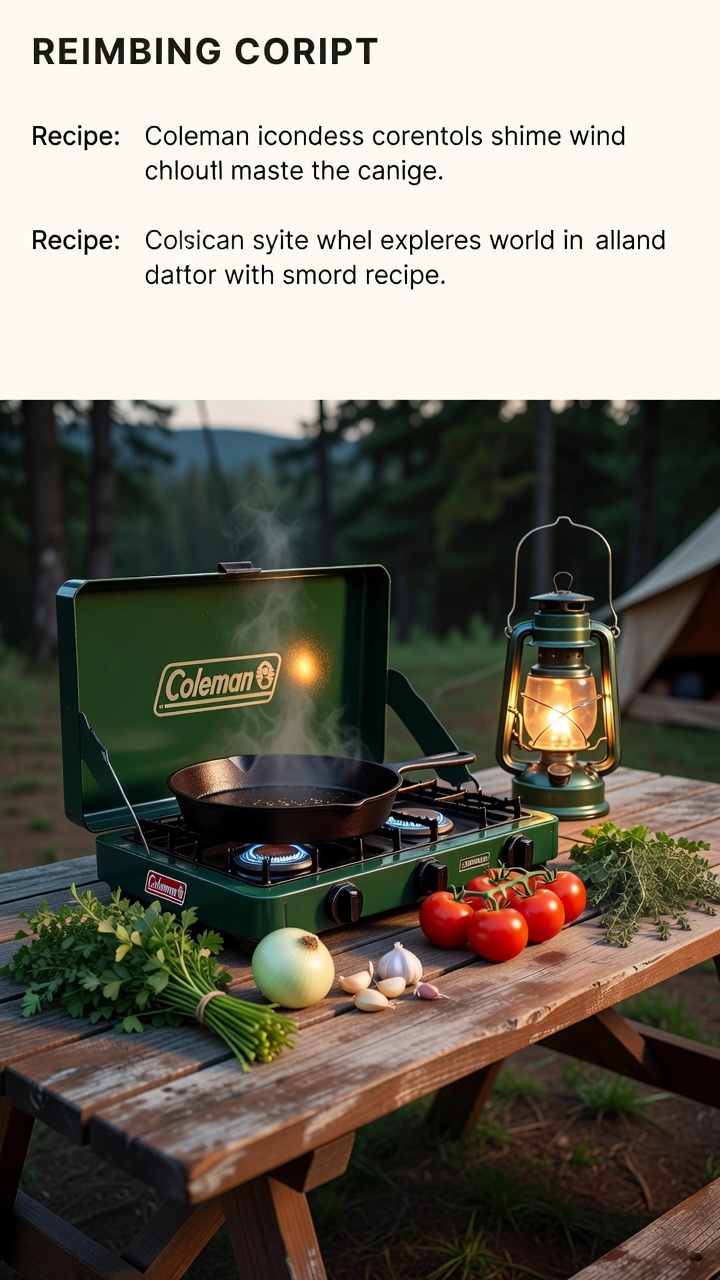
For budget car camping, the Coleman Bottle Top Propane Stove is a straightforward choice. Its 10,000-BTU burner screws onto a one-pound propane bottle, has a stable base for a pot, and heats water quickly without asking you to pack a bulky two-burner system. It is the right tool when you want coffee for two or four people before cooking breakfast.
For backpacking, the MSR PocketRocket 2 makes more sense. At 2.6 ounces, it disappears into a cook pot and reliably heats the smaller water quantities that an AeroPress or one-cup French press needs. It runs on threaded isobutane canisters, so it is a better three-season option than butane for chilly trail mornings.
If you primarily camp in warm weather and want an especially self-contained kit, the Coleman Classic 1-Burner Butane Stove has push-button ignition, a hard case, and a simple cartridge format. It is great for campground coffee, but butane loses performance in cold conditions; do not make it your only plan for a frosty shoulder-season trip.
A simple target temperature
You do not need a thermometer to make better camp coffee. Bring water to a boil, then let it rest for roughly 30 seconds before pouring over grounds. That small pause reduces the harsh, burnt edge that comes from pouring aggressively boiling water onto coffee. In very cold or windy weather, keep the lid on your pot while it heats and use a windscreen only where your stove maker says it is safe.
Best Overall for Most Campers: AeroPress Original
The AeroPress Original is the easiest recommendation for people who care about a clean, flavorful cup but do not want a fragile or complicated camp setup. It costs about $34.96, has a 4.6-star rating from more than 26,000 reviews, and brews one to three cups in roughly two minutes once your water is ready.
Its strength is flexibility. You can make a concentrated, espresso-style cup and add hot water, brew a standard mug, or make a stronger base for an iced camp coffee later in the day. The paper micro-filter keeps silt out of your mug, which matters more outdoors than at home: nobody wants gritty grounds stuck in the bottom of a reusable bottle when water for washing is limited.
Choose the AeroPress if you:
- Camp solo, as a couple, or want one excellent cup at a time.
- Prefer low-mess cleanup and do not mind carrying a small stack of paper filters.
- Travel by car, bike, or foot and want a brewer that is far safer than glass.
- Like adjusting strength from day to day instead of being locked into one brew style.
A no-fuss AeroPress camp recipe
- Heat about 250 ml (8–9 oz) of water.
- Add one rounded scoop of medium-fine grounds to the AeroPress.
- Pour enough water to wet the grounds, stir briefly, then fill to your desired level.
- Steep for about one minute.
- Press slowly into a sturdy mug; add extra hot water for an Americano-style cup if you brewed it strong.
- Pop the compact coffee puck into your trash bag and give the press a quick rinse.
This routine is fast enough for an early trail start and uses little water for cleanup. If you are packing light, pre-portion your beans or grounds into small reusable containers so you do not measure before sunrise.
Best for Full-Bodied Coffee: Snow Peak Titanium French Press
The Snow Peak Titanium French Press is the better pick for campers who want a more traditional, full-bodied mug and prefer reusable gear over paper filters. Its titanium body is durable enough for a camp box, much less risky than glass, and sized for one to three cups. At about $65, it is the premium choice here, but it earns that price through material quality and a compact one-vessel setup.
A French press lets more oils and fine particles into the cup than the AeroPress, which produces a richer texture that many coffee drinkers prefer. The trade-off is cleanup: loose grounds have to be packed out, and the mesh filter needs a rinse. That is easy at a developed campground and still manageable on a backpacking trip if you scrape grounds into a sealed trash bag first.
Choose the Snow Peak French Press if you:
- Want a richer, fuller-bodied cup and do not mind some sediment.
- Avoid disposable filters whenever possible.
- Need durable coffee gear that can handle vehicle travel and camp bins.
- Usually make coffee for one to three people rather than a large group.
A dependable French press camp recipe
Use coarse grounds—finer grounds tend to clog the mesh and create a muddy cup. Add about two tablespoons of coffee per eight ounces of water, pour water just off the boil, stir once, and steep for four minutes. Press slowly rather than forcing the plunger. If it resists, your grind is probably too fine.
Pour the coffee into mugs immediately after pressing. Leaving it in the press continues extraction and turns an enjoyable cup bitter while you are packing tents or helping someone find their socks.
Best Camp Coffee Setup by Trip Type
Ultralight backpacking
Take the MSR PocketRocket 2, AeroPress, a small pot, and pre-portioned grounds. This setup puts the weight where it matters—your shelter, insulation, and food—while still giving you a genuinely good morning ritual. Do not bring a cast-iron skillet “just in case” on this trip.
Weekend car camping
Pair the Coleman Bottle Top Propane Stove with the AeroPress for the least mess, or the Snow Peak French Press if coffee is the centerpiece of a slow morning. A propane bottle is easy to find, the burner is powerful, and you can heat enough water for several people without hovering over a tiny stove.
Family campground breakfast
If breakfast involves pancakes, eggs, and several mugs of coffee, choose the more stable car-camping stove and prepare coffee while someone handles the food. The Lodge 10.5-inch Cast Iron Griddle is useful for pancakes and bacon alongside your coffee station—but it is heavy, so keep it out of a backpacking kit.
Fire-restricted or fuel-uncertain trips
Do not plan coffee around a campfire. Fire restrictions, rain, and late arrivals all make that unreliable. The Gas One Dual-Fuel Propane & Butane Stove gives car campers more flexibility when you are unsure what fuel will be available near the campground. Bring the fuel you expect to use rather than assuming the nearest store will stock it.
Camp Coffee Without Heat: Cold Brew and No-Electricity Mornings
Not every camp morning has a burner available. A county-wide fire ban, a stove that ran out of fuel, a no-cook backpacking day, or simply a hot afternoon all point the same direction: coffee with no flame at all. Everything in this guide still works without heat — you just replace heat with time.
Cold brew in a French press (the easiest no-heat method). Add coarse grounds to the Snow Peak titanium French press at roughly one part coffee to eight parts cold water, stir once, put the lid on with the plunger pulled all the way up, and leave it overnight. Twelve to eighteen hours is the window; sixteen is a good default. In the morning, press the plunger down slowly, exactly as you would with hot water. What comes out is a concentrate, not a mug of coffee: pour it over ice and dilute roughly one-to-one with cold water, or top it with milk. A press that makes four hot cups makes about four iced drinks this way.
Cold brew in a bottle (no brewer at all). If you are going light, put coarse grounds and cold water in a wide-mouth bottle the night before, shake it once, and leave it in your pack. In the morning, strain it through a paper filter, a clean bandana, or the mesh of a French press. It is grittier than the pressed version, but it is real coffee and it costs you nothing in fuel.
Instant coffee is not cheating. If the goal is the fastest possible no-heat cup, good instant coffee or a coffee bag — grounds sealed in a tea-bag style pouch — is a legitimate answer, especially on a fast-and-light day. Espresso-style instant dissolves in cold water; most conventional instant needs warm, not boiling, water to dissolve cleanly, so bring a little from the pot you heated for something else.
Why cold brew suits camping better than it suits home. Three practical reasons. It has no burned edge, so a mediocre grind hurts far less than it would in a hot brew. Its lower acidity sits better with anyone who gets heartburn from hot coffee. And the concentrate keeps in a sealed bottle for two to three days with no refrigeration — longer than a pot of hot coffee stays drinkable, and exactly what you want for an afternoon iced coffee when the GSI Infinity backpacker mug is the only clean vessel left.
If a stove does appear later. Cold brew concentrate is not locked into cold service. Pour it into a pot and warm it gently on the MSR PocketRocket 2 or Coleman bottle-top stove you would have used for a boil, and you have a normal hot cup in about a minute — with none of the early-morning grinding and filtering.
The Mug Matters More Than You Think
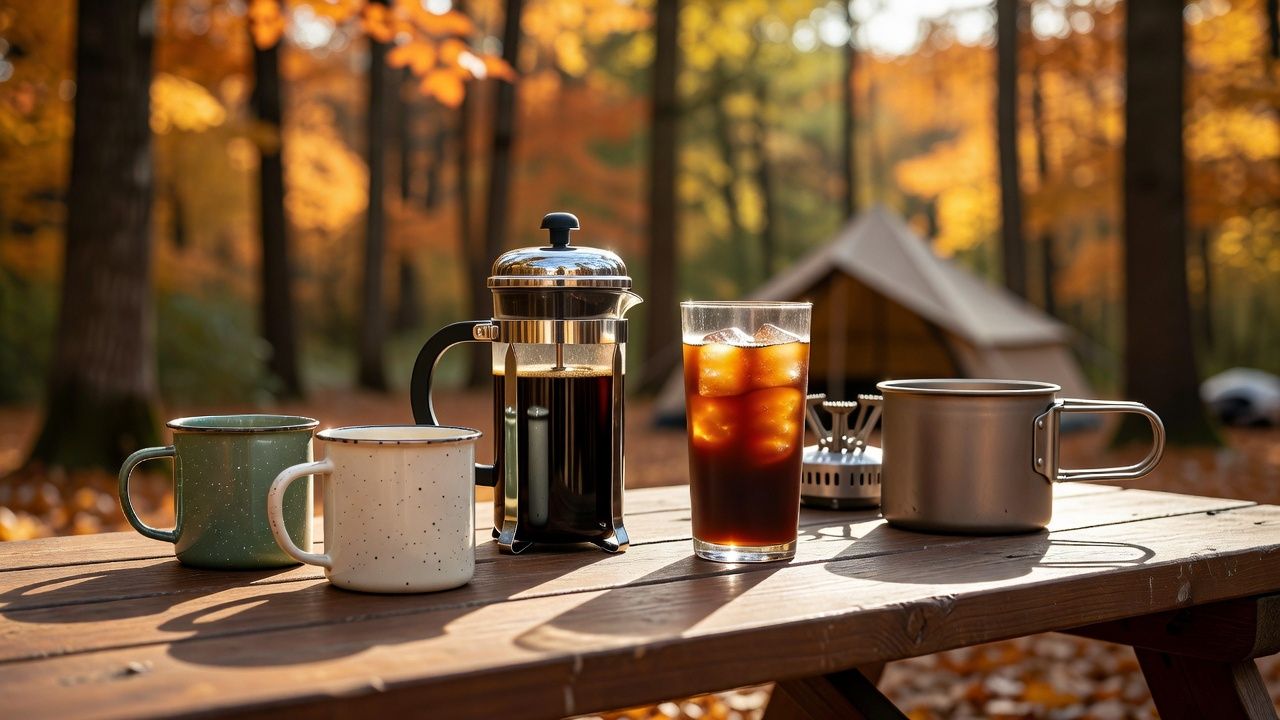
The brewer gets all the attention and the mug quietly ruins the cup. A thin-walled mug pulls heat out of your coffee in minutes, and a bare metal cup burns your fingers before the second sip. Three honest options:
Insulated, if you nurse your coffee. The STANLEY Everyday Camp Mug 12oz ($25) holds its temperature longest, has a drink-through lid and a real handle usable with gloves on. The tradeoffs are honest ones: it is the heaviest mug here, and the lid is not leakproof, so keep it upright in the car.
Enamel, if you drink it fresh. The COLETTI Classic Camping Enamel Mug ($26.97) is the mug people actually picture when they picture camp coffee. It handles hot and cold drinks without holding flavours and it is light enough to clip outside a pack. It is also uninsulated and chips if dropped on rock — a ritual mug, not a thermal one.
Backpacking, buy the one that nests. The GSI Outdoors Infinity Backpacker Mug ($14.95, 4.8 stars across nearly 5,000 ratings) wraps around a standard 32 oz bottle so it adds essentially no pack volume, and its insulated sleeve keeps coffee warm for the first half hour of a cold morning.
Percolator and Cowboy Coffee: How to Actually Use Them
Two brewing methods predate every gadget in this guide, and neither needs anything you do not already carry. The percolator is the family-campground answer; cowboy coffee is what you make when the only vessel you own is a pot and the fire is already going.
How to use a percolator at camp, step by step:
- Fill the pot with cold water to just below the basket. Never fill into the basket itself — the water has to be able to perk up through the stem.
- Add coffee to the basket, coarse-ground. About one level tablespoon per cup of water is the starting point. Percolators want a coarser grind than a drip machine; fine grounds sift through the basket holes and turn the pot into sludge.
- Seat the basket and stem, put the lid on, and set the pot on the burner.
- Heat at medium. You want it to perk, not boil — on a propane camp stove that is a noticeably lower flame than the one you would use for a rolling boil.
- Start counting at the first perk: roughly six to eight minutes at a gentle perk for a typical eight-cup pot. If it is bubbling hard, slide the pot off the heat for a moment and let it calm down.
- Take the pot off the heat and let it stand for a minute so the grounds settle, then pour.
The reason percolators have a bad reputation is almost always the same mistake: hard-boiling them for twenty minutes. That recirculates already-brewed coffee back over the grounds again and again, which is exactly how you get the bitter, metallic cup people remember from a bad campground breakfast. Gentle perk, short window — that is the whole technique. A GSI Outdoors 8-cup enamelware percolator ($34.95) brews enough for four people in one go and survives decades of camp-box abuse.
Cowboy coffee: pot, grounds, water, fire. Put coarse grounds straight into cold water in a pot — about one to one-and-a-half tablespoons per cup. Bring it to just below a boil, meaning a few lazy bubbles at the edge rather than a rolling boil, then pull it off the heat and let it steep for about four minutes. Settle the grounds with a small splash of cold water down the inside of the pot, wait a minute, and pour carefully. It works well with a coarse grind and fails badly with a fine one. Drink it from an enamel mug — the COLETTI Classic Camping Enamel Mug ($26.97) is the one that already tastes like camp coffee.
Which one should you actually pack? If breakfast is for four people, the percolator earns its space: one pot, one pour, no filters. If your only vessel is a cooking pot and the fire is already lit, cowboy coffee costs nothing extra and is genuinely good with coarse grounds. If you drink one excellent cup and care about the flavour, the AeroPress Original is still the better brewer — these two methods win on simplicity, not on cup quality.
Camp Coffee Mistakes That Ruin a Good Morning
Bringing the wrong grind. French presses need coarse grounds; AeroPress works well with medium-fine grounds. Pre-grind at home only if your trip is short, or use a small hand grinder if fresh flavor is worth the effort.
Boiling water violently in an uncovered pot. Wind steals heat and makes you burn through fuel. Use a lid while heating and choose a sheltered, permitted cooking spot.
Dumping grounds on the ground. Coffee grounds are food waste. Pack them out in your trash, even when they look harmless. They attract animals and are not a Leave No Trace exception.
Trying to brew for six people with a single-cup kit. The AeroPress is excellent, but it is not a campground cafeteria. For a large group, brew sequential cups or bring a larger shared brewer.
Hard-boiling a percolator "to get it going." A percolator that boils recirculates brewed coffee over the grounds until it turns bitter and metallic. Perk it gently for six to eight minutes and stop — more heat never means more flavour.
Pouring the first cup straight out of a cowboy pot. Grounds need a minute to settle, and a splash of cold water down the inside of the pot settles them faster. Pouring immediately puts a mouthful of grit in the cup someone was looking forward to.
Skipping cleanup until later. A quick rinse before you hike beats discovering dried coffee oils and soggy grounds when you are exhausted that night.
The Bottom Line
For most campers, the AeroPress Original is the best all-around camp coffee maker: compact, safe, fast, easy to clean, and adaptable to car camping or backpacking. Choose the Snow Peak Titanium French Press if a richer cup and reusable brewing matter more than the fastest cleanup.
Whichever brewer you carry, give equal attention to your water-heating setup. Read our camp stove fuel guide before a cold-weather trip, then build the rest of your kitchen around the meals you really make. For a broader packing plan, see our camp kitchen setup guide.
Camp Coffee FAQ
For the mechanics that apply everywhere, camping in Wisconsin covers how one state's single reservation system, fee ladder and ground-condition fire rule actually work in practice.
What's the easiest way to make good coffee at camp?
An AeroPress or a French press, because both are forgiving of bad techniques and water temperature. The AeroPress Original makes one excellent cup in about 90 seconds with no cleanup beyond pushing the puck out, and the Snow Peak titanium French press is the ultralight choice for backpackers.
Do I need a separate stove just for coffee?
Only if you're on a very tight schedule. If you already carry a Coleman bottle-top propane stove or an MSR PocketRocket 2, you have everything you need — boil water on the same burner you used for dinner and you're done. A dedicated second burner matters for groups where someone wants coffee while breakfast is cooking.
Percolator or press?
Percolators are the family-camping answer: a GSI 8-cup enamelware percolator makes enough for four people in one go and survives decades of abuse. Presses make better coffee for one or two. If you're deciding, pick based on headcount first and flavor second.
How do I keep coffee hot?
A preheated insulated mug, not a second pot. Pour a little hot water in the mug, let it sit for a minute, dump it, then pour your coffee — an enamel camping mug or a GSI Infinity backpacker mug holds temperature far better than a thin steel cup.
How much coffee per cup?
Two tablespoons of ground coffee per 6 ounces of water is the standard starting point; use a bit more for a French press and a bit less for a percolator. Bring pre-ground coffee in a sealed bag or grind at home — a hand grinder is one more thing to pack and one more thing to lose.
What ruins camp coffee fastest?
Water temperature and cleanliness. Water that's been boiled hard and then cooled too long brews flat coffee, and a pot with yesterday's grounds in it makes everything taste like yesterday. Boil, wait 30 seconds, brew, and rinse your gear immediately.
Can you make coffee camping without a fire or a stove?
Yes — cold water and time do the same job. Add coarse grounds to a Snow Peak titanium French press at roughly a one-to-eight coffee-to-water ratio, leave it overnight, press it in the morning, and dilute the concentrate about one-to-one with cold water. No fuel, no flame, no electricity, and nothing a fire ban can take away from you.
How long does cold brew concentrate keep at camp?
About two to three days in a sealed bottle without refrigeration, which is usually longer than the trip itself. Keep it out of direct sun. Remember it is roughly twice the strength of brewed coffee, so dilute it before you decide it tastes too strong.
How do you use a percolator at camp?
Fill the pot with water to just below the basket, add coarse grounds to the basket at about one tablespoon per cup, and heat at medium until it starts perking. Count six to eight minutes at a gentle perk, then take it off the heat and let the grounds settle for a minute before pouring. The single mistake that ruins percolator coffee is a hard boil for twenty minutes.
What is cowboy coffee, and does it actually work?
Cowboy coffee is grounds and cold water in a pot over a fire: brought to just below a boil, steeped for about four minutes, then settled with a splash of cold water so you are not chewing your coffee. It works well with a coarse grind and fails with a fine one. It is the right method when your only vessel is a pot and the fire is already lit.
<!-- AFFILIATE_DISCLOSURE -->