How to Pitch a Tent: Step-by-Step Setup Tutorial for Beginners (2026)
Learn how to pitch a tent the right way in 2026, from picking a flat spot and threading poles to staking guy lines and fixing the 5 common mistakes.
The first time I pitched a tent alone, I was 19, it was getting dark, and I'd never noticed that tent poles come color-coded. I spent 20 minutes trying to force a wrong-angle pole through a sleeve until a neighboring camper took pity and pointed at the little red tab matching the red corner. That was the night I learned that how you pitch a tent matters more than which tent you bought. You can own the best family camping tent on the market and still wake up in a collapsed puddle if you stake it wrong.
This is the beginner's tent setup tutorial I wish someone had handed me. I'll walk through the full pitch — site selection, pole threading, staking, guy lines, rainfly, and teardown — and the five mistakes I see first-timers make every single season. If you're still deciding which tent to buy, our complete tent size guide breaks down how much real space you get at 2P, 4P, and 6P capacities, and our best family camping tents 2026 roundup has specific picks at each size. This guide picks up after the box arrives.
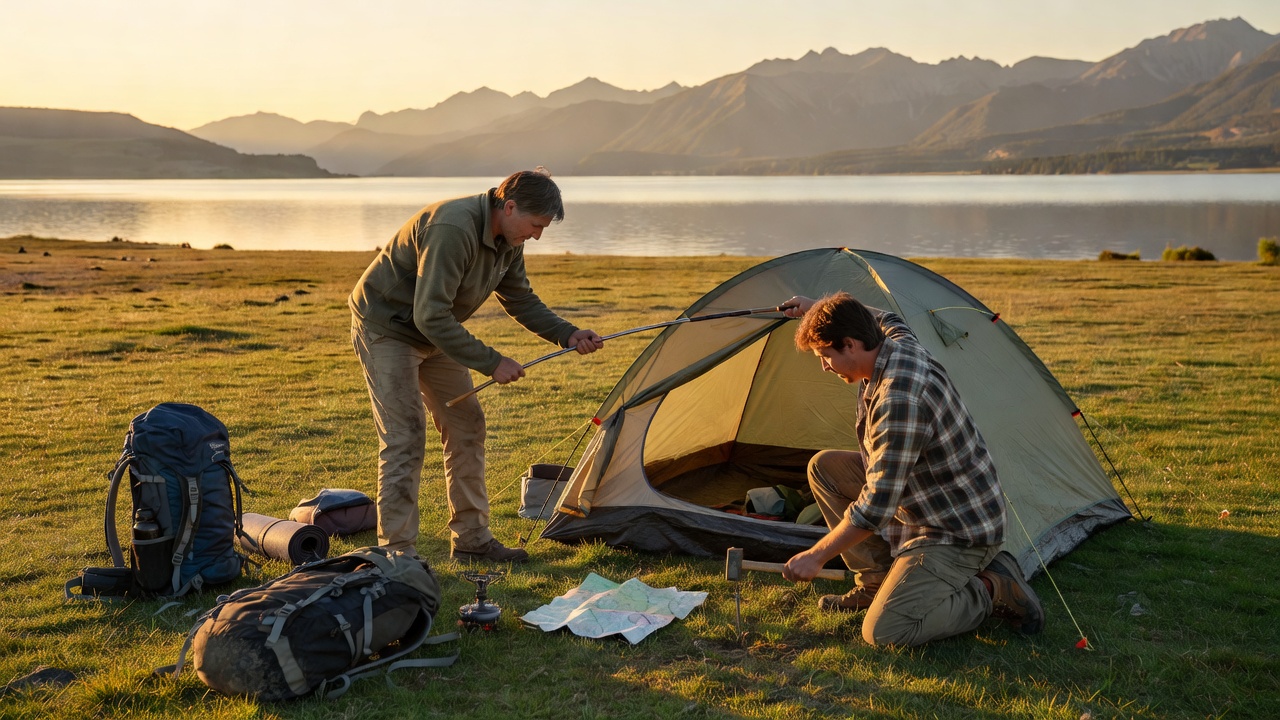
Quick Answer: The 5-Step Tent Pitch, In Order
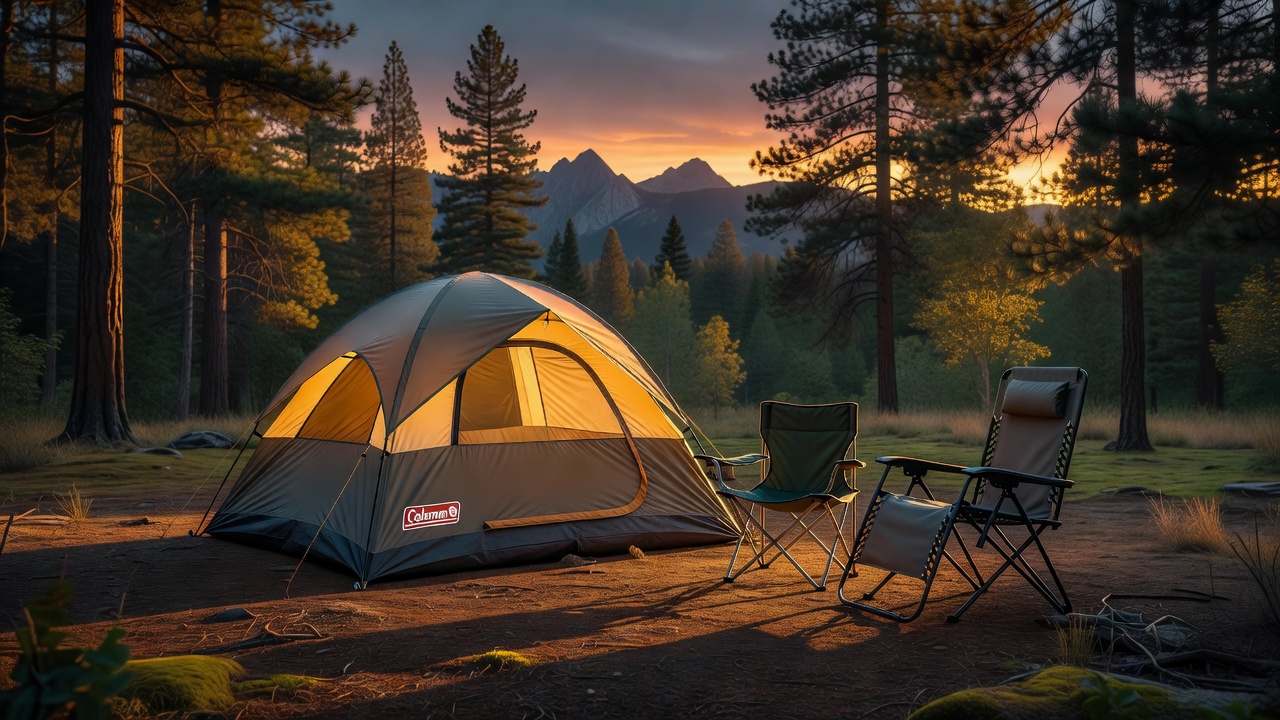
- Pick the site first: slightly elevated ground, no dead branches overhead, door turned away from the prevailing wind. This decides more about your night than the tent you bought.
- Stake the corners, then thread the poles: match the color-coded tabs. Pre-attached poles like the Coleman Skydome 4-Person ($122.99) turn this into a five-minute job.
- Guy lines out, then the rainfly: the two steps everyone skips, and the reason tents collapse at 2 a.m. in weather they should have shrugged off.
- Reproof the fly once a season: Nikwax Tent & Gear SolarProof ($19.95) keeps a budget tent dry for years and takes ten minutes in the driveway.
The Same Question, Six Different Ways
Most of the searches that land on this page are the same question typed differently, so here is the decoder table before the step-by-step. Find your words on the left, take the answer on the right, then follow the numbered steps below.
| The words you typed | The short answer |
|---|---|
| how to pitch a tent by yourself | Stake the four corners loosely first, then thread the poles. A staked floor holds its shape, so the frame stops fighting you while you work. |
| how to pitch a tent alone | Same order, plus one solo trick: lay the body out flat and let the wind fill it slightly before you stake. One person can then walk the frame up instead of wrestling it. |
| how to put up a tent by yourself | Add a deliberate pause after the arch is seated: clip or velcro the body to the poles before reaching for the rainfly, so nothing you already tightened can shift. |
| how to put up a tent on your own | Work in one direction around the tent, not back and forth. Corner, corner, arch, fly, guy lines — a fixed route is how you keep one pair of hands on schedule. |
| how to set up a tent by yourself | Pre-attached poles and clip attachments are the real solo upgrade. If your tent still uses sleeves, assemble every pole on the ground first so you never fumble a section mid-arch. |
| how to put up a tent for beginners | Ignore the instructions only after your first pitch. The order on the tag — body, poles, fly, guy lines — is the order that works; most first-tent disasters come from improvising the sequence. |
| how to put up a tent step by step | Six steps, in this order: pick the site, stake corners loosely, thread the poles, seat the arch, attach the fly, tension the guy lines. Each step gets its own section below. |
| how to set up a tent step by step | Identical sequence. The only variation worth knowing is the instant-cabin family, where the frame is pre-built and you simply pull the walls up and lock the roof. |
| how to set up a tent instructions | Every dome-tent instruction sheet says the same three things that actually matter: match the color-coded poles, seat the ends before bowing the arch, and never force a pole that feels wrong. |
| tent setup instructions | Read them once at home with the tent out of the bag, not at camp in the dark. Five minutes on the driveway prevents the twenty-minute fumble that ends with a bent pole section. |
| camping tent instructions | The written sheet is usually awful — diagrams only. Do the dry run instead; your hands learn the sequence faster than a photocopied diagram teaches it. |
| camping tent easy setup | Two features do 90% of the work: pre-attached poles and clips instead of sleeves. A tent with both goes up in about five minutes without any pole threading at all. |
| camping tent quick setup | Buy for the setup, not the pack size, if you always arrive after dark. Instant cabins and pre-attached-pole domes are the two designs that trade weight for speed. |
| how to set up an instant tent | Pull it out of the bag, extend the legs until each hub clicks, throw the roof up, then stake the corners and clip the fly. The only way to break one is to force a hub that has not clicked. |
If you would rather watch than read, look for clips of your specific tent model — setup order varies more between frames than the generic "how to pitch a tent" tutorials admit. A pre-attached-pole family car-camping tent like the Coleman Skydome 4-Person ($122.99) and a 2-person sleeve-and-pole backpacking tent are pitched in genuinely different orders.
Step 1: Pick the Right Spot (This Decides Everything)
Before you touch a single pole, spend two minutes reading the ground. The site you choose does more for your comfort than any gear upgrade.
- Find flat ground. Not "kind of flat" — actually flat. Lie down on it. If your sleeping pad is going to slide you into a corner all night, pick somewhere else. A 2-inch slope is enough to ruin sleep.
- Look up. No dead branches overhead (campers call them "widowmakers" for a reason). No ant hills. No root crowns that'll jab your back at 3 a.m.
- Pitch high and dry. Avoid the lowest point of a meadow or the natural drainage path of a slope. A tent pitched in a dip fills with water in 10 minutes of rain.
- Mind the sun and wind. In summer, shade the tent from afternoon sun so it doesn't become a sauna. In windy weather, point the lowest end (usually the foot) into the wind.
If you're car camping, the Coleman Skydome 4-Person Camping Tent ($122.99) has pre-attached poles and LED lighting that make the whole pitch forgiving — it's the tent I'd hand a friend who's never set one up before. You can see our full take on it in the 2P vs 4P vs 6P tent comparison.
One more thing worth checking before you carry a tent to a site: many public campgrounds limit the pad or tent footprint you're allowed to occupy, so the size you can book and the size you can afford are the same decision. If the tent is still on your shopping list, put your group and sleep system through our tent size calculator — it returns the floor area you need and the capacity class that matches it, before you reserve a spot the tent won't sit on.
Step 2: Lay Out the Tent Body and Stake the Corners
Unroll the tent body and lay it flat where you want it to sleep. Most beginners want to thread poles first — don't. Stake the four corners first, loosely, so the tent holds its shape while you work.
- Pull each corner tight so the floor is taut, not bunched.
- Push stakes in at a 45-degree angle, pointing toward the tent body (not straight down). The stake should grip the ground against pull, not lift out.
- Leave a little slack — you'll tighten after the poles are up.
A common mistake is staking too early on rocky ground. If you can't get a stake in, move the tent two feet — don't fight the rock. For car-campers who want a genuinely fast pitch, the CORE 6-Person Instant Cabin Tent ($169.99) pre-assembles the poles into the frame, so you go from bag to standing tent in about 60 seconds. That's the route I recommend for families with kids underfoot.
Step 3: Thread the Poles (Watch the Color Coding)
This is the step that breaks beginners. Modern dome tents use color-coded poles — one end of a pole matches a colored tab on the tent corner. Match them before you push anything through a sleeve or clip.
- Assemble each pole fully on the ground first (the elastic cord inside keeps sections in order).
- Find the color tab on each corner of the tent body.
- Slide the pole through the sleeve or clip it into the matching colored connector.
- Seat one end into the corner grommet, then bow the pole up and seat the other end. Don't try to push both ends in at once — you'll bend the pole.
If your tent has clips instead of sleeves, you'll snap the poles into the clips after the frame is standing. Either way: ends first, then the arch. The CORE 6-Person Instant Cabin Tent ($169.99) uses a similar instant-cabin frame — its blackout fabric is genuinely dark in daylight, which is a lifesaver for kids' nap time and summer sunrise sleep-ins.
Guy Lines, Knots and the Words People Use for Them
Guy lines are also called guy ropes, guy cords, and — in a lot of campground conversations and search boxes — guidelines, which is really just a spelling of the same thing. Whatever you call them, they are the cheapest wind insurance a tent has, and the details below are the ones people actually ask about.
| Your question | The answer that works |
|---|---|
| tent guy lines or guidelines | Same component, two names. Guy lines run from the fly or upper corners to a stake; the tensioner on each line is what lets you tighten without untying anything. |
| tie tent guy lines | If your tent came with pre-tied loops, leave them. To tie your own, a taut-line hitch holds and still slides for adjustment; a bowline makes a fixed loop that will not slip. |
| tent guy line knot | The taut-line hitch for adjustable tension, the bowline when you need a loop that never slips, and a simple two-half-hitches if you are tying off to a rock. |
| tent guy line adjusters | The triangular plastic sliders on most tents work like a friction lock — pull the free end away from the tent to tighten, and push it back to release. No knots required. |
| tent guy line tensioners | Same part as an adjuster. Metal or plastic, they grip a doubled line; if one slips under load, double the line through it to add friction instead of tying it off. |
| tent guy line tensioner how to use | Thread the free end through the tensioner, loop it back around the line, then pull to set. Once set, a small tug test should not move the fly. |
| tent guy lines how to use | Stake them at 45 degrees, roughly three to four feet out, keep them taut but not guitar-string tight, and run every line you have once wind passes 15 mph. |
| tent guy line length | Three to four feet of usable line per attachment point is the working range for a family dome. Longer than that and a tripping hazard outweighs the mechanical advantage. |
| tent guy line locks | A lock is just a tensioner with a stop. If yours has no lock, add a half hitch above the slider so a gust cannot walk the line loose. |
| tent guy line diagram | Picture an X: four lines from the fly's corners angling out at 45 degrees, then, in real wind, two more from the midpoint of each long wall. That is the full pattern. |
| best tent guy lines | For a family car-camping tent: 2.5 mm reflective cord with a metal tensioner. Reflective line is also the single best upgrade for anyone who gets back to camp after dark. |
| reflective tent guy lines | Replacing plain guy lines with reflective cord costs about the price of two coffees and is the difference between seeing your tent and not tripping over it. |
| dyneema tent guy lines | Dyneema (or Dyneema-core cord) is the ultralight answer — the same strength at roughly half the weight, at two to three times the price. Worth it on a backpacking tent, not on a family dome. |
How to stake a tent properly is a separate skill from how to tie it, and it is where most setups quietly fail:
- how to stake a tent for wind — angle the stake 45 degrees away from the pull, point the head into the ground, and put your two strongest stakes on the windward corners.
- how to stake a tent with rocks — when the ground refuses, wrap the guy line around a fist-sized rock, bury it in a small trench, and pile three more rocks on top. Loop, bury, weight.
- how to stake a tent in rocky ground — move the tent. A hollow between rocks you can stake in beats a perfect flat spot you cannot, because an unsecured corner is what tears a floor.
- how to stake a tent in gravel — use longer, wider stakes rather than pushing harder. Gravel has almost no pull resistance, so surface area is doing the holding, not depth.
- how to stake a tent in sand — sand stakes (wide, flat, deadman-style) or buried-rock anchors. Straight stakes pull out of sand in a single gust, no matter how deep they go.
- how to stake a tent on the beach — anchor the windward corners first, with sand stakes or buried bags, then work the leeward side. Beach wind rarely arrives from one direction for long, so oversize your anchors.
- how to stake a tent on hard ground — pre-drill with a sturdy spike or a screw-in stake, then replace it with your real stake. Frozen or baked ground needs a pilot hole, not brute force.
- how to stake a tent in frozen ground — a screw-in stake turned with a leverage bar, or an ice-screw-style anchor. Pounding in winter is how stakes bend and shock cord snaps.
- how to stake a tent in snow — deadman anchors: fill a stuff sack or mesh bag with snow, bury it, attach the line, and let it set overnight. Snow anchors strengthen with time, unlike stakes in sand.
- how to stake a tent on a platform — many tent platforms and wooden decks ban stakes outright. Use the eye bolts or cleats, or run line to the platform frame and tension it; carry a few extra feet of cord for exactly this.
- how to stake a tent on hard ground (national-park pads and asphalt) — the honest answer is that you usually cannot, and should not try. Weight the corners with gear instead, or ask the host for a grassy overflow site.
A pack of wide aluminum stakes costs less than lunch and fixes the two failure cases above — gravel and wind. I keep a spare set in the car door, permanently.
Step 4: Stake the Guy Lines (The Step Everyone Skips)
Guy lines are the lines that run from the tent's upper corners or rainfly out to the ground at an angle. They're the difference between a tent that survives a gust and one that folds in on you at 2 a.m.
- Stake each guy line out at 45 degrees from the tent body, roughly 3–4 feet out.
- Keep the line taut but not guitar-string tight — it needs to absorb wind shock.
- In calm weather, two lines on the windward side are fine. In any wind above 15 mph, run all available lines.
If your tent only comes with a few stakes, a small pack of aluminum tent stakes costs under $10 and covers your guy lines and corners. Worth it. I keep a spare set in every pack.
Pitching in Rain and Wind (the Two Conditions That Test Everything)
How to pitch a tent in the rain comes down to one principle: keep the inside dry while the outside is being built. Lay the fly over the body before you go hunting for poles, keep the doors zipped, and accept that your hands will be wet so your sleeping bag is not.
- how to pitch a tent in the rain — pitch fly-first if your tent allows it: stake the fly, slide the body underneath, then raise the frame. Same result, half the water inside.
- pitching a tent in the rain — work fast and in one pass. Opening and re-opening a tent in a downpour to fetch something you forgot is how the interior gets soaked.
- how to put up a tent in the rain — clip the body to the poles before attaching the fly, so you never have to reach inside the tent with wet arms once the fly is on.
- how to set up a tent in the rain — pick your site by drainage first. Ten extra seconds looking for the high, slightly-sloped patch beats any waterproofing claim on the box.
- tent setup for rain — add a footprint, run every guy line, and make sure the fly does not touch the body mesh anywhere. Contact points are where leaks begin.
- how to set up a tent for rain — angle the lowest end of the tent into the rain or away from the door, then tension the fly so the sides stay off the walls.
How to pitch a tent in the wind is a different discipline: the tent wants to become a sail while you work, and the fix is sequencing rather than strength.
- how to pitch a tent in the wind — stake the windward corners before you assemble any pole. An anchored floor cannot be carried off your site while you thread sections.
- how to pitch a tent in high winds — lay the body with the lowest end into the wind, keep the poles low and horizontal until every end is seated, and only then bow the arch upward.
- how to pitch a tent in the wind on open ground — orient the door away from the wind, use every guy line the tent has, and consider moving to the lee of a building, a hedge, or the tree line before you start.
- pitching a tent in high wind with kids around — split the jobs. One adult holds the body down while the other assembles poles, because a half-built tent becoming airborne is the single most common injury moment in family camping.
Never let go of a partly-pitched tent in real wind. A dome with two poles seated and nothing staked will roll across a field faster than you can run.
Step 5: Attach the Rainfly (Even If It's Clear)
The rainfly is the waterproof outer layer that goes over the tent body. Even on a clear evening, attach it — weather changes fast, and a 2 a.m. storm with an un-flyed tent means everything you own gets wet.
A fly that's tensioned properly does one more job: it keeps the cold outer fabric off the air you're breathing, which is the whole mechanism behind why your tent is wet inside on cold mornings. If you've been blaming a leak, that guide separates condensation from an actual seam failure in about thirty seconds.
- Orient the fly so its doors line up with the tent body's doors.
- Hook the fly's corners to the same stakes or guy lines, not the tent body itself (this creates an air gap that reduces condensation).
- Tighten the fly so it doesn't touch the tent body mesh — contact points leak.
For ultralight tents where every gram matters, the fly setup is different — our best ultralight backpacking tents guide covers the single-wall vs. double-wall tradeoff and which pitches work above treeline.
Step 6: Final Tension and the 30-Second Test
Once everything is up, walk around the tent and pull each stake tight. Then do the 30-second test: push firmly on each wall. The tent should flex and return, not wobble or lean. A wall that leans means a stake or guy line is loose.
- Tighten any slack you find.
- Re-check the rainfly isn't touching the body mesh anywhere.
- Make sure the doors zip fully and the vestibule is staked out so it doesn't blow against the mesh.
Pitching on Whatever Ground You Get
The site you booked is almost never the perfect flat grass pad the product photos promised. Here is how each surface changes the pitch.
Sand. For how to pitch a tent in sand, or how to pitch a tent on sand, forget the stakes in the bag — they pull straight out. Use wide sand stakes or deadman anchors (a buried rock, or a stuff sack filled with sand and buried a foot down), and stake the windward corners first. A tent stakes for sand set is a genuinely different product from the aluminum stakes you use on forest duff.
If what you typed was pitching a tent on sand, here is the short version: bury a weighted anchor and tension the line to it, because no straight stake holds in loose sand through a full night of wind.
Beach camping. The same physics with salt in it: how to put up a tent on the beach starts with the tide chart, not the poles. Pitch above the high-water line, use sand anchors on every attachment point, and expect to re-tension after the wind shifts in the evening. A sun shelter like the Gorich Beach Tent Sun Shelter ($49.99) is often the better tool for a day trip than a full tent, and it pitches with the same anchor logic.
Gravel. How to pitch a tent on gravel and how to stake a tent in gravel are the same problem: almost no resistance and a lot of abrasion. Go longer and wider on stakes, put a footprint or a ground tarp down to save the floor, and do not be surprised if a corner creeps loose overnight — re-tension in the morning.
Pitching a tent on gravel is the same lesson wearing a different hat — longer, wider stakes plus a groundsheet under the floor, and never brute force.
Hard ground and compacted pads. How to pitch a tent on hard ground and how to stake a tent on hard ground mean pilot holes: a sturdy spike, a screw-in stake, or a few minutes with a mallet and a spare nail, then your real stake into the hole. On asphalt you simply do not stake — weight the corners with gear.
Rock. How to pitch a tent on rocky ground and how to stake a tent in rocky ground have one honest answer: move the tent two feet. Find a pocket of soil between rocks, or use rock anchors — line wrapped around a fist-sized rock, buried in a shallow trench, and weighted with more rocks. A tent stakes for rocky ground design (a bent, wide-blade stake) helps, but relocating beats improvising every time. A tent stakes heavy duty set — thicker shaft, wider blade — is the right buy if rocky sites are normal for you, while lightweight tent stakes metal aluminum is fine on soil and pointless on rock.
A slope. How to pitch a tent on a slope — sleep head uphill, put the door on the downhill side for drainage, and accept that you cannot pitch a true dome on a real incline and keep it taut. Look for the flattest few square feet and orient the tent with its long axis across the fall line. If the site is a genuine slope, dig level or move.
Wooden platforms. How to pitch a tent on a platform — and the same question phrased as how to stake a tent on a platform — is a permit-area reality in places like the Adirondacks and some national park campgrounds. Stakes are banned because they pierce the deck, so use the platform's eye bolts, cleats, or rails and tie off with extra cord. Carry ten extra feet of line for this specific case.
If the phrase you searched was how to set up a tent on a platform, the good news is that the setup order does not change at all — body, poles, fly, guy lines — only the anchoring changes.
Snow and frozen ground. How to pitch a tent in snow and how to stake a tent in snow rely on snow anchors — buried stuff sacks or deadmen that actually strengthen as the snow sets. How to stake a tent in frozen ground needs a screw-in stake and a leverage bar, or an ice-screw-style anchor; pounding metal into frozen soil bends stakes and snaps pole shock cords.
Concrete and artificial surfaces. When there is nothing to penetrate, the pitch becomes a weighting exercise: water jugs, gear bags, or dedicated anchor weights on every corner, plus a fully guyed fly. That is the one time a heavier tent is an advantage, because mass is what holds it.
The 5 Mistakes That Ruin First-Timers' Trips
- Staking before threading poles. The tent ends up lopsided and the floor bunches. Thread poles first, then stake.
- Forgetting guy lines in calm weather. "It's not windy" is exactly when the first big gust arrives and folds your tent.
- Staking straight down instead of at 45 degrees. Vertical stakes pull out under sideways load. Angle them toward the tent.
- Pitching in a dip or the low point of a field. Rain pools there first. Always pitch slightly high.
- No rainfly because the forecast is clear. Mountain and coastal weather changes in 20 minutes. Always fly.
I made four of these five on my first solo trip. Don't be me.
No Stakes, No Poles, No Problem
Sometimes the kit does not match the site.
How to pitch a tent without stakes — weight the corners with rocks, gear bags, or water jugs, and run guy lines to something immovable: a picnic table leg, a tree trunk, the corner of a truck bed. A taut line to a trunk is worth four stakes in sand.
How to pitch a tent without poles — and how to put up a tent without poles, how to set up a tent without poles, which are the same question — means a tarp shelter instead of a tent. Ridge line between two trees, tarp draped over it, corners staked or weighted, and you have a dry place to sleep with no pole to lose. A OneTigris Bulwark all-season tarp ($56.98) does this job and doubles as a kitchen awning on a normal trip.
How to put up a tent without stakes — same logic as no stakes at all, with one addition: if your tent has an internal frame, the weight of your gear and body is already doing some of the anchoring, so concentrate your weights on the two windward corners.
How to set up a tent with a tarp and tent setup with tarp: lay the tarp as a groundsheet first, sized smaller than the tent floor, then pitch the tent on top. A tarp that extends past the edge channels rain underneath and defeats the point.
How to set up a tent with clips — snap every pole into every clip before raising the arch. Clips look forgiving and are, right up to the moment you bow a pole with three clips still open and stress the sleeve.
How to set up a tent with poles and how to put up a tent with poles are the standard case, and how to put up a tent with 2 poles is the classic dome: two crossed poles, four corners, fly on top. How to set up a tent with 3 poles usually means a tunnel or a dome with a ridge pole — the third pole always goes in last, along the top, after the two arches are seated.
For a family, the frame built for clips and pre-attached poles removes most of this. If your whole reason for reading this is "camping tent easy setup", the honest answer is to buy the design rather than fight the one you own — the Londtren 4 Person Easy Pop Up Tent ($84.99) is a pop-up that needs no threading at all, and the Golabs 2-3 Person Tent ($30.66) uses pre-attached poles for a three-minute pitch.
Teardown: Pack It Dry, Pack It Right
Taking a tent down properly extends its life by years. The rule is simple: never pack a wet tent for more than a few hours.
- Shake out dirt and leaves before collapsing the poles.
- Fold the tent body along its seams — don't just stuff it, which wears the waterproofing unevenly (stuff sacks are for the fly, not the body).
- If anything is damp, set it up or hang it to dry within a few hours of getting home. A tent packed wet for a weekend grows mildew that ruins the coating.
- Store poles collapsed and rolled loosely; forcing them tight stresses the elastic cord.
What to Practice Before Your First Trip
If you've never pitched a tent, do a dry run in your backyard or a local park before the real trip. Time yourself. You should be able to get from bag to standing tent in under 10 minutes for a dome, under 2 minutes for an instant cabin. Practicing once saves you from fumbling in the dark at camp.
Half of all first pitches happen after dark — you drive in after work, the site is a mile from the car, and the tent goes up by headlight. That is the one variable in this whole guide you can buy your way out of. A Black Diamond Spot 400 Headlamp ($39.95, 4.5 stars, 1,500 reviews) puts 400 lumens on a 69-gram frame and clips to your forehead so both hands stay on the poles, and its red night mode lets you re-tension guy lines at 11 p.m. without waking the kids in the next tent. For light inside the tent rather than on the work, the Black Diamond Moji Lantern ($24.95) is a 200-lumen dimmable globe that hangs from the ceiling loop and runs all weekend on three AAAs. Families are usually better off with the MalloMe 4-pack ($23.99) instead — four multicolor lanterns for roughly the price of one Moji, so every kid gets their own and nobody is negotiating over the single light at bedtime.
New to camping generally? Our hiking for beginners complete guide covers the trail and gear side, and our budget camping tents under $100 roundup has picks if you want to start cheap before committing to a $130+ tent. For families sizing up, the what size tent for 2 adults, 2 kids, and a dog walkthrough does the capacity math for the most common family configuration.
A couple of questions come up before the first trip rather than during it. How to set up a tent for camping is really about choosing a site you can sleep on, which is why site selection comes first below. Camping tent setup inside — practicing in the living room — is worth one run just to learn the pole order, though you will want to check the poles clear your ceiling before you bow an arch indoors. Camping tent installation sounds more permanent than it is: for a weekend tent it means nothing more than the same six steps you will use at camp.
If you learn better from pictures, search for tent camping setup pictures of your exact model — the pole layout is the one part of a pitch that varies most between tents. Broadly, though, camping gear setup at a drive-in campsite follows a fixed order: shelter first, sleep system second, kitchen third, and everything else after that. Get the campsite tent setup finished and staked before you unpack anything else, because the tent is the one piece of the camp that wind can ruin while you are busy organizing.
The Footprint Question (and What It Is Actually For)
Tent footprint meaning: a footprint is a shaped groundsheet cut to the tent's floor plan, usually with webbing loops at the corners so it can be clipped under the poles. It is not the same thing as the tent floor, and it is not the same as a tarp.
| Your question | The straight answer |
|---|---|
| tent footprint purpose | Two jobs: protecting the floor from rock and root abrasion, and blocking ground moisture and condensation from wicking up through the floor. |
| tent footprint necessary | No on soft grass in fair weather. Yes on rock, gravel, sand, pine duff, and anywhere abrasion or wet ground is likely. |
| tent footprint or not | If the site is rough, bring it. If it is soft grass and you are car camping, the footprint mostly adds pack bulk. |
| tent footprint vs tarp | A footprint is shaped to the tent and sized slightly smaller. A tarp is flat, cheap, and rectangular — and a tarp that sticks out past the floor channels rain underneath the tent, so you must fold or cut it to fit. |
| tent footprint tarp | Yes, you can use a tarp as a footprint. Fold the overhang back under, or trim the tarp to the footprint size, and it behaves the same way a purpose-made groundsheet does. |
| tent footprint tyvek | The DIY classic. Tyvek house wrap is tough, cheap, and light; it softens with washing, is a little noisy in wind, and plenty of backpackers have used it for years. |
| tent footprint alternative | Tyvek, a trim-to-fit tarp, a piece of 4-mil poly sheeting, or even a cheap blue tarp folded to size. The only rule is that nothing extends past the tent's edge. |
| tent footprint material | Nylon or polyester with a coated underside for weight, Tyvek for cost, and polyethylene for the throwaway end of the market. Coated nylon packs smallest. |
| tent footprint size | Match the floor plan and go one step smaller, not one step bigger. If the tent is 7 x 7 ft, a 6.5 x 6.5 ft footprint is correct — overhang is the one mistake that makes a footprint worse than nothing. |
| tent footprint which side up | Coated or shiny side down, facing the ground, so moisture stays below the barrier instead of pooling on the smooth face against your floor. Loop or grommet side up if it has them. |
| tent footprint backpacking | Worth the weight only on rocky or sandy ground. Many ultralight tents instead use a single-wall design with a thinner floor and treat careful site selection as the protection. |
For car camping on gravel or forest floors, a cheap tarp folded to size does the footprint job at a tenth of the price. For backpacking, Tyvek cut to shape is the standard hack.
The 30-Second Recap
- Pick flat, high, dry ground — look up for widowmakers.
- Lay out and loosely stake the four corners, taut not bunched.
- Thread color-matched poles: ends seated first, then the arch.
- Run guy lines at 45 degrees, even in calm weather.
- Fly it regardless of forecast — weather changes fast.
- Tension everything; do the 30-second push test on each wall.
- Pack dry, fold along seams, dry within hours if damp.
Pitch a tent right once and it stops being intimidating. Pitch it wrong once in a storm and you'll never forget the lesson — so learn it here instead.
Before the next wet weekend, it is worth ten minutes with our tent leaking and waterproofing guide — it walks through sealing seams and re-proofing a fly that has stopped beading.
Tent Setup FAQ
How long should pitching a tent take?
Under ten minutes for any normal tent, and under two for an instant cabin. If it's taking longer, something is wrong — usually a pole in the wrong sleeve or the fly put on inside-out. A Coleman Skydome 4-person has pre-attached poles and pitches in about five minutes; the CORE 6-person instant cabin is up in around 60 seconds.
Do I need to seam-seal a new tent?
Not usually — factory-sealed seams are fine for the first season. But coatings and seam tape degrade with UV, and a tent that leaks in year two almost always leaked at a seam first. Re-proofing with a Nikwax SolarProof treatment once a season is cheap insurance.
What if I lose a stake or a pole section?
Stakes are consumable, so replace them with better ones and carry two spares. A lost pole section is a real problem — a pole repair sleeve or splint gets you through the night, and the tent maker sells replacement sections. This is why you pitch your tent before you need it, at home, and count the parts.
The same trip-saving logic applies to fabric. Most tent "leaks" that appear mid-season are not seam failures at all — they are pinholes and half-inch tears where a pole end, a zipper pull, or a stray branch wore through the fly, plus the guy-line tab that pulls off in a gust. A GEAR AID Tenacious Tape patch ($14.39, 4.2 stars, 2,117 reviews) is the two-minute fix: clean the area, cut a patch with rounded corners so the edges cannot peel, press it down, and it holds through a wash and a full season of UV. Be clear about the limits, though — tape will not patch a snapped aluminium pole section and it is not a substitute for re-sealing a factory seam. It buys you a dry night on torn fabric, which is the failure you are most likely to actually have.
Should I use a footprint?
Yes on rough ground, no on soft grass. A footprint protects the floor from rocks and roots and keeps ground moisture off the base, but a cheap tarp that extends past the tent's edge will channel rain underneath it. If you're not buying the maker's footprint, size it slightly smaller than the floor.
What do I do if it starts raining during setup?
Get the fly on first, or pitch the tent upside down so the floor protects the inside, then flip it. The important thing is that the interior stays dry — a wet interior means a cold night, and a tent pitched in rain without a footprint will wick water up through the floor.
Where should I pitch it?
Look up first — dead branches are the classic camping injury. Then pick a spot that's slightly elevated rather than in a hollow (cold air and water collect in low ground), orient the door away from the prevailing wind, and don't pitch under a lone tall tree in a storm.
How do you pitch a tent by yourself?
Stake the four corners loosely, then thread the poles. A staked and roughly taut floor holds the shape of the tent while you bow the poles up with one pair of hands, which is the entire trick — a loose, unstaked body shifts under the frame and makes the arch harder to seat. Pre-attached poles and clips make solo pitching genuinely easy, which is why they are the norm on family car-camping tents.
Do you tie guy lines or stake them?
Both, in that order. Tie the line to its attachment point with a taut-line hitch (adjustable) or a bowline (fixed), run it out three to four feet at 45 degrees, then stake it down. A guy line that is staked but never tied off will slide, and a line tied to nothing is decoration.
Is a tent footprint the same as a tarp?
No. A footprint is cut to the shape of the tent floor and sized slightly smaller, usually with corner loops to clip under the poles. A tarp is a flat rectangular sheet you fold or trim to fit. Both protect the floor; only the footprint is shaped for it, and any overhang past the floor edge channels water underneath.
What size footprint do I need?
Match the floor plan and go slightly smaller — if the tent floor is 7 x 7 ft, a 6.5 x 6.5 ft footprint is right. Never buy a footprint larger than the floor. On soft grass in fair weather you can skip it entirely; on gravel, rock, sand, or pine duff, bring it.
How do you pitch a tent on a platform?
Use the eye bolts, cleats, or rails on the platform instead of stakes — most permit-area and park platforms ban stakes because they pierce the deck. Run your guy lines to those fixed points and tension them, and carry ten extra feet of cord for exactly this situation. If the platform has nothing to tie to, weight the corners with gear.
Can you pitch a tent without stakes?
Yes. Weight the corners with rocks, gear bags, or water jugs and run the guy lines to anything immovable — a picnic table leg, a tree trunk, or the corner of a truck bed. A taut line to a solid object holds better than any stake in sand.
<!-- AFFILIATE_DISCLOSURE -->