How to Pack a Cooler for a Weekend Camping Trip (2026)
Learn how to pack a cooler for a weekend camping trip: the 2-cooler system, layering order, pre-chilling tricks and food-safety rules that keep ice.
In this article · 11 sections
- Quick Answer: The 2-Cooler System, In One Box
- The 2-Cooler System: Drinks Go in a Different Cooler
- The Layering Order: Ice, Cold, Colder
- What to Pre-Chill, What to Freeze, What to Skip
- The Drinks Cooler Setup
- Food Safety: The Rules That Keep Everyone Well
- The Weekend Timeline: Friday to Monday
- Common Cooler Mistakes (Learn From Mine)
- What About the Rest of the Camp Kitchen?
- How to Pack a Cooler FAQ
- The Bottom Line
The scene is the same at every campground on Friday evening: someone holds up a lukewarm soda, sighs, and starts digging through a cooler that's already a puddle of cold water with floating hot dogs. It doesn't have to be you.
Here's the thing about cooler packing that most first-timers get wrong: a cooler is not a box you fill with food and dump ice on top. It's a thermal system. How you arrange what's inside matters almost as much as the cooler itself — and with the right system, a $40 Coleman will out-ice a poorly-packed $350 YETI.
This guide covers the complete weekend-camping cooler method: the two-cooler split, the exact layering order, what to pre-chill (and what never to freeze), and the food-safety rules that keep a family of four eating well from Friday night to Monday morning. For help choosing which cooler fits your trip, see our complete cooler buying guide — this article assumes you already have one and want to use it right.
Quick Answer: The 2-Cooler System, In One Box
- Budget weekend workhorse (5 days of ice): Coleman 70-quart Xtreme ($79.99).
- Rolls to the site: Coleman 316 Series 62qt wheeled cooler ($84.99).
- Best value hard cooler: RTIC 45 QT ($239.00).
- Drinks-only day cooler: YETI Roadie 24 ($250.00).
- Soft-sided for the front seat: Stanley All-Day Julienne cooler bag ($100.00).
- Real ice-retention test data: our cooler comparison.
The 2-Cooler System: Drinks Go in a Different Cooler
The single highest-impact change you can make this weekend is splitting your cold stuff into two coolers:
- Cooler #1 — Food (the "main" cooler): opens rarely, stays shut 95% of the time, holds meat, dairy, leftovers, and pre-made meals.
- Cooler #2 — Drinks (the "day" cooler): opens constantly, gets topped off with ice, and takes the abuse.
Why this matters: every time you open a cooler, cold air escapes and warm air rushes in. A family of four grabbing drinks for a weekend opens the cooler 30-50 times a day. If that's the same cooler holding your chicken for Sunday's dinner, you're melting your food's ice reserve one soda at a time.
The drinks cooler doesn't need to be fancy — a basic Coleman 316 Series Wheeled Cooler 62QT at $85 handles the job, and the wheels are genuinely useful for hauling a case of soda plus bagged ice from the car. If you want a premium option that shrugs off a weekend of constant opening, the YETI Roadie 24 is the popular pick — it's small, rugged, and its insulation laughs at a warm afternoon.
The food cooler is where you spend the real money on ice retention. The Coleman 70-Quart Xtreme 5-Day is the family-camping workhorse for a reason: at $80 it holds enough for four people for three days, and the 5-day ice claim holds up in practice when packed right. For the budget-conscious who still want rotomolded toughness, the RTIC 45 QT undercuts the big premium brands while keeping a full weekend of ice. And if you want the maximum ice retention money buys — or you camp somewhere that requires bear-resistant food storage — the YETI Tundra 45 is the premium food cooler, while the wheeled YETI Tundra Haul is the same build in the version you don't have to carry.
The one exception: if you're only doing a day trip or a single overnight, skip the split and use one cooler — the Stanley All Day Julienne Soft Cooler is perfect for that use case, and it folds down when empty.
The Layering Order: Ice, Cold, Colder
Packing order is the difference between a cooler that sweats through Saturday and one that's still holding ice Monday. Here's the sequence that works, top to bottom:
Step 1 — Pre-chill the cooler (12-24 hours before)
A warm cooler shell eats ice. The night before, put the empty cooler in the garage or basement (or inside an air-conditioned room) with a couple of frozen water bottles inside. Even 6 hours of pre-chilling measurably slows the first-day melt.
Step 2 — Bottom layer: block ice or the coldest items
Frozen meat, frozen water bottles, and block ice go on the bottom. Cold air sinks — the coldest zone of the cooler is the floor, and that's where your most perishable items belong. If you have a block of ice (or a frozen gallon jug — my favorite hack), lay it flat across the bottom first.
Step 3 — Middle layer: food that needs to stay cold, not frozen
Deli meat, cheese, eggs, cooked food, butter. These sit directly on the bottom cold zone. Pack them in airtight containers — not just for cleanliness, but because food-to-food contact transfers cold far better than food-to-air.
Step 4 — Top layer: items that tolerate temperature swings
Things you'll grab quickly — fruit, vegetables, condiments, drinks if you didn't split them out. The top of the cooler is the warmest zone and the most exposed every time you open the lid.
Step 5 — Last: ice on top, then close
Ice on top is the #1 rule. As the ice melts, cold water trickles DOWN through the whole cooler, continuously re-chilling everything beneath it. If you bury ice at the bottom with food above it, you've built the system backwards — the cold never travels upward.
Use bagged ice, not cubes from your home freezer if you can — commercial ice is denser, larger, and melts slower than the small cubes most home ice makers produce.
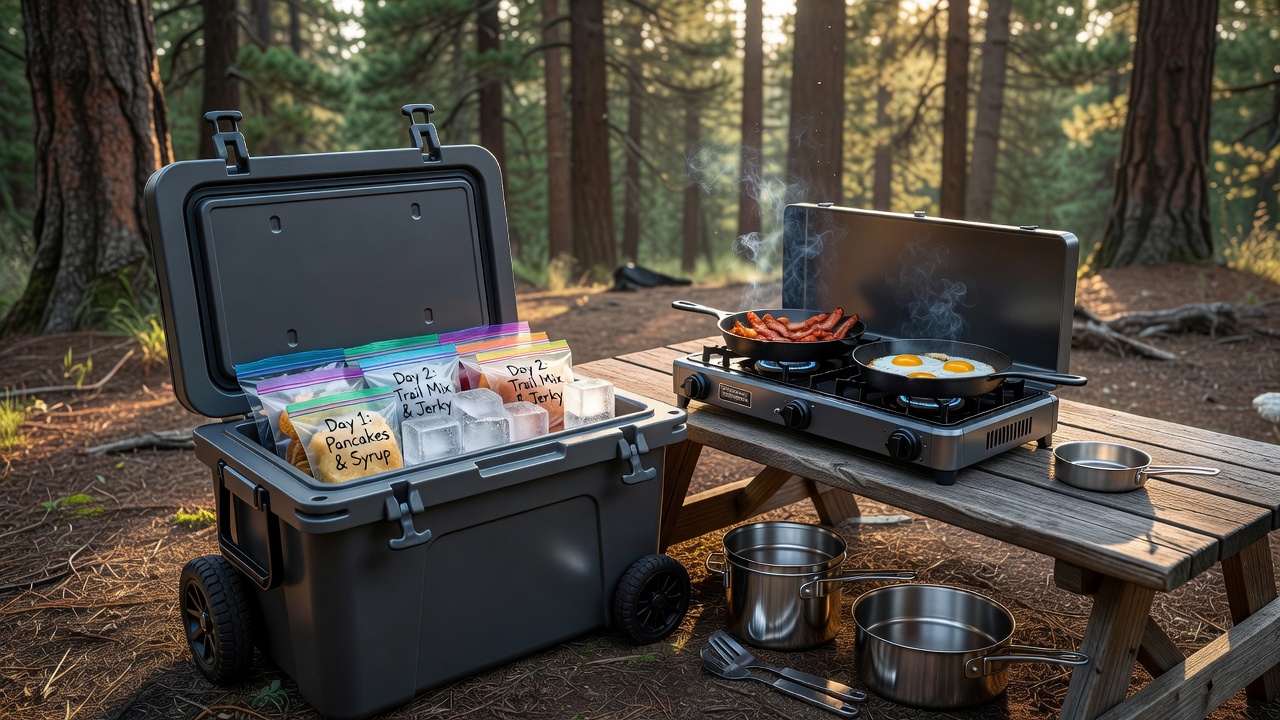
What to Pre-Chill, What to Freeze, What to Skip
A little planning at home saves a lot of ice at the campsite:
| Item | Do this | Why |
|---|---|---|
| Drinks (cans/bottles) | Pre-chill in the fridge 24h before | Warm cans are the #1 ice killer — room-temp drinks melt ice in hours |
| Water bottles | Freeze 2-4 solid | Double duty: ice substitute + cold drinking water as they thaw |
| Meat (cooked or raw) | Freeze solid | Acts as a cold block, thaws safely over 1-2 days in the cold zone |
| Dairy / eggs | Fridge-cold, pack in middle | Needs steady cold but must not freeze (egg shells crack) |
| Fruits & veggies | Fridge-cold, top layer | Tolerate swings; crushed ice on top keeps them crisp |
| Condiments | Whatever | Ketchup and mustard survive anything; don't waste cold zone on them |
Never freeze: eggs (shells crack and leak), soda (cans burst), lettuce (turns to mush), and anything in glass that's more than half full.
The Drinks Cooler Setup
For the drinks cooler, simplicity wins:
- Pre-chill everything. Warm drinks are the difference between one bag of ice lasting the weekend and needing three.
- Ice on top, drinks below — same rule as the food cooler. As ice melts it flows down and around the cans.
- Keep a separate bag of ice for the drinks cooler. The food cooler gets a fresh sealed bag on day 2-3; the drinks cooler gets topped with crushed ice that's cheaper and melts faster (fine for drinks, not for food).
- Drain or don't drain? For drinks: drain the meltwater Saturday morning if you're topping up with fresh ice — floating cans in cold water actually stay colder, but waterlogged cans get hard to reach. For food: never drain — that cold water is your insulation.
Food Safety: The Rules That Keep Everyone Well
Cold food is safe food. Three rules, no exceptions:
- Keep it under 40°F. Perishables (meat, dairy, cooked food, eggs) that sit above 40°F for more than 2 hours go in the trash. When in doubt, throw it out — food poisoning ruins more trips than rain.
- Raw meat lives on the bottom, sealed, and away from everything. It's the coldest zone and it can't drip onto other food. Double-bag it or use a dedicated sealed container.
- Leftovers don't go back in. Food that's been out at the table for a meal has already warmed up; putting it back in the cooler warms everything around it. Eat it, toss it, or cook it — don't recycle it.
Pack your camping kitchen setup so that everything that needs the cold zone actually gets it, and keep the food cooler in the shade with a blanket over it. Shade + insulation on the outside is the cheapest ice-retention upgrade you'll ever make.
The Weekend Timeline: Friday to Monday
Thursday night (at home):
- Pre-chill both coolers with frozen water bottles
- Freeze meat, freeze 2-4 water bottles
- Pre-chill every drink you're bringing
Friday morning (packing):
- Bottom: frozen meat + frozen bottles
- Middle: dairy, deli, eggs in sealed containers
- Top: fruit, veg, condiments
- Finish: bag of ice on top, close it, and don't open the food cooler again until you're at the campsite
Friday night at camp:
- Drinks cooler is the only one that gets opened regularly
- Put the food cooler in the shade, blanket on top
Saturday:
- Top off the drinks cooler with fresh ice
- Food cooler stays sealed; it has 3+ days of ice if packed right
Sunday/Monday:
- The Coleman Xtreme should still have ice
- Eat or cook leftovers at dinner — don't bring them home
Common Cooler Mistakes (Learn From Mine)
I've made every one of these, usually at the worst possible moment:
- Warm drinks in a full cooler. The #1 mistake. A six-pack of room-temp soda can raise the internal temperature of a packed cooler by 10°F in an hour.
- Ice on the bottom. It looks logical — "ice sinks" — but it's backwards. Ice belongs on top so meltwater flows down through the food.
- Opening the food cooler "just to check." Every open is a few hours of ice life lost. Trust the system, keep it shut.
- Packing food directly against the walls. Air gaps between items and the cooler walls are where cold escapes. Pack tight, fill gaps with crushed ice or frozen bottles.
- Skipping the pre-chill. Arriving with a warm cooler means your first bag of ice fights the shell before it touches any food.
- One cooler for everything. Drinks + food in one box means the whole family's soda habit slowly melts your dinner's ice. Split them.
What About the Rest of the Camp Kitchen?
The cooler is the anchor of the camp kitchen, but it works best as part of a full system — a good stove, a solid cook set, and a meal plan. For the broader setup, our camp kitchen setup guide covers stoves and cookware, and the complete family camping gear checklist ties the whole trip together.
Planning a last-minute trip? The Labor Day weekend camping checklist walks through everything you need for a stress-free 3-day outing — and yes, the cooler is on it.
How to Pack a Cooler FAQ
How much ice do I need for a three-day trip?
Rough rule: two-thirds of the cooler's volume in ice for a hot-weather weekend, or about 10 pounds of ice per day per person in a cheap cooler — closer to 4-5 pounds in a premium rotomolded one. Pre-chilling the cooler with a bag of ice the night before buys you an extra day of retention for free.
Block ice or cubed ice?
Block ice lasts far longer because it has less surface area, so use a block or frozen gallon jugs as your base layer and cubed ice on top for packing food tightly. Cubed-only coolers drain out by day two; a Coleman 70-quart Xtreme plus blocks is the classic budget setup that reliably clears three days.
Is a premium cooler worth it?
If you camp more than four or five times a year and hate buying ice, yes. Rotomolded coolers like the YETI Tundra 45 and RTIC 45 hold ice for days rather than hours, and the RTIC does it for roughly half the price. If you're a twice-a-summer camper, the Coleman 316 Series is the better use of money.
Wet ice or dry ice?
Dry ice is worth it for long trips and frozen meat, but only with a barrier — it will freeze and crack anything in direct contact and it needs ventilation in an enclosed space. For a normal weekend, wet ice plus frozen water bottles is simpler and safer.
How do I keep drinks from ruining my food?
Give drinks their own cooler. A dedicated drink cooler that gets opened 40 times a day kills a food cooler's ice retention, which is exactly what soft-sided bags like the Stanley All Day Julienne or a small YETI Roadie 24 are for.
Where should the cooler ride in the car?
Out of the sun and on a level surface — a cooler on a hot trunk floor loses ice noticeably faster. If you're traveling far, throw a blanket or a reflective layer over it; every degree of shade counts.
<!-- AFFILIATE_DISCLOSURE -->Cooler math gets harder in a warm state — our Camping in Florida guide covers ice retention for a coastal trip where the shade you pack is the shade you get.
The rest of the one-night kit — shelter, sleep systems, stove and lighting — is in our 2-day camping trip packing list.
The Bottom Line
Packing a cooler for a weekend trip isn't complicated, but it is a system: two coolers (food + drinks), ice on top, cold food on the bottom, everything pre-chilled at home. Follow the layering order once, and the difference is obvious by Saturday — ice where other campers have lukewarm puddles, cold chicken on day three, and zero trips to the camp store for emergency ice.
What that buys you is lunch: camping lunch ideas covers 25 midday meals built around exactly this packing order, plus the 2-hour food-safety rule that decides what can ride on top all day.
Your main cooler: Coleman 70-Quart Xtreme 5-Day — the family weekend workhorse. Your drinks cooler: Coleman 316 Series Wheeled 62QT. Want to go premium? The YETI Roadie 24 and RTIC 45 QT both carry a full weekend of ice. Pack it right, and the coldest thing at the campsite is your dinner — not your patience.