Bike Camping Gear Essentials (2026): The Small Kit That Saves a Weekend Ride
Build a reliable bike camping kit for 2026: gloves, pump, multi-tool and bike rack essentials for trail rides, overnights and family campground trips.
A bike camping weekend has a funny way of exposing every tiny weak link in your setup. The tent may be perfect, the cooler may be packed, and the route may look easy on a map — then a slow flat appears six miles from camp, your palms start buzzing on rough pavement, or a bottle-cage bolt works itself loose on a washboard road.
That is why the most useful bike camping gear is not always the biggest or most exciting. A few compact, ride-saving pieces earn their space long before you need them. This guide focuses on the practical cycling layer: the gear that keeps a day ride, campground shuttle, rail-trail overnight, or family road trip rolling.
If you are still choosing how to get bikes to the trailhead, start with our best hitch bike rack buying guide. It explains the rack styles and vehicle fit questions. Once you know which style you want, our Kuat vs Thule vs Yakima comparison narrows it down by receiver size and per-bike weight limit. Here, we are concentrating on the small bike camping kit that belongs on the bike, in a saddlebag, or in the car-camping bin.
Quick Answer: The Bike Camping Kit, Ranked by What Ends Rides
- Giro Jag cycling gloves — $30.00. Buzzing palms and numb hands end more rides than climbs do.
- Topeak Mini Morph pump — $29.93. A hose and foot pad beat wrestling a frame pump at dusk.
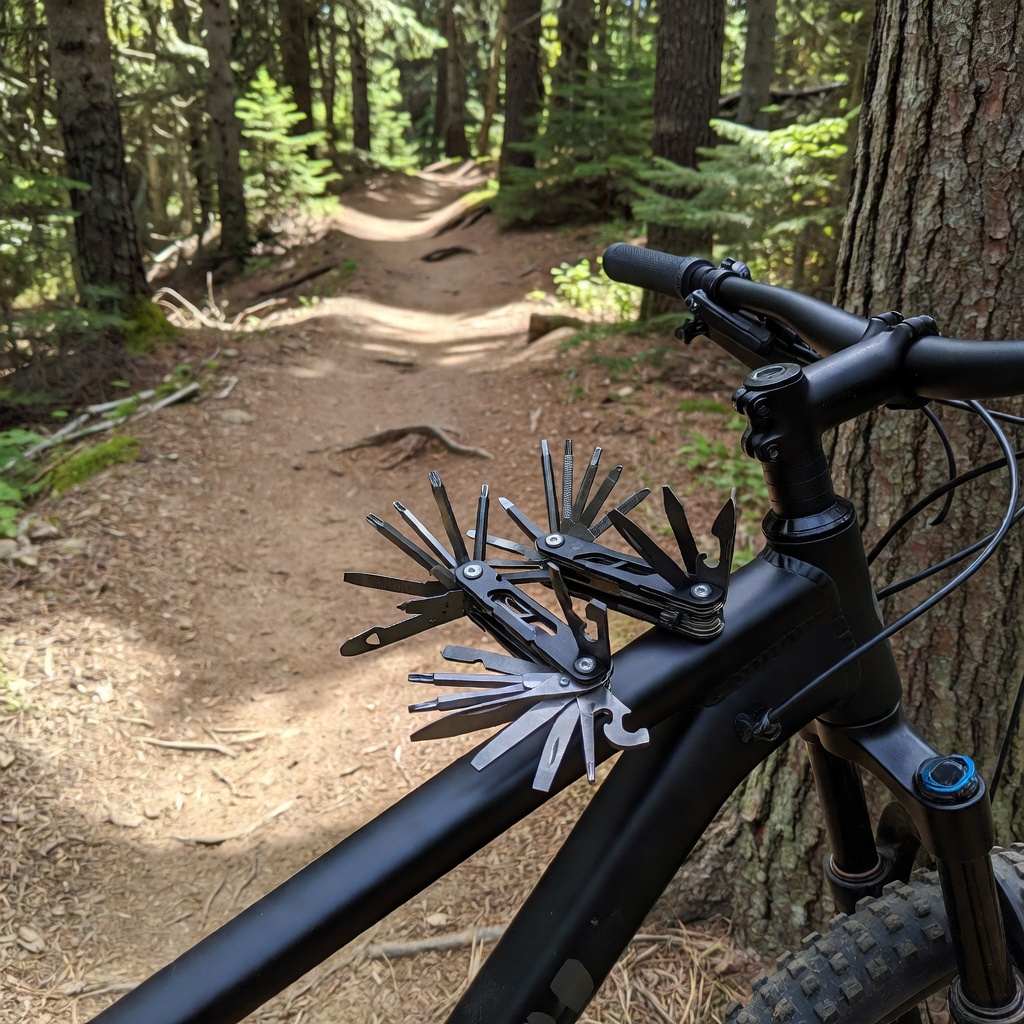
- Crankbrothers M20 multi-tool — $39.99, with an integrated tire plug kit for the punctures a tube cannot save.
- Thule Epos 2 hitch rack — $749.95. The expensive answer to getting bikes there without frame damage — worth it only if you travel with bikes often.
- Cygolite Hotrod 110/50 light combo — $36.95 so the ride home after dark is not the risky part.
- Giro Scamp MIPS II youth helmet — $52.80 for a kid on the ride.
Start with the pieces that match your next actual trip. A simple, familiar kit beats an expensive pile of gear you have not tested.
The bike camping kit: solve the problems that end rides first
For casual campground cycling, you do not need to turn your bike into a full expedition rig. You do need to cover four predictable problems:
- Hand fatigue and vibration on longer rides or gravel connectors.
- Tire pressure and punctures away from a garage pump.
- Loose hardware and minor mechanical issues before they become a walk home.
- Safe transport when the adventure starts with a drive rather than a pedal from home.
The goal is redundancy without clutter. A repair kit you leave at home because it is bulky is less useful than a compact kit you carry every time.
1. Comfortable hands: Giro Jag cycling gloves
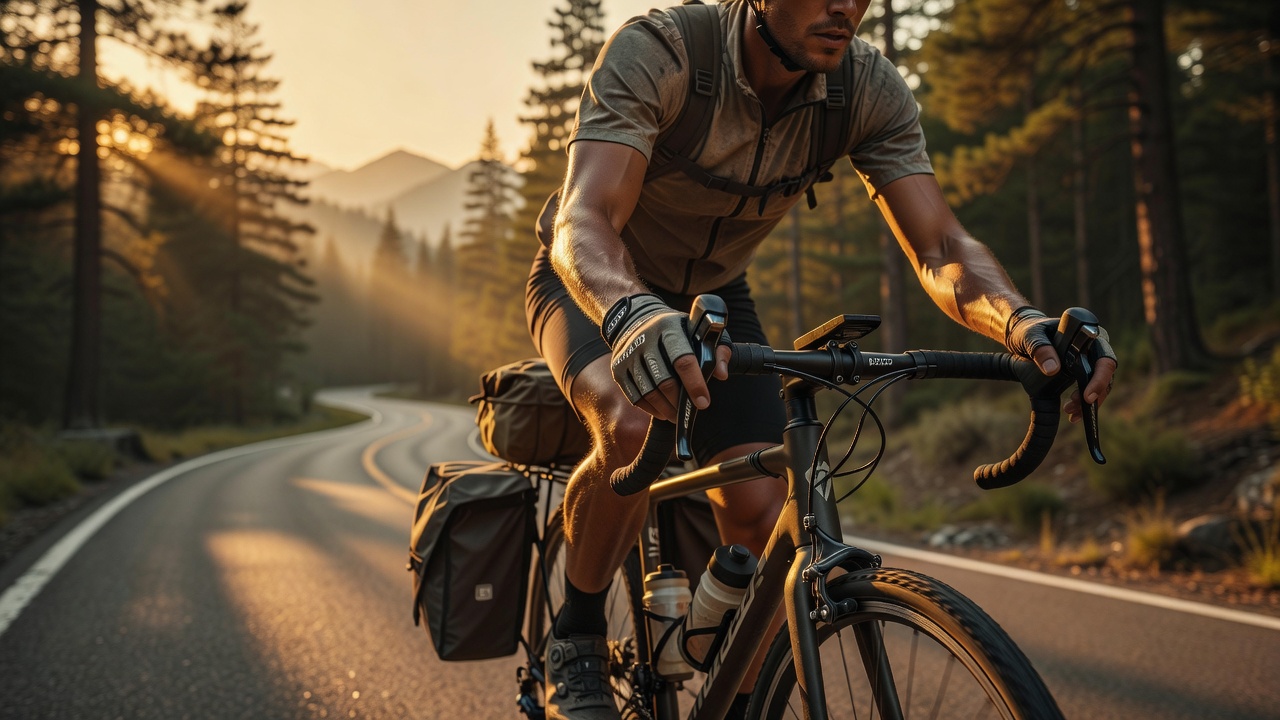
For a campground loop with kids, a brewery-to-campsite ride, or a couple of hours on mixed pavement and packed gravel, padded gloves are one of the least glamorous upgrades with the most immediate payoff. They reduce the road buzz that makes your hands tingle and give you a more secure grip when sweat, drizzle, or dusty trail surfaces show up.
The Giro Jag men's cycling gloves are a sensible first pair at around $30. Their Super Fit palm is designed to reduce bunching at the bar, while the EVA padding takes the edge off repetitive vibration. The moisture-wicking fabric and microfiber thumb are also genuinely useful on hot rides: you can wipe sweat without turning your jersey into a towel.
They are not a heavily cushioned mountain-bike glove, and sizing tends to run small, so check the size guide and consider going up if you sit between sizes. But for riders building a compact weekend kit, the balance makes sense: enough padding for comfort, enough dexterity for shifting and using a phone, and no oversized bulk when you pack them.
Pack it if: your hands go numb on longer rides, you are new to drop bars or flat-bar gravel riding, or your route includes rough campground roads.
2. A pump that works when you are tired: Topeak Mini Morph
A mini pump is easy to dismiss until you have tried to inflate a 40 psi tire with a tiny, hose-free emergency pump beside a trail. That is when lever action, stability, and valve protection stop sounding like marketing words.
The Topeak Mini Morph bike pump earns its place because its fold-out foot pad and flexible hose let it work more like a small floor pump. You are not fighting the valve stem with every stroke, and the hose is especially reassuring if your bike uses Presta valves. It handles Presta, Schrader, and Dunlop valves with a thumb-lock lever, so it can cover a mixed-family fleet without separate adapters.
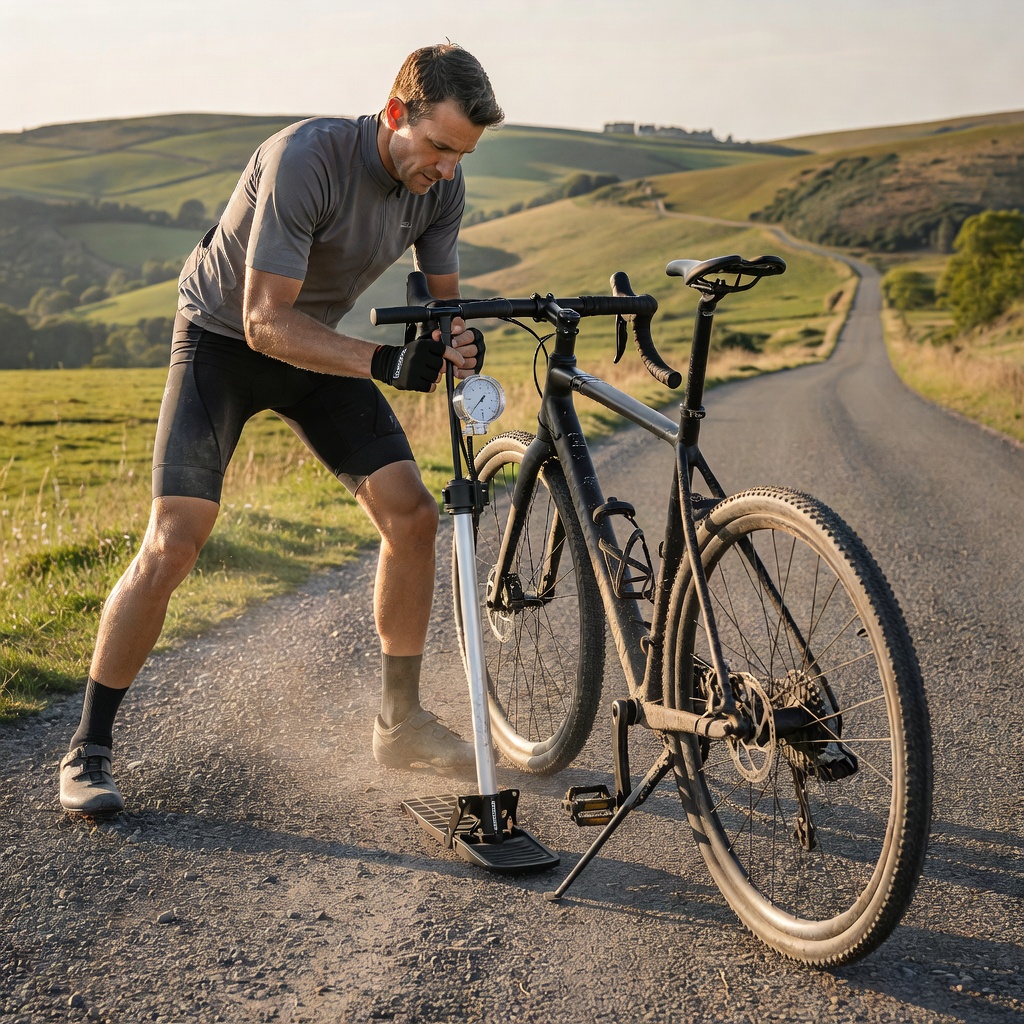
At roughly $29.93, it is an easy insurance purchase for bike camping. The aluminum barrel is rated to 160 psi, which is more than enough range for road tires as well as the lower pressures common on hybrids and gravel bikes. The tradeoff is simple: this version has no built-in pressure gauge, and the frame bracket can rattle on rough roads. Pair it with a small gauge if exact pressure matters to you, or use it as a reliable get-home pump.
Pack it if: you ride beyond cell-service range, bring kids' bikes with different valve types, or do not want a puncture to end the day.
3. The repair tool that handles the annoying surprises: Crankbrothers M20
Most campground mechanicals are small: a loose saddle bolt, a slipped cleat, a rattling bottle cage, or a tubeless tire that needs a plug. You do not need a workshop to handle those moments, but you do need more than one undersized Allen key.
The Crankbrothers M20 multi-tool with tire plug kit combines 20 high-tensile steel tools with an integrated tubeless plug tool and included plugs. That makes it more useful than a basic hex-key foldout for riders on modern tubeless setups. Its magnetic storage case can hold a quick link, and the whole package is compact enough for a jersey pocket, handlebar bag, or saddlebag.
At about $39.99, it is not the cheapest multi-tool, but it covers a lot of realistic trailside adjustments in one object. There are limits: the chain tool is small for stubborn 11-speed pins, and it does not include a disc-brake spacer or rotor truing tool. For normal bike camping, though, the M20 is the kind of tool that turns a 20-minute problem into a two-minute pause.
Pack it if: your bike is tubeless, you ride gravel or uneven campground roads, or you want one compact tool instead of a loose handful of hardware-store Allen keys.
For the complete roadside setup — spare tubes, levers, patch kits, and the order to use them when something lets go mid-ride — our bike touring repair kit checklist walks through every item for both tubeless and tube-type bikes, sized to fit a small seat bag.
4. Transport without frame damage: Thule Epos 2
Not every bike camping trip begins by pedaling out the front door. For family campground weekends, national-park loops, and rides that start far from home, the rack is part of the gear system. A cheap rack that rubs paint, blocks the hatch, or cannot carry your tire size turns the first and last mile into the most stressful part of the weekend.
The Thule Epos 2 premium hitch bike rack is a premium option at $749.95, but its wheel-only attachment is meaningful for carbon frames and unusual tube shapes. It holds bikes without frame contact, tilts for trunk access while loaded, fits bikes from kids' sizes to fat tires, and locks both the bikes and rack.
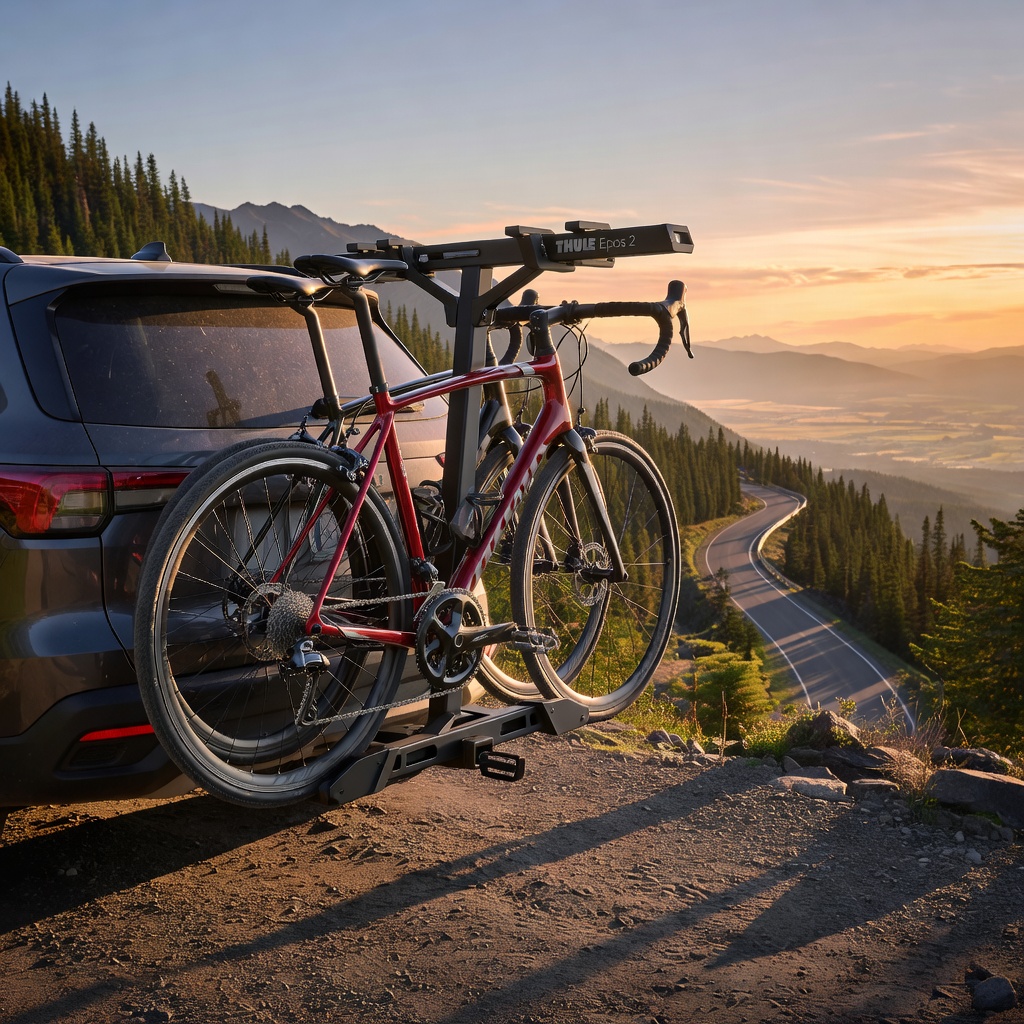
That price means it is not the automatic answer for every occasional rider. Consider it when you transport bikes frequently, own a carbon frame or e-bike you do not want clamped, or spend enough weekends traveling that fast, low-stress loading is worth paying for. For a deeper look at the tradeoffs, see our full Thule Epos 2 review.
Pack it — or rather, mount it — if: bike transport is the bottleneck that keeps you from riding more places.
A practical bike camping checklist
Before you roll away from the campsite or load up for the trailhead, use this short check:
- Gloves: Pack padded gloves, especially for gravel, long pavement sections, or a new-to-cycling partner. They are small enough to live in your helmet.
- Pump: Confirm the pump fits your valves. Bring it even on short rides; a slow leak does not care how close camp is.
- Multi-tool: Check that it has the hex sizes your bike uses. Add a spare quick link if you carry a chain tool.
- Tire repair: Tubeless riders should bring plugs. Tube riders should bring a spare tube, tire levers, and a patch kit.
- Lights: A front and rear light are worth carrying when campground dinners turn into longer-than-planned sunset rides. A USB-rechargeable set like the Cygolite Hotrod 110 front / 50 tail combo tops up from a power bank before the ride and includes daylight flashing modes for visibility in full sun.
- Water and layers: Bikepacking can make a short route feel long when the weather changes. Use our camping water filtration and hydration guide to plan water capacity, and keep a light layer handy for the ride back after dark.
- Transport check: Before driving, check rack straps or wheel arms, hitch-pin security, and whether you can still access the hatch. Our hitch bike rack guide has a full pre-departure fit checklist.
How to choose the right level of bike camping gear
The best kit depends on how you actually ride, not on the version of yourself you imagine during a late-night gear search.
For campground and family rides
Start with gloves, a pump, and a multi-tool. These three items are compact, reasonably priced, and useful whether your ride is two miles to a lake or twenty miles on a rail trail. If you drive to rides, prioritize a rack that is easy enough to use correctly every time. Riding with young kids also means making sure their heads are properly protected — the Giro Scamp MIPS II youth helmet fits heads down to toddler size with a dial-adjust system and rotational-impact protection, so it works on balance bikes, training wheels, and inside a bike trailer alike.
For gravel overnights and bikepacking weekends
Add tubeless plugs or a tube-repair kit, a chain quick link, lights, and a small first-aid kit. Check every fastener before leaving: bottle cages, rack bolts, cleats, and saddle rails are all more likely to reveal a problem after hours of vibration.
For road trips with multiple bikes
The transport system becomes the critical decision. A high-quality hitch rack can be more valuable than another tiny accessory because it determines whether everyone arrives with an undamaged, ride-ready bike. The Epos 2 is a strong premium choice, while our bike rack buying guide helps narrow the right rack category for your car and bikes.
Common bike camping mistakes to avoid
Bringing tools you have never used. Practice removing a wheel, using your pump head, and operating your multi-tool at home. A new tool is much easier to understand in a driveway than beside a trail in a rain shower.
Skipping the test ride after packing. A loaded handlebar bag can interfere with cables, a rack bag can rub a tire, and a loose pump bracket can become a rattle you hear for ten miles. Ride around the block before the trip.
Treating a rack as set-and-forget. Recheck wheel straps and attachment points after the first 10 to 15 minutes of driving. Temperature changes and road vibration can settle straps or hardware.
Packing every tool but no repair plan. Know what your kit covers. A pump plus tire plugs is excellent for many tubeless punctures; it does not solve a torn sidewall without a boot or spare tube.
Ignoring comfort because the route looks short. Numb hands, poor hydration, and a badly positioned saddle can turn an easy sightseeing ride into a miserable one. Start with comfort and reliability, then add speed-focused gear later.
Bike camping, bikepacking or cycle touring? Settle the words first
People search for the difference between bikepacking and touring and expect one clean paragraph, so here it is: touring means racks and panniers on a bike built for pavement, while bikepacking means soft bags strapped to the frame for rougher routes. If you want the sharp version, bikepacking vs cycle touring is mostly a story about luggage rather than distance, and the classic bike touring vs bikepacking argument usually ends the same way - the rider with the lighter setup climbs faster and sleeps colder.
Because the words overlap so much, buyers end up comparing bikepacking vs touring bike specs when what they actually need to decide is volume. Think of bikepacking vs touring setup as a question of where the weight sits: behind the rear wheel on a rack, or spread along the top tube and fork. If you still cannot choose between bikepacking or touring, start from the trips you already take - a two-night state park ride with a kid on a tag-along is touring logic, a forest-road overnighter with a bivy is bikepacking logic.
Nobody needs a formal class for this, which is why a plain-language bikepacking beginners guide matters more than a glossary. The best bikepacking tips for beginners are unglamorous: ride the loaded bike once before you leave, keep heavy items low and centered, and be honest about how many miles you actually enjoy with a loaded bike. A short bikepacking essentials for beginners list is shelter, sleep system, water, food, lights, tools and one dry bag for anything that must stay dry.
If you would rather shop than study, treat bikepacking gear for beginners as a budget question - buy the bags that fit your frame, borrow the tent, and spend the money on tires and brakes. The same logic applies to bike camping 101: the first trip should be one night about ten miles from home so you can bail out at midnight if the sleep system fails. You can learn how to bike camp in a weekend, but you cannot really how to bike with camping gear at all until you have ridden twenty loaded miles.
When someone asks how to take bikes camping, they usually mean a drive-to campground with the bike in the truck bed, which is a completely different packing problem from a bike packing camping setup that has to survive thirty miles of gravel. Both are worth doing, and most bike camping ideas mix them: a rails-to-trails overnighter, a lake loop with a reserved site, a fall foliage ride with a cabin as a bailout, and a first weekend on a fire road you already know.
Panniers, handlebar rolls and frame bags: where the gear actually goes
Bags decide whether a bike camping trip feels fun. The most-searched comparison in this category is the best bike panniers for touring against the best bike panniers for bikepacking, and the honest answer is that they are the same bag mounted differently: touring wants a stiff rack and hook system, bikepacking wants a bag that does not move when the trail turns rough. Anyone shopping the best bikepacking panniers is really shopping rack bags that survive gravel.
Start with the rack, not the bag. If you search best bike panniers rack, you are asking about eyelets on the frame and a rack rated for the load you plan to carry - and if your frame has no eyelets, you are in the seat-bag and frame-bag world whether you like it or not. Waterproofing is the second filter, and best bike panniers waterproof is really a search for welded seams and a roll-top closure rather than a fabric with a coating.
Capacity confuses first-time buyers, so here is the practical version: a pair of 20-liter bags is a car-camping amount of gear, 12 liters per side is a comfortable load, and anything on your back deserves a second thought. The reason people look at the best bike panniers backpack hybrids is that they want the commute function too, and the reason most go back to a rack is that a loaded backpack raises your center of gravity for forty miles. A pair of bike panniers ortlieb style with one large hook is the benchmark design for a reason: one motion on and off, no rattle, and a shape that survives being set down in the dirt.
Commuters ask about bike panniers vs basket every week. A basket is fine for groceries at three miles; a pannier is what you want at thirty, because the load sits below the axle line and does not swing the bars. If your rides are grocery runs with a six-mile detour, be honest about which one you are actually doing.
Between bike touring panniers and bike touring bags on one side and the soft kit on the other, the technical difference is the mount: soft bags strap against the frame with no hardware, so a bike set up for bikepacking bags vs panniers needs a different mount to accept a rack bag. This is also why the bikepacking bags handlebar position is so popular - it is the only spot that stays usable when the frame triangle is tiny. A half frame bag bikepacking setup leaves room for a bottle and is the most useful single bag on a small frame; a full frame bag bikepacking setup is the choice when you carry a bladder and want the weight dead-center; and a top frame bag bikepacking setup for snacks and a phone is the one bag nearly everyone keeps. An apidura bikepacking frame bag or a bikepacking bags revelate harness are the reference points people compare against when they shop best bikepacking bags brands, and a frame bag bikepacking waterproof build is the one place where a welded zip is worth the money. Whatever you buy, plan a best bikepacking bags setup around the frame you own rather than the one you saw online.
Up front, three shapes do almost all the work. A bikepacking handlebar bag harness holds a dry bag clear of the cables; a bikepacking handlebar bag mount has to clear your levers at full lock; and a bikepacking handlebar bag waterproof roll-top is the difference between a wet sleeping bag and a dry one on a rainy night. That is why the handlebar roll bag bikepacking form factor - a long cylinder strapped to the bars - remains the standard for sleep systems, and why best bikepacking bags for gravel bikes advice almost always starts with a bar roll.
Out back, the saddle bag family is a study in sizes: a small saddle bag bikepacking bag for a day ride, a large saddle bag bikepacking bag for two nights, and a saddle bag harness bikepacking to stop the load wagging. A seat bag bikepacking setup above fifteen liters will swing unless it is braced, and a topeak saddle bag bikepacking or ortlieb saddle bag bikepacking harness with a stabilizer arm is the usual fix. A saddle pack bikepacking bag in the twelve-liter range is where most riders land, and when someone asks for the best bikepacking saddle they are usually asking which one does not rub their thighs - which depends on saddle width and how far back you sit.
Bike choice changes the bag list more than the bag list changes the bike. gravel bike bikepacking bags are the easiest to fit because frame triangles are roomy and the bars are wide, so best bikepacking bags for gravel bikes is a mature question with plenty of answers. A hardtail wants the best bikepacking bags for mountain bikes shape - smaller frame bag, bigger bar roll - and a full-suspension bike needs the best bikepacking bags for full suspension approach, where the frame bag is split so the rear triangle can still move. Whatever you pick, the test is the same: load the bike, ride it around the block, and listen for anything that moves.
The tent and sleep system: the one place to spend money
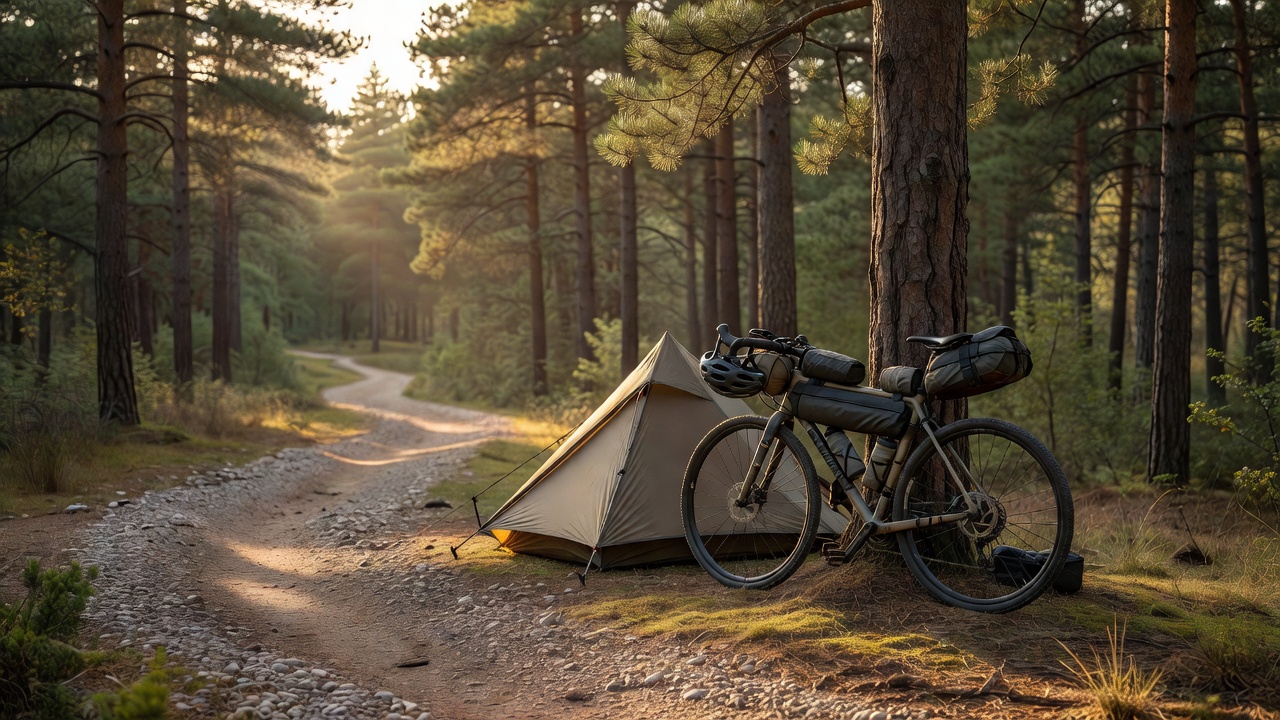
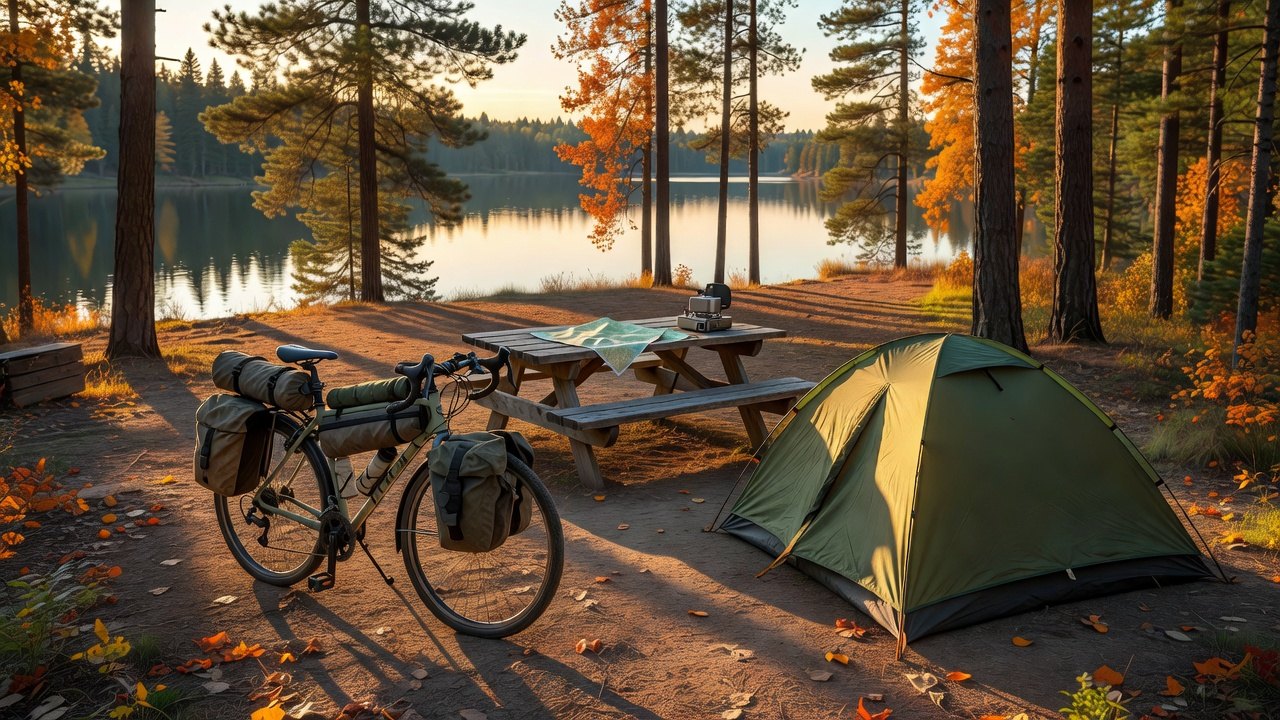
A bike camping trip is only as good as the sleep at the end of it. Shelter is where budget riders overspend on volume and underspend on waterproofing, so the best bike camping tent is usually the lightest one that still has a full-coverage fly rather than the largest one that fits on the bars.
Sizing drives everything. A best bikepacking tent for 1 is a solo-shaped wedge that packs short enough to strap to the bars; the best bikepacking tent solo option for tall riders is often a two-person model used alone, because the extra length matters more than the weight. A best bikepacking tent 2 person is the default for couples and for one rider plus gear, and a best bikepacking tent 3 person is the family answer for two adults and a small kid who still sleeps between them. If money is the constraint, a best bikepacking tent budget pick with a decent fly beats a bargain tent with a mesh-only roof, and a best bikepacking tent under 100 is realistic if you accept a heavier package and a shorter packed length.
Short packed length is the whole point, which is why bikepacking tent poles - or a pole-free trekking-pole design - show up in every recommendation. A bikepacking tent 1 person with three folding pole segments fits between the drops; a long pole set does not. Storage matters too: bikepacking tent storage is the habit of keeping the fly separate from the inner so a wet night does not soak the inside of your bag the next morning, and a bikepacking tent with bike storage is a nice convenience for the same reason - the bike stays under cover and out of sight. Anyone upgrading from hiking should read a bikepacking tent vs backpacking tent comparison before buying, because the trade is packed length instead of trail weight. A bikepacking tent big agnes style freestanding model is the usual first recommendation when the budget allows it.
Underneath, the same logic applies. A bikepacking sleeping bag 3 season covers most of the year if you layer; a bikepacking sleeping bag summer bag is a compact, cheap, warm-weather-only choice; and a bikepacking sleeping bag compact design in the 30-degree range is what most riders carry most months. A bikepacking sleeping bag or quilt decision usually comes down to how you sleep - quilts save weight and bulk if you sleep warm, bags are easier if you move around. A bikepacking sleeping bag liner is the cheapest way to extend a summer bag into October, and a bikepacking sleeping bag and pad pairing should be planned together so the pad's R-value matches the low temperatures you expect. The best bike camping sleeping bag for a family campground trip and the best bike camping sleeping pad for a car-supported ride can both be heavier and cheaper than a pure bikepacking set, and the best bikepacking sleeping bag plus best bikepacking sleeping pad pairing is where the money goes if you plan to ride through fall.
The tent-and-sleep kit, matched to the shapes above
Everything in this section is about packed length rather than trail weight, so the picks below are sorted the same way - the tents by the size they roll to, the pads by whether you want them inflatable or indestructible.
- Night Cat 2-Person Backpacking Tent - $53.99. The "best bikepacking tent under 100" case the section names: aluminum poles, a short packed length, and a full-coverage fly that survives a wet night two.
- Kelty Late Start 2P Backpacking Tent - $159.95. The default two-person answer for couples and for one rider plus gear, in a three-pole shape that still fits between the drops.
- Naturehike Cloud-Up 2 Person Backpacking Tent - $143.10. Ships with its own footprint, which is the same habit as keeping the fly separate from the inner - the groundsheet takes the wet, not the tent floor.
- Big Agnes Copper Spur HV UL2 - $549.95. The freestanding upgrade the section flags for "when the budget allows it" - the lightest thing here that still pitches without stakes.
- Therm-a-Rest Z Lite Sol - $54.95. Closed-cell foam: it cannot puncture, cannot leak, and cannot fail on night three. The lowest-risk answer to the pad half of the decision.
- Klymit Static V - $64.95. Packs to about a bottle and still insulates, for riders who want the pad inside the bar roll rather than strapped outside it.
- Litume Fleece Sleeping Bag Liner - $57.98. Exactly the "cheapest way to extend a summer bag into October" the section describes - it adds up to 27F for a fraction of a new bag.
- Kelty Cosmic Down 20 - $169.00. The one-bag answer for a rider who would rather carry a single 20-degree bag than a summer bag plus a liner.
Cooking on a bike: fuel, pots and what actually gets eaten
Cook or do not cook is the first decision, and bikepacking without stove travel is a legitimate strategy - you eat in town, carry no fuel, and save a liter of space. Most people still carry one, and the best bikepacking stove is a small canister burner that fits inside a pot with the fuel bottle wedged in the frame bag.
Fuel type drives the rest. A bikepacking gas stove is the easiest to live with because canisters are available at nearly every outdoor store, while a bikepacking alcohol stove is the cheapest and quietest option and a bikepacking wood stove is a genuine choice only where open fires are allowed and dry twigs are abundant - which rules it out in most fall fire restrictions. A jetboil bikepacking stoves style integrated system boils fast and packs as one unit, and a trangia stove bikepacking setup is the classic alcohol choice for riders who want a windshield and a real simmer.
Your bikepacking stove setup should answer three questions: where does the fuel ride, where does the pot ride, and what happens on a windy evening. A bikepacking stove kit that nests into one pot pays for itself in packing space, and a lightweight bikepacking stove plus a windscreen is faster in wind than a bigger burner without one.
The rest of a bikepacking cooking setup is a pot, a lid, a lighter, a scrubber and a small towel. A bikepacking cooking pot in the 750 ml to 1.5 liter range covers coffee, noodles and one-pot meals; a deeper pot is easier for pasta and oatmeal, and a shallow pan is easier for eggs and pancakes. A bikepacking cooking stove and a pot that fits inside it is the difference between a 1.2-liter dry bag and a 3-liter one. If you are buying a set, the best bikepacking cooking set is the one whose pot lid doubles as a pan, and the best bikepacking cooking system is the one where every piece nests and nothing rattles on gravel. A best bikepacking cooking pot with a heat-exchanger base will boil noticeably faster but takes longer to clean.
Food is where beginners overthink and then under-eat. bikepacking cooking food that works is anything that boils in one pot and needs no draining: couscous, instant rice, ramen, dehydrated beans, oatmeal with the nuts already in the bag. Practical bikepacking cooking gear on top of that is a long-handled spoon, a sealed salt-and-pepper shaker, and a small bottle of oil. When you plan bikepacking cooking setup for two people, split the cook kit so one rider carries the stove and fuel and the other carries the pot and the dry food - that way one lost bag does not cost you dinner. Simple bikepacking cooking recipes like one-pot rice with a can of chicken travel better than anything with fresh ingredients, and if you want variety without extra weight, bike camping meals built around a tortilla are the most forgiving format there is. bike camping food ideas that survive a warm day are the ones that start shelf-stable, and bike touring food ideas plus a couple of bike touring food recipes you have tested at home will save you from a gas-station dinner every night.
The cook kit, matched to the stove choices above
The section sorts stoves by fuel type and by how they nest, so here is that same list as real gear - plus the cheap part that decides a windy evening.
- MSR PocketRocket 2 - $49.95. The "small canister burner that fits inside a pot" the section calls the default bikepacking stove.
- Jetboil Flash Personal Cooking System - $119.95. The integrated "boils fast and packs as one unit" case - burner and pot are the same object.
- MSR WhisperLite Universal - $149.95. Runs canister or liquid fuel, which is the answer when a cold morning drops canister pressure and the trip is long.
- MSR Heat Reflector and Windscreen - $16.97. The section's rule - "a lightweight bikepacking stove plus a windscreen is faster in wind than a bigger burner without one" - for the price of a coffee.
- MalloMe 17-Piece Mess Kit - $32.99. The nesting one-pot kit that turns the cook load into a 1.2-liter dry bag instead of a 3-liter one.
- GSI Outdoors Pinnacle Camper Cookset - $159.95. The two-person version the section describes, where the pot lid doubles as a pan and nothing rattles on gravel.
Water: the plan is a route, not a bottle size
Water is the constraint that decides where you can actually sleep, so plan it before the tent. bikepacking water carrying usually means two bottles on the frame plus a bladder or a collapsible cube, because a bike has room for volume but not much for weight in one spot.
For pavement trips, a bike touring water bottle in a cage on the down tube and a second on the fork will get you between refills, and a bike touring water storage bottle of 1.5 liters in a pannier covers cooking and morning coffee. A touring bike water bottle cage can be doubled with a clamp-on mount if your frame has no second set of bosses. Where the route is dry, a bike water carrier in the form of a frame-mounted cube is the least annoying way to carry four extra liters, and a bike water canister in the 3 to 6 liter range is a good choice for a family campground where the tap is a walk away. For daily rides, bike riding water bottles with a wide mouth are easier to fill from a campground spigot than a narrow-mouth bottle, and easier to clean at the end of the season.
Those two water plans need two different containers, and the catalog covers both - plus the insulated one for the cold-morning ride.
- CamelBak Crux 3L Hydration Reservoir - $34.95. The bladder the "two bottles on the frame plus a bladder" plan assumes - volume where the weight sits closest to the frame.
- Nalgene 32 oz Wide Mouth - $16.99. The wide-mouth bottle the section calls easier to fill from a campground spigot than a narrow-mouth one, and easier to scrub at the end of the season.
- Hydro Flask 32 oz Wide Mouth - $44.95. Insulated, for the shoulder-season ride where an uninsulated bottle is genuinely unpleasant to drink from.
Lights, locks and the rules you will actually be checked on
Lights are a safety item first and a legality item second. Riders ask do you need a light on your bike at night because they ride home in the dark half the year, and the answer is that you need a white front light bright enough to be seen, a rear light, and enough runtime to get back if you misjudge the daylight. The other half of the question, do you need bike lights during the day, matters on roads where a daytime flasher measurably reduces being overlooked at intersections.
Rules vary by state, so treat bicycle lights required by law as a local check rather than a national standard - most places require a white front light and a red rear light or reflector after dark, and some require a side reflector. Practical bike lights waterproof ratings matter more than lumens for a bike camping trip, because a light that fills with water on a rainy ride leaves you invisible on night two. bike touring lights should be USB-rechargeable and last a full evening; a small power bank in the frame bag is the cheapest backup you can carry.
Locking is a smaller problem than people expect and a bigger one than they plan for. can you lock your bike anywhere is a fair question at a campground - most sites have a picnic table, a post or a tree, and a cable lock is enough to stop an opportunistic walk-away. A camping bike lock should be light enough that you do not leave it at home, and a bikepacking bike lock that doubles as a cable for your bags is a good compromise. In town, a bicycle touring lock rated for a real theft risk is worth the weight, and how to carry a u lock on a bike is solved by a frame-mounted clip or by strapping it under the saddle bag where it cannot rattle.
Two fit items are worth checking before you load the bike for real. Changing bike touring handlebars - to a flared drop or a swept alt bar - moves your hands, changes where the bar roll sits, and is the single biggest comfort upgrade on a loaded ride. A bike touring saddle that is comfortable for two hours is not automatically comfortable for six, and a bike touring gear setup with a very low climbing gear matters more once you add fifteen pounds of gear. Both are worth a shakedown ride before a long trip.
Trailers, kids, dogs and e-bikes: the family setups
Not every bike camping trip is a solo overnighter, and the family version changes the gear list almost completely. bike camping with trailer setups trade packing discipline for volume: a bike trailer for camping gear carries the tent, the cooler and the camp chairs, and a bike cargo trailer camping setup means one adult pulls all the bulk while the kids ride unloaded.
If you want the trailer to be a tent as well, a bike camping trailer tent design sleeps two and needs no separate shelter, and a bike trailer camping tent of similar shape works the same way - the trade is that you cannot detach the trailer for a side trip. A bicycle camping trailer tent setup is best on rail trails and flat campground loops; it is miserable on singletrack. When you are pulling weight, plan bike camping with a trailer as a shorter-miles day, and remember that braking distance is the thing you will notice first.
Dogs are the other family variable. bike camping with dog trips are easier with a trailer than with a basket because the dog has shade, water and a floor: a bike trailer with dogs arrangement keeps a 40-pound dog low and centered, and a how to carry a dog on a bike plan should start with the trailer if your dog is over about 15 pounds. A bike touring with dog trip needs a leash routine at every stop and a mat the dog recognizes, and a bicycle touring with dog packing list needs about two liters of water per dog per riding day. can i take my dog on a bike ride is really a question about the dog's fitness and the bike's stability; a tired dog leaning in a basket will tip a loaded bike, and the same dog in a four-wheel trailer will sleep.
Kids are easier than dogs. bike touring with kids works best when the adult carries the gear and the kids carry their own water and snacks, because a child with an empty bike has a much better day. A family bike camping plan on a rail trail with a reserved site beats an ambitious route every time, and a first overnight 8 miles from the car is the version that gets repeated.
E-bikes change the math in the most useful way. An ebike camping gear list adds a charger and a plan, and an ebike camping setup can carry more weight for the same effort, which means a bigger tent and a real cooler. An ebike camping tent trip still has to solve the battery: how to charge ebike when camping usually means a powered site, a campground outlet, or a car charger on a drive-to trip, and an electric bike touring plan should know the real range with the loaded setup rather than the brochure number. An electric touring bike range estimate should be halved for hills and cold mornings. If you want the trailer version, an ebike camping trailer or an electric bike camping trailer makes the family setup practical, and an ebike camping accessories list starts with a second charger, a lock and a cover. A bike camping with kids weekend and an ebike camping trips weekend are the two formats that convert non-riders into riders, and best ebike camping advice is almost always the same: ride it loaded once before you commit to a route.
The rack side of that plan deserves its own read: per-bike weight ratings, hitch class, ramp and fender fit, and the loading order that keeps a heavy e-bike stable are all in our e-bike hitch rack guide.
Rain: the one forecast you have to plan around
Rain does not cancel a bike camping trip, but it changes the packing list more than any other forecast. bike touring in rain is survivable and even pleasant with fenders and the right layers; what ruins the trip is a wet sleep system, which is a bag problem rather than a weather problem.
A bike touring rain gear kit is fenders, a shell, and dry bags - in that order of importance. A bike touring rain jacket should be breathable enough that you do not soak yourself from the inside on a climb, and a bike touring raincoat that doubles as a wind layer is easier to justify than a dedicated storm shell. bike touring rain pants are the difference between riding on and sitting in a puddle, and they are the item most people leave behind. Keep the sleep system in a roll-top dry bag strapped to the bars where spray cannot reach it, and pack tomorrow's clothes in a second one.
Mechanical questions come up constantly, and the answers are less alarming than the forum threads suggest. is it ok to bike in rain - yes, the bike is designed for weather, and the parts that suffer are the chain and the bearings, which is what lubrication is for. is it safe to bike in the rain is a different question: grip drops on metal plates and painted lines, rim brakes fade on long wet descents, and visibility is the real risk, so plan lower mileage and test the brakes early. As for what happens if you leave your bike in the rain, nothing catastrophic happens to a modern bike in a single storm - but is it ok for a bike to get rained on for a week straight is a no: the chain rusts, the cables stiffen, and the saddle takes on water. Dry the chain, re-lube it, and look after the bike and it will look after you.
Packing lists, routes and picking the bike you already own
Every trip starts with a list, and the shortest useful one is this: shelter, sleep, water, food, layers, lights, tools, and one dry bag for anything that must stay dry. If you want a fuller version, a bike camping gear checklist for a two-night trip is a kitchen kit, a repair kit, a first aid kit, a rain shell, a warm layer, a spare tube and a way to carry three liters of water. A bike camping gear list written for a specific trip beats a generic one every time, and a bike camping packing list for a family campground can afford a cooler and camp chairs.
Touring lists are longer because pavement trips are longer. A bike touring checklist adds cooking fuel, a second tube, chain lube, and a paper map or a charged phone. A bike touring gear checklist with weights in the margin is the single best training tool for a first long trip. A bike touring gear list for a week should fit two panniers and a handlebar bag. A bike touring packing list that lists clothes by day rather than by outfit is how people cut three pounds, and a bike touring list that stays in one note file is easier to trust than one you rewrite each spring.
The soft-bag version is different mainly in volume. A bikepacking camping checklist is shelter, sleep, water, food, tools and layers, with nothing that has a handle. A bikepacking gear checklist should be built around your frame's available space, so write it after you fit the bags, not before. A bikepacking packing list for a two-night trip is a 15 to 20 liter total. When you build a bikepacking gear list for the first time, weigh it, load the bike, and ride 20 miles before the trip. A good bikepacking gear guide will tell you the same thing, so read one and then check it against your own frame.
Two packing habits pay off immediately. how to pack for a bike trip is a skill of small containers: roll, do not fold, and put anything you might need at camp in the bag you open first. how to pack a bike for travel - the truck-bed and airplane version - needs the rear derailleur protected, the bars turned, and the pedals off. If you are building the base layer of a kit, what to pack for bicycle touring in the shoulder seasons is a warm layer, a shell, two kits, and camp shoes. Where people get stuck is the plan, so if you are the type who wants a formula, use a written bikepacking setup for beginners and adjust one variable at a time.
Routes are the last piece, and the good news is that the best first ones are close to home. A first bike camping routes plan should be a rail trail or a fire road with a campground at the midpoint. A list of bike camping locations near you is usually state park campgrounds and national forest dispersed sites, which are legal, cheap and quiet. The best bike camping trips for a family are flat, 15 to 25 miles a day, and near water. The best bike camping trails are the ones with no traffic and a bailout road, not the ones with the biggest view.
For the bike itself, three setups do most of the work. A mountain bike camping setup handles forest roads and rough campsites and needs the least skill. A gravel bike camping setup covers rail trails, gravel roads and pavement, and a gravel bike bikepacking setup with 45 mm tires is the most versatile single answer for a first overnighter. If you want the shallow version of the comparison, a gravel bike bikepacking gear list is smaller than the mountain bike version, so the bike eats less of your budget. Then look for routes that suit you: a set of best bikepacking routes for beginners will be shorter and better surfaced than the famous ones, and best bikepacking trips for beginners advice usually names rail trails and canal paths for exactly that reason. If you want to see what is possible later, the bikepacking routes usa map includes multi-week routes that no beginner should start on - but they are useful for judging what a two-night version of the same terrain would look like.
Bike Camping FAQ
What gear do I actually need for a first bike camping trip?
Less than you think. The core kit is a way to carry your gear, a way to fix a flat, lights, water, and a sleeping system. Most first-timers overload the bike and then hate the ride — do one small overnight, borrow what you can, and add gear only after you know what actually annoyed you. At the beginner stage reliability beats lightness, every time.
How do I carry gear on a bike without panniers?
It works, but it changes how the bike feels. A seat pack plus a handlebar roll covers most one-night trips, though it pushes weight high and can make standing climbs feel vague. If you plan to ride more than a couple of weekends a year, a rear rack with panniers is the more stable long-term answer and it keeps your gear out of your line of sight on descents.
Is bike camping safe for beginners?
Yes, with the same caveats as any outdoor activity: ride within your fitness, tell someone your route, and avoid unfamiliar roads after dark. The realistic risks are mundane — traffic, dehydration, and weather turning — rather than anything dramatic. A charged phone, a basic repair kit, and more water than you think you need solve the overwhelming majority of first-trip problems.
How far should I ride on my first bike camping trip?
Take a distance you could comfortably ride at home unloaded, then cut it by roughly a third. A loaded bike climbs slower and handles differently on descents, so the same mileage feels meaningfully harder. Many beginners land on something in the 15-25 mile range each way for a satisfying first overnight. The goal of trip one is to finish wanting a second one, not to prove you can suffer.
What is the most common bike camping mistake?
Underestimating the repair side. A flat on an unloaded bike is an annoyance; the same flat far from camp with no pump or spare ends the trip. Carry tools that match your tires and wheels, and practice using them once at home before you depend on them. A repair kit you have never opened is optimism, not preparation.
Do you have to be a cyclist to enjoy a bike camping trip?
No. Two of the easiest formats - a drive-to campground with the bikes in the truck and a rail trail with a reserved site - ask for a comfortable 10-mile ride, not fitness. If you can ride an hour and still want to keep riding, you can bike camp. Start with one night 8 to 10 miles from the car, and treat the first trip as a gear test rather than a route.
How much does a starter bike camping kit weigh?
On pavement, a two-night touring load usually lands between 25 and 35 pounds including water; on a soft-bag bikepacking setup, 15 to 22 pounds is a realistic target. The two weigh-ins that change the number are water - a gallon is eight pounds - and cook kit, which is why a nested pot and a canister stove save so much space. Weigh the load before the trip and again when you get home; whatever you did not use, leave behind next time.
Can you lock your bike anywhere at a campground?
Mostly yes, and mostly it is a courtesy problem rather than a security one. Loop a cable through the frame and a locked post, table leg or tree, and keep the bags with you overnight. If there is nothing to lock to, bring the bike inside the tent vestibule or under the fly, which is another argument for choosing a tent with a small bike-storage space.
Is it ok to bike in rain?
Yes - rain is a comfort problem for the rider and a maintenance problem for the chain. What actually ruins a rainy trip is a wet sleeping bag, so dry bags matter more than rain gear. Plan shorter mileage, pad your braking distance, test the brakes early on a wet descent, and dry and re-lube the chain at camp. Fenders keep most of the spray off your back and your gear, and a second dry bag for tomorrow's clothes is worth the space it takes.
Can I take my dog on a bike camping trip?
Small dogs can ride in a basket on an easy trail; dogs over about 15 pounds are safer in a two-wheel trailer with a floor, shade and water. Either way, plan the mileage around the dog's paws and the temperature, take a break every hour, and never leave the dog attached to a loaded bike while you walk away. A mat the dog already knows makes camp easier on the first night.
What do you do about an e-bike battery when you are camping?
Plan the charge before the route. A powered site or a campground outlet is the simplest answer; a car charger on a drive-to trip is the next easiest. If neither is available, cut the planned mileage, carry the second battery, and use the lowest assist setting on climbs. Cold mornings cut range noticeably, so treat the manufacturer's range figure as a warm-weather number.
Which bike do you need for a first bike camping trip?
Almost any bike with low enough gears and tires that fit the surface. A hardtail or a gravel bike with 40 to 45 mm tires covers rail trails, gravel roads and pavement, which is where most first trips happen. Racks and mounts matter more than the frame material: if your bike has eyelets, touring bags are easy; if it does not, soft frame and saddle bags work on any bike. Ride the loaded bike once before you commit to a route.
The bottom line
Bike camping works best when the gear disappears into the experience. The Giro Jag gloves, Topeak Mini Morph pump, and Crankbrothers M20 multi-tool handle the small failures that end otherwise great rides. The Thule Epos 2 solves the bigger transport question for riders who travel often.
Start with the pieces that match your next actual trip. A simple, familiar kit beats an expensive pile of gear every time — and lets you spend your weekend thinking about the lake, the campfire, and the next turn in the trail instead of a flat tire.
<!-- AFFILIATE_DISCLOSURE -->