Camp Cooking for Beginners: Easy Meal Planning, Gear & Recipes That Actually Work
Master camp cooking with this beginner-friendly guide to meal planning, essential camp stoves, cookware, and 5 no-fail recipes. GSI, Stanley, Coleman, Gas One — gear picks for every budget.
I've eaten some truly terrible camp meals. Burnt chili. Undercooked rice with crunchy centers. A "stir fry" that was basically wet vegetables on a too-cold pan. The worst part? It was all my own cooking.
Camp cooking has a steep learning curve, but it doesn't have to. The difference between a frustrating trip where everyone's hangry and a trip where meals are a highlight comes down to three things: the right stove for your style, one decent cook set, and a meal plan that doesn't require a professional kitchen.
This guide covers all three — with gear recommendations that span $13 ultralight backpacking burners to full two-burner propane setups.
Why Most People Get Camp Cooking Wrong (And How to Fix It)
The #1 mistake I see: treating camp cooking like home cooking, just outdoors. It's not the same. You don't have a full spice rack, unlimited prep space, or the ability to run to the store for a missing ingredient.
The second mistake: under-investing in the stove but over-investing in everything else. A $200 cooler full of ingredients cooked on a $15 stove that can't maintain temperature is a recipe for frustration.
Here's the framework that actually works:
- Pick your stove first — based on your camping style (car camping vs backpacking vs group trips)
- One good cook set — not a mishmash of old pots from home
- Plan meals, not ingredients — bring exactly what you need, pre-portioned
- Embrace the one-pot philosophy — fewer dishes, less cleanup, more time enjoying camp
Choosing Your Camp Stove: Car Camping vs Backpacking
Your stove decision drives everything else. The stove that's perfect for car camping (heavy, powerful, stable) is a nightmare on a backpacking trip. Here's how to pick:
Best Budget Car Camping Stoves
For car camping, you want power, stability, and the ability to use standard propane canisters.
Coleman Classic 1-Burner Butane Camp Stove — $29.99. This is the entry-level workhorse. Single burner, runs on butane canisters, fits in its own carrying case. Perfect for couples or solo campers who just need to boil water and cook one-pan meals. The built-in wind baffles actually work, which is more than I can say for most stoves at this price.
Budget Backpacking Alternative: Etekcity Ultralight Portable Backpacking Stove ($13.99). If you're hiking in, this is the stove. 7,000 BTU, folds to the size of a deck of cards, and screws directly onto isobutane canisters. Not powerful enough for group cooking, but for solo boiling and simple one-pot meals, it's all you need.
Best Mid-Range & Dual Fuel
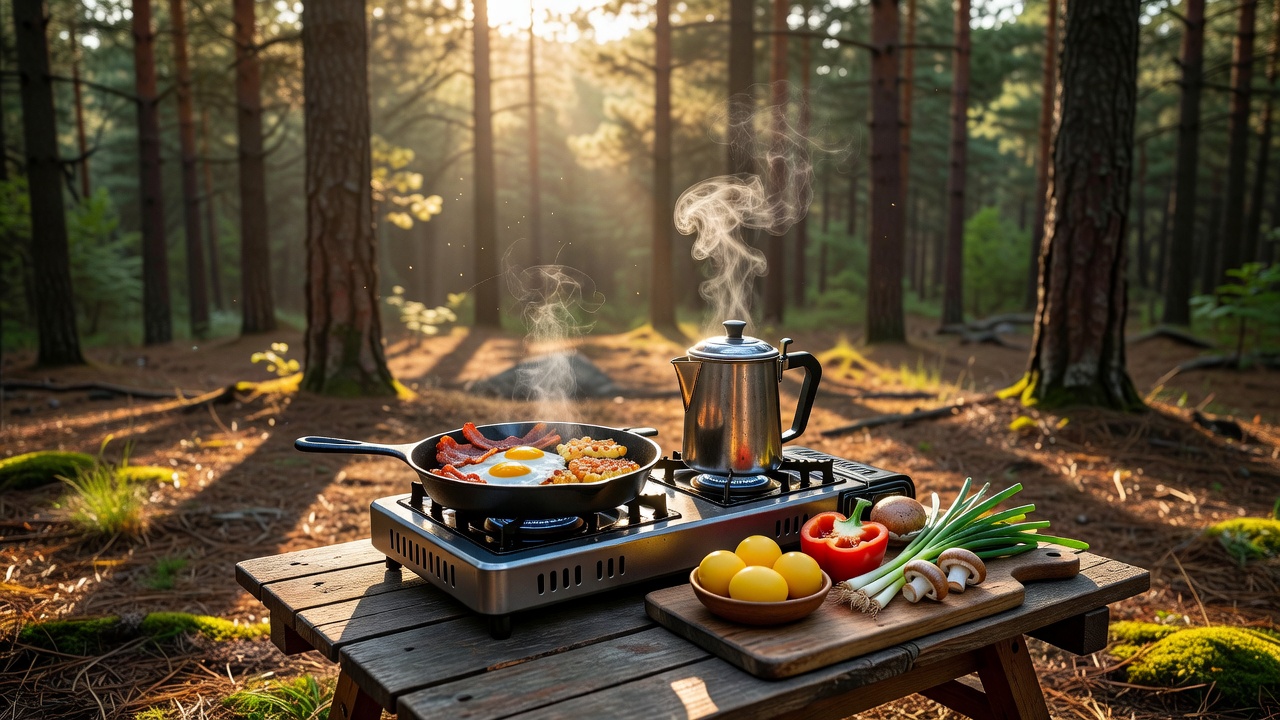
Gas One Portable Butane Stove — $24.87. The classic suitcase-style butane stove you've seen at every campsite and tailgate. 8,000 BTU, push-button ignition, and the auto-shutoff safety feature if it detects irregular pressure. I like this for breakfast duty — it's stable enough for a full cast iron pan of bacon and eggs.
Gas One GS-3400P Dual Fuel Stove — $34.99. This is the smart pick if you camp in different seasons. Runs on both butane and propane (with an adapter), so you're not stuck if you can't find butane canisters. Propane performs better in cold weather too — butane loses pressure below 40°F.
Best Premium / Multi-Purpose
Coleman Bottle Top Propane Camp Stove — $21.99. Don't let the price fool you — this 10,000 BTU burner connects directly to a 1lb propane cylinder and puts out serious heat. Perfect for boiling large pots of water for group pasta nights or chili cook-offs.
BioLite CampStove 2+ Bundle — $199.95. This is the tech-forward pick. Burns twigs and biomass (no fuel canisters needed), generates electricity to charge your devices via USB, and has a built-in fan for efficient combustion. It's heavier than gas stoves, but the "unlimited fuel" aspect is a game-changer for extended backcountry trips.
Essential Camp Cookware: You Don't Need a Full Kitchen
The cookware aisle at REI will convince you that you need a 12-piece nesting set with specialized omelet pans. You don't. Here's what actually matters:
The Two-Cook-Set Strategy
Stanley Adventure 9-Piece Camp Cook Set — $29.99. This is the value pick that does 90% of what you need. Two pots (one with a vented lid for straining), two bowls, a cutting board, spatula, ladle, and a locking bungee that holds everything together. The 24oz pot is perfect for coffee or oatmeal; the larger pot handles soup, pasta, or chili for two. Everything nests into one compact bundle the size of a Nalgene bottle.
GSI Outdoors Pinnacle Camper Cookset — $159.95. If you're feeding 4+ people and car camping, this is the upgrade. Two pots, one frying pan (with the Fusion non-stick coating that actually works), four plates, four mugs, four bowls, and a cutting board — all nested. The Teflon-with-Radiance technology heats evenly, which means no more scorched center / raw edge pancakes. It's $160, but you'll use it every trip for years.
The Two Items I Actually Use Every Trip
A good water setup. I carry the Sawyer Squeeze Water Filtration System ($34.95) for backpacking — filters 100,000 gallons and weighs 3 ounces. For car camping, the Owala FreeSip Insulated Water Bottle ($35.99) — the two-way spout means I can sip upright or chug, and it keeps water cold for 24 hours. Both have earned permanent spots in my kit.
A cast iron skillet. If you do ONE cooking upgrade, bring a cast iron pan. It works on any stove, handles direct fire, and makes campfire cornbread that'll ruin you for oven-baked forever. Lodge 10.25-inch is the gold standard — $25 and it'll outlive you.
5-Day Camp Meal Plan (No Refrigeration Needed Past Day 1)
Here's a tested meal plan for a 3-night car camping trip. Everything past Day 1 needs no cooler — this is the real test of camp cooking.
| Meal | Day 1 | Day 2 | Day 3 |
|---|---|---|---|
| Breakfast | Bacon + eggs + tortillas (use cooler items first) | Instant oatmeal + dried fruit + coffee | Pancakes (just-add-water mix) + shelf-stable bacon bits |
| Lunch | Pre-made sandwiches from home | Canned tuna + crackers + apple | Peanut butter + tortillas + honey |
| Dinner | Foil-packet sausage + peppers + potatoes (cook over coals) | One-pot chili mac (canned chili + elbow pasta + cheese packet) | Backpacker's pad thai (ramen + peanut butter packet + soy sauce + lime) |
| Snack | Trail mix | Beef jerky + dried mango | Granola bars |
The One-Pot Chili Mac (Real Recipe)
This feeds 2 hungry campers and uses exactly one pot:
- Boil 2 cups water in your Stanley pot
- Add 1 cup elbow macaroni, cook 8 minutes, drain (use the strainer lid)
- Dump in 1 can of your favorite chili, stir, heat 3 minutes
- Top with shredded cheese (bring the small pre-shredded bag from home)
- Eat directly from the pot. Zero dishes.
Backpacker's Pad Thai (No Stove Needed Past Boiling)
- Boil water, pour over 1 pack ramen noodles in your bowl
- Drain most water after 3 minutes, save a splash
- Stir in 1 tablespoon peanut butter + 1 soy sauce packet + squeeze of lime
- Crush a handful of peanuts on top. Sriracha if you're feeling fancy.
5 Common Camp Cooking Mistakes (Learn From Mine)
1. Forgetting the can opener. I've opened cans with a multi-tool and it's exactly as frustrating as it sounds. Check your kit.
2. Not pre-measuring ingredients. "Eyeballing" pasta portions at camp means either not enough or way too much. Pre-portion at home into zip-top bags labeled with the meal name. Takes 10 minutes, saves 30 minutes of camp confusion.
3. Bringing glass jars. They're heavy, breakable, and become trash you have to pack out. Transfer sauces, oils, and spreads into small squeeze bottles or travel-sized containers.
4. Underestimating boil time at altitude. Water boils at 200°F at 6,000 feet instead of 212°F. That means pasta takes longer, rice takes longer, and your coffee won't be as hot. Add ~25% more cook time above 5,000 feet.
5. Not having a windbreak. Even a 10mph breeze can cut your stove's efficiency by half. Use your cook set's stuff sack filled with rocks, a folded windshield reflector, or just position your pack upwind.
Camp Kitchen Setup: The 3-Zone System
On arrival, set up three distinct zones:
- Cook Zone — Stove(s) on a stable surface, windbreak in place, fire extinguisher or water bucket within arm's reach
- Prep Zone — Cutting board, knife, ingredients laid out. A folding camp table or even a flat rock works
- Clean Zone — Wash bin (collapsible sink), biodegradable soap, drying towel hung on a line
Keep raw meat and ready-to-eat food in separate coolers. Sounds obvious, but at camp when space is tight, cross-contamination happens fast.
What to Bring: The Essential Camp Kitchen Checklist
- Camp stove + extra fuel canisters
- Cook set (pot, pan, utensils)
- Cast iron skillet (optional, game-changing)
- Cutting board + chef's knife
- Biodegradable soap + scrub sponge
- Collapsible water container (for washing)
- Trash bags (multiple — you'll produce more than you think)
- Aluminum foil + zip-top bags
- Seasoning kit: salt, pepper, garlic powder, red pepper flakes, olive oil (small squeeze bottles)
- Fire extinguisher or dedicated water jug
- Reusable plates/bowls/utensils for each person
- French press or pour-over for coffee (instant works in a pinch)
The Verdict: Start Simple, Build Over Time
You don't need a $200 stove and a $160 cook set to eat well at camp. A $14 Etekcity burner and a $30 Stanley cook set will make better meals than any fancy gear if you plan your meals and pre-portion your ingredients.
Start with one stove, one cook set, and a 2-night trip. Master the one-pot meals. Add cast iron when you're ready for pancakes and cornbread. Every trip, your camp kitchen gets a little better — and so do the meals.
The best camp meal I've ever had wasn't the one with the fanciest ingredients. It was a one-pot chili mac eaten straight from the pot at 9pm after a 12-mile day, sitting on a log, watching the fire die down. It tasted better than any restaurant because I was hungry, exhausted, and exactly where I wanted to be.
<!-- AFFILIATE_DISCLOSURE -->