Hammock Camping: The Complete Beginner's Guide (2026)
Everything you need to know about hammock camping — from choosing your first hammock to staying warm, bug-free, and comfortable overnight. Ditch the tent and sleep among the trees.
Why Hammock Camping?
Hammock camping isn't just "sleeping in a hammock instead of a tent." It's a fundamentally different — and for many people, better — way to spend a night outdoors. You're suspended between two trees, gently swaying in the breeze, with nothing between you and the stars except a bug net.
Here's why more backpackers and car campers are making the switch:
- Comfort: No rocks, roots, or uneven ground digging into your back. The hammock conforms to your body.
- Weight: A hammock setup (hammock + straps + tarp) can weigh under 2 pounds — half what a budget tent weighs.
- Flexibility: You can set up on slopes, rocky terrain, or wet ground where a tent would be miserable.
- Views: Fall asleep watching the stars. Wake up to a forest canopy.
- Leave No Trace: No flattened vegetation, no tent footprint scarring the ground.
That said, hammock camping isn't for everyone. You need trees (or at least sturdy anchors), you're more exposed to cold air underneath, and sharing a hammock with a partner or dog takes practice. This guide covers everything you need to know to decide if hammock camping is right for you — and how to do it right.
Choosing Your First Camping Hammock
Not all hammocks are camping hammocks. That colorful $15 backyard hammock from the drugstore? It'll hold you for an afternoon nap, but it's not built for overnight use. Here's what to look for:
What Makes a Good Camping Hammock
- Size: A gathered-end hammock should be at least 9 feet long and 4.5-6 feet wide. Anything shorter won't let you lie flat diagonally — and diagonal is the only comfortable sleeping position.
- Material: Ripstop nylon (30D-70D) with a high weight rating (400+ lbs). Parachute nylon is common and durable.
- Suspension system: Tree straps (at least 1 inch wide to protect bark) with adjustable attachment points. Rope-only systems damage trees and slip.
- Integrated vs separate bug net: Integrated is more convenient for buggy areas. Separate gives you flexibility in cold weather.
Our Pick: ENO DoubleNest
The ENO DoubleNest Hammock is the gold standard for beginners and experienced hammock campers alike. At 9'4" × 6'2", it's wide enough for diagonal sleeping and rated for 400 lbs. The triple-stitched seams hold up to years of use, and it packs down to the size of a grapefruit.
What we love: The width gives you a genuinely flat lay. Aluminum wiregate carabiners are lighter than steel. Available in dozens of colors — find one that matches your style.
Heads up: The DoubleNest doesn't include tree straps or a bug net. Factor those in (ENO sells the Atlas straps and Guardian bug net separately).
Essential Hammock Camping Gear Checklist
Hammock camping requires a slightly different gear loadout than tent camping. Here's the full checklist, organized by priority:
The Core Setup
| Item | Why You Need It | Approx. Weight |
|---|---|---|
| Hammock | Your bed. Get a real camping hammock, not a backyard one. | 16-22 oz |
| Tree straps | Protect trees and provide anchor points. 1-inch minimum width. | 4-8 oz |
| Tarp/Rainfly | Keeps rain and dew off. Look for silnylon or silpoly. | 10-16 oz |
| Bug net | Mosquitoes, gnats, and ticks. Non-negotiable in summer. | 6-10 oz |
| Insulation (bottom) | Underquilt or sleeping pad. Prevents "cold butt syndrome." | 12-24 oz |
| Insulation (top) | Sleeping bag or top quilt. | 1-3 lbs |
Comfort & Convenience
- Headlamp: Hands-free light for nighttime setup. The Black Diamond Spot 400 is our go-to — waterproof, 400 lumens, red night-vision mode.
- Pillow: Inflatable or stuff-sack-turned-pillow. Even a small one makes a huge difference.
- Ridgeline organizer: Clips to your structural ridgeline to hold your phone, headlamp, and water bottle within reach.
Cooking & Hydration
- Camp stove: The Coleman Tabletop 2-in-1 Grill/Stove works great for hammock-friendly car camping meals. For backpacking, try a canister stove.
- Water bottle: The Owala FreeSip Sway keeps water cold for 24 hours. For longer hikes, the CamelBak Crux Reservoir holds 3 liters and fits most daypacks.
Repair & Safety
- Repair tape: A small tear in your hammock or tarp is a trip-ender without backup. Gear Aid Tenacious Tape fixes rips in nylon, silnylon, and mesh — stick a strip in your repair kit.
- Bug repellent: Cliganic Mosquito Repellent Bracelets are DEET-free, work for 250+ hours, and don't need reapplication. Clip one to your ridgeline and one on your wrist.
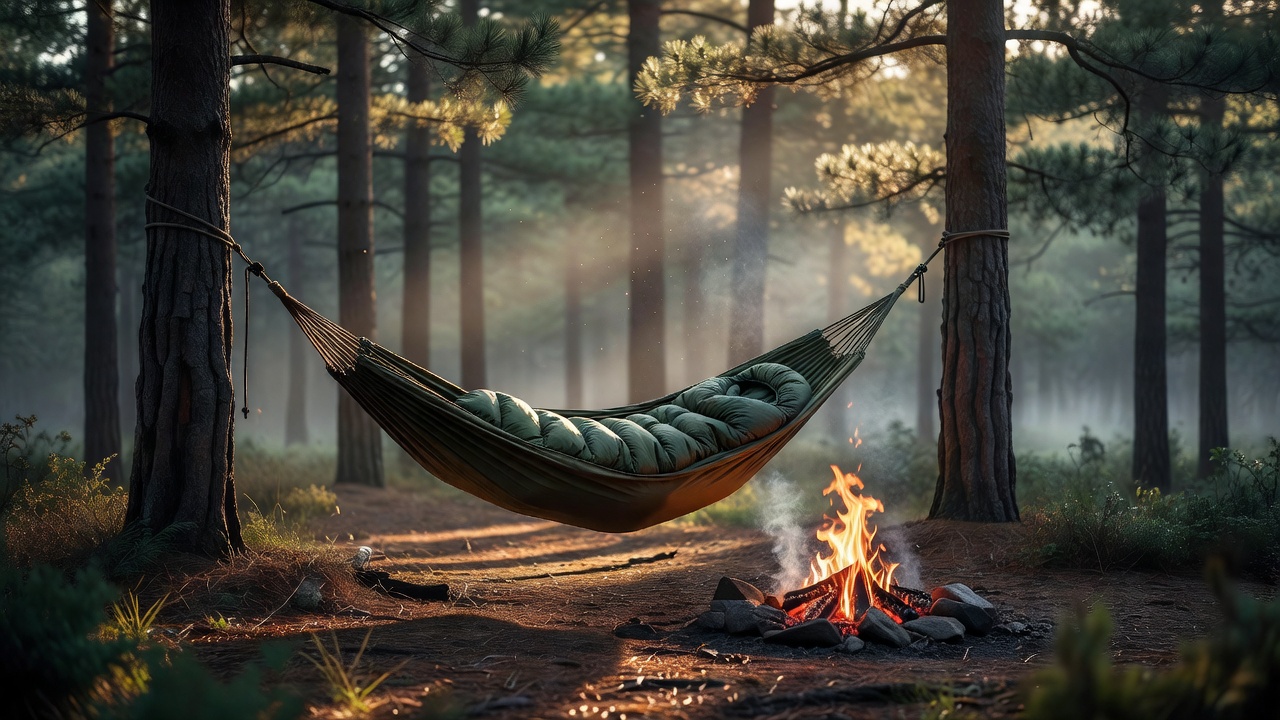
How to Set Up a Hammock (Step by Step)
Setting up a hammock takes about 5 minutes once you know the drill. Here's how:
Step 1: Find the Right Trees
Look for two healthy, living trees 12-15 feet apart. Trunks should be at least 6 inches in diameter — anything thinner can bend or break under tension. Avoid dead trees (widowmakers) and trees with loose branches overhead.
Step 2: Hang at the Right Height and Angle
Wrap your tree straps around each trunk at about head height (5'6"–6' from the ground). The ideal hang angle is 30 degrees from horizontal — this gives you the right amount of sag for a flat diagonal lay. A common trick: make a "finger gun" with your thumb and index finger. If the suspension line aligns with your thumb (pointing at the tree) and index finger (parallel to the ground), you're at ~30 degrees.
Step 3: Aim for Chair Height
When you sit in the hammock, the bottom edge should be about chair height (18-24 inches off the ground). Too high and you'll struggle to get in. Too low and your underquilt drags on wet ground.
Step 4: Pitch Your Tarp
Set the tarp above the hammock, centered, with enough coverage to extend past both gathered ends by 6-12 inches. In rain, pitch it low and tight. In fair weather, pitch it higher for ventilation and views. Use the tarp's ridgeline to create a "porch mode" with trekking poles for extra sitting space.
Step 5: Attach Your Underquilt
An underquilt hangs beneath the hammock, trapping warm air without compressing (unlike a sleeping pad inside the hammock). Adjust the suspension so it hugs the bottom of the hammock without gaps — cold air sneaks through even a 1-inch gap.
Staying Warm: The "Cold Butt Syndrome" Problem
This is the #1 complaint from new hammock campers. You're toasty in your sleeping bag on top, but your back and butt are freezing. Why?
Compressed insulation doesn't insulate. When you lie on top of your sleeping bag inside a hammock, your body weight crushes the loft — and loft is what traps warm air. The solution is insulation under the hammock, where it stays fluffy and effective.
Underquilt vs Sleeping Pad
- Underquilt (recommended): Hangs beneath the hammock, zero compression, most comfortable. Down underquilts are lightest; synthetic works better in wet conditions. Temperature ratings work the same as sleeping bags.
- Sleeping pad: Cheaper option. Slide it inside the hammock between you and the fabric. Works, but it shifts around at night and can feel clammy. Double-layer hammocks have a sleeve for the pad — much better than single-layer.
Top Insulation
A regular sleeping bag works fine — just use it like a blanket or climb inside. For weight-conscious backpackers, a top quilt (no back, no zipper) saves several ounces. The TETON Celsius XXL Sleeping Bag is rated to 0°F, has a mummy-style hood, and the extra length fits taller campers comfortably.
Temperature rule of thumb: Your underquilt should be rated 10°F warmer than your sleeping bag. You lose more heat from below in a hammock than in a tent (no ground insulation).
Bug Protection for Hammock Campers
Nothing ruins a hammock night faster than mosquitoes buzzing in your ear at 2 AM. Three layers of protection:
-
Bug net: A full-coverage net that zips around your entire hammock. Integrated nets (sewn into the hammock) are most convenient. Separate nets that cocoon the whole hammock work with any setup. Make sure the bottom seals — mosquitoes will find any gap.
-
Permethrin treatment: Treat your hammock, bug net, and outer clothing with permethrin spray before your trip. It bonds to fabric and lasts through 6 washes. Ticks die on contact.
-
Personal repellent: Cliganic Bracelets provide passive protection without reapplying. For heavy bug pressure, add a DEET or picaridin spray on exposed skin.
Hammock Camping vs Tent Camping
Both have their place. Here's an honest comparison:
When Hammock Wins
- Uneven/rocky terrain: You're floating. The ground doesn't matter.
- Backpacking weight: A complete hammock system (hammock + tarp + bug net + underquilt) can weigh 3-4 lbs. A comparable 2-person tent is 4-5+ lbs.
- Hot weather: Airflow on all sides — no tent greenhouse effect.
- Rain: You're off the ground, above puddles and runoff. Pack up without mud.
- Solo trips: A hammock is inherently a 1-person shelter. Perfectly sized.
When Tent Wins
- Above treeline: No trees, no hammock. Tents work anywhere.
- Couples/families: Sharing a tent is cozy. Sharing a hammock is acrobatics.
- Cold weather (below 20°F): Tents trap more body heat and block wind better.
- Car camping with gear: Tents have floor space for bags, clothes, and a dog bed. Hammocks have... your lap.
- Anxiety about trees: Some people genuinely worry about branches falling. A tent feels more enclosed and secure.
For family trips, check out our Family Camping Trip Checklist for tent-based setups. For tent recommendations, see Best Camping Tents 2025 — we cover everything from the Night Cat ultralight 1-person to the Coleman 4-Person Instant Cabin and the EVER ADVANCED 6-Person family tent.
Can You Do Both?
Absolutely. Many campers carry a hammock and a tent. Set up the tent as base camp and string the hammock nearby for afternoon naps, reading, and stargazing. Best of both worlds.
Best Locations for Hammock Camping
Hammocks shine in:
- Eastern forests (Appalachian Trail, Shenandoah, Adirondacks) — dense tree cover, endless anchor points
- Pacific Northwest — old-growth forests with massive trees (bring extra-long straps)
- Southeast swamps and bayous — wet ground that would flood a tent
- National Forests (dispersed camping) — pick any spot with two good trees, no designated campsite needed
Hammocks struggle in:
- Deserts — no trees. You'll need a freestanding hammock stand (adds 10+ lbs)
- Alpine zones — above the treeline
- Prairies and grasslands — same problem
For more location inspiration, see our National Park Camping Guide and Camping Trip Planning Guide.
Common Hammock Camping Mistakes (Learn From Mine)
1. Hanging Too Tight
A taut hammock with no sag creates a "cocoon effect" — the sides squeeze your shoulders and you can't lie flat. You want a deep, banana-shaped curve. 30 degrees is the sweet spot.
2. Skipping the Underquilt in 50°F Weather
"It's not that cold." Famous last words at 3 AM with a frozen butt. Even at 60°F, moving air underneath pulls heat fast. Underquilt or pad — always.
3. Hanging Too High
Your hammock should be low enough that you can sit in it like a chair. If you need to jump to get in, it's too high — and if you fall out, you're going to the hospital.
4. Forgetting to Test at Home
Set up your entire hammock system in the backyard (or a local park) before your trip. Figure out the knots, strap length, and tarp pitch in daylight — not at dusk with mosquitos swarming.
5. No Ridgeline
A structural ridgeline (a cord connecting both ends of the hammock) gives you consistent sag every time, regardless of tree spacing. It also serves as a clothesline and gear hanger. Most serious hammocks include one — if yours doesn't, add one.
Hammock Camping Packing Checklist
Use this as your pre-trip checklist (print or screenshot it):
Shelter & Sleep
- Camping hammock with tree straps
- Rainfly/tarp with guylines and stakes
- Bug net
- Underquilt or sleeping pad (rated 10°F below expected low)
- Sleeping bag or top quilt
- Inflatable pillow
Cooking & Food
- Camp stove + fuel (see our camp stove guide)
- Cookware and utensils
- Food (meal plan: Weekend Car Camping Meal Plan)
- Water bottles or reservoir
- Water filter or purification tablets
Clothing
- Rain jacket (hammock doesn't protect you when you're outside it)
- Warm layer (it gets colder suspended in the air than on the ground)
- Extra socks (cold feet = no sleep)
- Hat/beanie for cold nights
Safety & Comfort
- Headlamp with fresh batteries
- Bug repellent + Cliganic bracelets
- Gear Aid Tenacious Tape (emergency repairs)
- First aid kit
- Ridgeline organizer for nighttime essentials
- Camp chair or sit pad (you'll want somewhere to sit that isn't your hammock)
Ready to Hang?
Hammock camping changes how you experience the outdoors. Instead of zipping yourself into a nylon box on the ground, you're suspended among the trees, feeling the breeze, watching the stars. It's lighter, often more comfortable, and genuinely more fun.
Start with a quality hammock like the ENO DoubleNest, add an underquilt and tarp, practice setup in your backyard, and you're ready. The first night you wake up to birdsong filtering through the forest canopy — no tent walls, no zipper, just open air — you'll wonder why you waited so long.
Gear up, get outside, and hang loose.
<!-- AFFILIATE_DISCLOSURE -->